


Soutache – create unique jewelry with materials from Hilmaspyssel.se
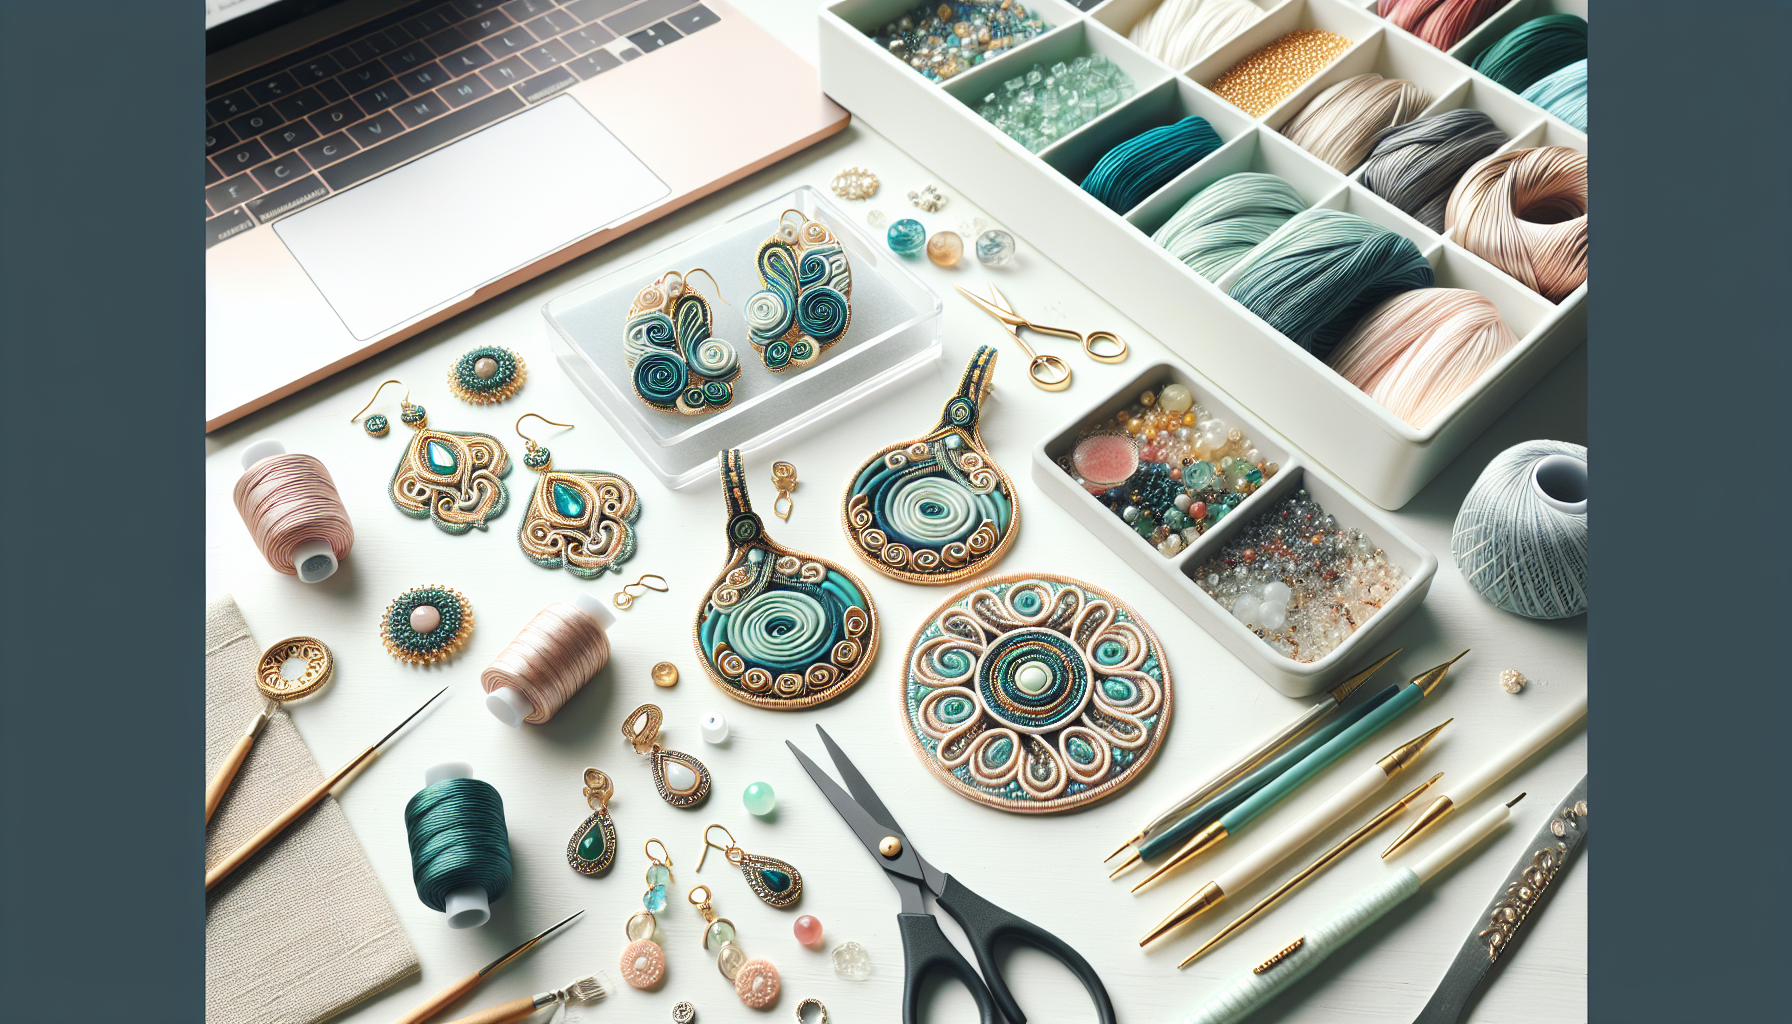
Do you want to create unique, handmade jewelry that looks both luxurious and personal – without the need for advanced silversmithing equipment? Then soutache is a technique you will love. With decorative soutache braids, sparkling beads, and a few basic tools, you can design everything from elegant bridal earrings to colorful boho necklaces, right at your kitchen table.
In this guide, we will go through everything you need to get started, focusing on materials and accessories from Hilmaspyssel.se, a Swedish online store with a wide range for soutache jewelry. You will get a clear overview of basic techniques, smart material choices, step-by-step tips, common mistakes to avoid, and plenty of concrete project ideas and shopping suggestions so you can start creating your own soutache jewelry today.
Soutache is popping up everywhere today – in handmade statement earrings, exclusive bridal jewelry, and colorful boho accessories. But what exactly is soutache, and why has this particular technique become so talked about among jewelry makers? In short, soutache involves sewing decorative braids around beads and cabochons to create soft, sculpted shapes with a lot of character. At Hilmaspyssel.se, you'll find both the soutache braids themselves and all the complementary beads needed to get started.
From uniform braids to handmade designer jewelry
Traditionally, soutache braid was used as decorative and uniform trim in textiles, for example, along the edges of jackets, costumes, and interior textiles. The braid is made up of tightly twisted threads with a "groove" in the middle – this groove makes it perfect for sewing through when creating jewelry.
-
Historical origin: Used in military uniforms, stage costumes, and luxurious home décor.
-
Modern development: In the 2000s, the technique was picked up by jewelry designers, especially in Eastern Europe, and quickly spread via blogs and social media.
-
Today: An established niche in handmade jewelry, often combined with bead embroidery and crystals for a couture feel.
This background explains why soutache jewelry can feel both classic and ultra-modern at the same time – a combination that many appreciate.
Why soutache is a strong trend – and how it's used
Soutache has become popular because the technique combines maximum design freedom with relatively simple basic steps. You can create:
-
Earrings – from small everyday models to large statement pairs for parties.
-
Necklaces and pendants – with a central cabochon framed by several layers of braid.
-
Brooches and hair accessories – perfect for graduations, proms, and weddings.
-
Bridal jewelry – in white, cream, and silver with pearls and crystals for a luxurious yet personal look.
On Instagram and Pinterest, soutache is often seen in feeds featuring boho chic, festival fashion, and unique bridal designs. The combination of color, texture, and the ability to match the jewelry exactly with clothing makes the technique particularly sought after.
Hilmaspyssel.se meets this trend by offering specially selected soutache braids, cabochons, and beads that work well together – something many top articles miss highlighting. This makes it easier for you to not only be inspired but actually succeed in creating your own soutache jewelry at home, with materials that are tested and adapted for the technique.
Material guide for soutache – everything you need from Hilmaspyssel.se
To succeed with soutache jewelry, a beautiful idea isn't enough – the right materials make all the difference between a messy sample and a professional result. In this section, we'll go through exactly what you need, how the materials differ, and how you can put together a smart starter kit directly from Hilmaspyssel.se.
Basic materials: braid, beads, backing, thread, and needles
-
Soutache braid: Available in different widths and qualities, often in viscose (soft, luxurious sheen), polyester (durable, easy to shape), or blends. Choose braids with a clear "groove" in the middle – it significantly simplifies sewing.
-
Beads: Combine seed beads (rocaille beads), rivoli, cabochons, glass, and crystal beads. Hilmaspyssel.se has categories that are particularly popular for soutache, such as sparkling glass rondelles and flat cabochons to build the design around.
-
Backing: Thin felt, faux leather, or microfiber provides a clean and comfortable finish against the skin. Choose a neutral color or match the main tone of the braids.
-
Sewing thread: Thin but strong thread, preferably polyester or nylon thread in a color that blends with the braids. Avoid cotton, which is more prone to fraying.
-
Needles: Thin beading needles that pass through small seed beads but are still stable enough to sew through several layers of braid.
A practical tip is to always buy a little extra thread in your most common colors (black, white, beige) – they are used in almost every project and run out faster than you think.
Tools, buying tips, and ready-made shopping list
In addition to materials, a few simple tools are needed: sharp fabric scissors, possibly jewelry glue (for spot reinforcement), small jewelry pliers for ear hooks and rings, and clips or pins to hold the braids in place while you sew.
When shopping at Hilmaspyssel.se, you can use this simple shopping list for your first soutache kit:
-
Soutache braid: 3 colors (e.g., dark base, mid-tone accent, light highlight)
-
Cabochons: 2–3 pieces in neutral or favorite color
-
Seed beads in 2 sizes (11/0 and 8/0) in matching metal or base tones
- A small selection of glass or crystal beads for extra sparkle
-
Felt or faux leather in black or beige for backing
-
Polyester thread in at least two colors (one dark, one light)
-
Beading needles, scissors, and a small jewelry clasp kit (ear hooks, clasps, rings)
By using this list, you'll have enough material for several small projects – perfect for learning the technique without getting stuck on difficult choices with your first order.
Getting started with soutache – basic techniques step by step
Getting started with soutache is less about advanced tools and more about understanding a few simple, yet smart basic techniques. Here, we'll go through how to prepare braids, sew your first stitches, and build a small piece of jewelry from scratch – with materials you can easily find at Hilmaspyssel.se.
Preparation and organization of the workspace
-
Cutting soutache braid correctly: Always cut the braid with sharp scissors at a clear, straight angle. Seal the ends immediately with a small drop of clear glue or, if the material allows, a quick touch with a lighter to prevent fraying.
-
Preparing cabochon and backing: Provisionally attach the cabochon to a piece of felt or microfiber with a small amount of glue. This makes it easier to hold it in place when you start sewing around it.
-
Organizing small parts: Place beads in small dishes or bead trays and roll up braids into small bundles. This reduces tangles and makes it easier to maintain even lines.
When your materials are organized, the actual sewing becomes both more enjoyable and more precise, something many beginner guides underestimate.
Basic stitches, shaping, and the first earring
-
Sewing through the "groove": Soutache braid has a faint seam in the middle – that's where you pass the needle. Lay 2–3 braids edge to edge, thread the needle through all layers, and sew with small, tight stitches close to the cabochon for a clean, professional edge.
-
Building curves and edges: To create soft curves, gently bend the braids as you sew, securing with a stitch at each new "bend point." Small seed beads along the edge help both the shape and create an elegant look.
- Practical example – simple soutache earring:
- Glue a round cabochon onto felt.
- Place three color-coordinated braids around the cabochon and sew them in place all around.
- Add a row of small beads along the outer edge.
- Trim the felt backing cleanly, cover with a new piece of felt or leather, and sew the layers together.
- Attach an ear hook at the top with a few extra stitches and possibly a small jump ring.
By starting with a small earring, a brooch, or a simple pendant, you get to practice all the basic elements: preparation, sewing, shape, and finishing – without the project feeling overwhelming. Once these steps are mastered, you're ready to explore more advanced soutache techniques in the next part of the guide.
Choose the right soutache braid and beads – color, quality, and design
The choice of soutache braid and beads determines whether your jewelry looks exclusive and professional – or just "okay." By combining the right quality, color, and shape, it becomes much easier to achieve the elegant, even lines that characterize beautiful soutache jewelry. Here, we'll go through what actually makes a difference, and how you can use the assortment at Hilmaspyssel.se smartly.
Quality of soutache braid and how it affects the result
- Material (viscose, polyester, blends):
- Viscose braid provides a luxurious, silk-like sheen and follows soft curves beautifully. Perfect for bridal jewelry and parties.
- Polyester braid is slightly stiffer and more durable – good for everyday jewelry, bracelets, and hair accessories that endure more wear.
-
Blends can offer a good balance between sheen and stability, especially for beginners who want braids that hold their shape.
-
Width and stability: Narrower braids (approx. 2–3 mm) create more detailed patterns, while slightly wider braids are easier to control initially. A braid that doesn't twist easily makes it simpler to achieve straight lines and symmetry.
When ordering from Hilmaspyssel.se, it's advisable to choose a few different qualities the first time and make small test pieces. This way, you'll quickly feel which braid suits your particular style and projects.
Color choice and matching with beads – ready-made palettes to try
- Color strategy:
- Tone-on-tone (e.g., several blue shades) creates a calm, elegant expression.
- Complementary colors (e.g., petrol + coral, purple + gold) create more drama and stand out clearly in photos – perfect for social media.
-
Let the cabochon's color guide you and pick up 1–2 accent colors in the braids.
-
Bead choice for balance and depth:
- Choose smaller seed beads around the focal stone for a fine, dense frame.
- Combine matte and glossy beads to create depth, e.g., matte rocaille beads with crystal rondelles.
- Maintain proportions: a large cabochon + too small beads can look "heavy" in the middle but sparse around it – match the sizes harmoniously.
Examples of ready-made palettes you can pick up at Hilmaspyssel.se:
- Petrol + gold + cream – luxurious statement earrings.
- Powder pink + grey + silver – romantic bridal jewelry.
- Black + silver + red – graphic, dramatic evening jewelry.
A practical tip is to always order a little extra of your favorite neutral colors (black, grey, cream, gold). They act as the "glue" in many different projects and make it easy to build a personal color palette around a few key shades. This way, you can use the same set of beads and soutache braids for several matching pieces of jewelry – earrings, necklaces, and bracelets in an entire collection.
Advanced soutache techniques – layers, volume, and details
Once you've mastered the basics of soutache, a whole new world of advanced techniques opens up. Here, it's about building layers, creating volume, and adding thoughtful details that make your jewelry look professional – whether you're sewing for pleasure or to sell. With the right materials from Hilmaspyssel.se, it also becomes significantly easier to succeed.
Building layers and creating 3D effects
To achieve that luxurious, three-dimensional look, you work with multiple braid layers and deliberate curves:
-
Multiple braid layers around the same cabochon: Place 2–4 rows of soutache braid around your center stone, preferably in different colors, for a "framework" with depth.
-
Curves, swirls, and folds: Form soft S-curves, spirals, and folded "waves" by sewing tightly and guiding the braids with your fingers as you sew.
-
Volume with bead rows: Insert a row of seed beads or crystals between two braid layers to build height and create clear level differences.
Remember to always work in reverse when making earrings or cufflinks: sew one side at a time, but follow the same order of braids and beads. Here, having a consistent color system is a great help – something you can easily plan by choosing 3–4 matching colors of soutache braid and beads at Hilmaspyssel.se.
Combining soutache with other techniques
When you want to take your jewelry to the next level, mixed media techniques are invaluable:
-
Soutache + bead embroidery: Embroider small beads around an embroidery on felt and then frame the work with soutache braid for an exclusive look.
-
Soutache + wire wrapping: Use thin jewelry wire to attach crystals or chains and let the soutache soften the metal's expression.
-
Soutache + chains, tassels, and drops: Attach loops, chains, and pre-made tassels to the bottom edge for extra movement and a festive feel.
For durability, the backing is crucial. Cut the felt or leather so that it covers seams and glue carefully before neatly trimming the edges. Finish by sewing around the back edge with small beads – this both locks the layers and provides a professional finish. At Hilmaspyssel.se, you'll find everything you need for these details: from large cabochons and decorative crystals to tassels, chains, and backing materials that can withstand frequent use.
Common mistakes with soutache – and how to avoid them
Learning soutache involves a good deal of trial and error, but many of the most common mistakes can actually be avoided from the start. By understanding why things go wrong – crooked lines, fraying braids, or heavy, uncomfortable earrings – you'll save material, time, and frustration. Here, we'll go through typical pitfalls and how you can work more professionally right from your first projects.
Typical beginner problems – and concrete solutions
-
Uneven stitches and crooked braid lines:
Sew with short, tight stitches through the groove in the middle of the soutache braids and pull the thread evenly after each stitch. Work on a flat surface, not in the air – this provides better control over the lines.
-
Fraying braid ends:
Always seal the ends immediately after cutting. For synthetic braids, a quick heating with a lighter (without touching the flame) works, for other materials, a small drop of clear glue is better. Hilmaspyssel.se has glue that dries clear and does not discolor the braids.
-
Overly heavy or unbalanced jewelry:
Avoid large, heavy glass stones for earrings initially. Choose smaller cabochons and lighter beads and build outward rather than upward. For necklaces – distribute the weight by mirroring the design on both sides.
-
Visible threads on the front:
Use thread in a matching color to the dominant braids and keep stitches hidden between the braids and behind the beads. A thin beading needle makes it easier to precisely control where the thread exits.
By consciously practicing these details in small projects – for example, a simple earring or a mini symbol – you'll build "muscle memory" that makes the next piece of jewelry both prettier and faster to create.
Quality control and smart practice before larger projects
Before attaching ear hooks, chains, or clasps, it's worth doing a quick quality check:
-
Feel the edges – is anything sticking out, are all braid ends securely fastened?
-
Gently bend the jewelry – do the seams hold, is any part loose?
-
Examine the back – is it clean, smooth, and comfortable against the skin?
-
Look at the symmetry – especially important for earrings and cufflinks.
A powerful but often overlooked tip is to always make a small test piece before starting a larger statement necklace or bridal jewelry. For example, sew a simple curve with two braids and a row of beads to test:
- How that particular braid behaves (stiffness, flexibility)
- How thread, needle, and glue interact
- The color impression between braid, cabochon, and beads
Save your failed prototypes in a small box – they'll become an invaluable visual logbook of what you've learned. Over time, you'll clearly see how both technique and design language evolve, and you can go back and improve older ideas with your new skills and with better materials from Hilmaspyssel.se.
Inspiration and project ideas – soutache with materials from Hilmaspyssel.se
Soutache becomes most inspiring when you start to apply the technique to concrete projects. In this section, you'll find ideas that are realistic to carry out – even if you're a beginner – but still look like something taken from Pinterest or Instagram. All suggestions can be easily adapted with materials directly from Hilmaspyssel.se.
Concrete project ideas you can start with right away
-
Minimalist everyday earrings:
Use 1–2 colors of soutache braid, a small cabochon, and a few seed beads. Keep the shape simple and elongated – perfect as a first project and stylish with a t-shirt and jeans.
-
Wedding and Party Earrings:
Combine white, cream, and gold ribbons with crystal rivolis. Add small drops or tassels for extra movement – ideal for brides, bridesmaids, or prom.
-
Boho Bracelets in Bright Colors:
Use multiple rows of ribbon around a row of cabochons or larger beads. Opt for turquoise, coral, and sand tones for a summer boho feel.
-
Brooches and Hair Accessories:
Create smaller, compact motifs that can be attached to a brooch pin or hair comb. Perfect for lapels, hats, or updos for special occasions.
Consider planning a "mini-collection project", such as earrings + necklace + hair accessory in the same color scheme – this will maximize your materials and provide a cohesive look.
Seasonal Themes, Sources of Inspiration, and Smart Planning
Think in seasons to always have fresh ideas:
-
Summer: turquoise, coral, white, sand – beach-inspired earrings and bracelets.
-
Autumn: mustard yellow, rust, forest green, copper – warm brooches and statement earrings for knitted sweaters.
-
Winter: dark blue, silver, burgundy – festive necklaces and glamorous Christmas and New Year's jewelry.
For more inspiration:
- Search for hashtags like #soutache, #soutachejewelry, and #handmadejewelry on Instagram and Pinterest.
- Use Hilmaspyssel.se as an idea bank: browse through the categories for soutache ribbon, cabochons, and crystals and let the color combinations on the product pages guide your palettes.
A practical approach is to always think "3 projects per order": when you add items to your cart, simultaneously write down three specific pieces of jewelry you want to make from those colors. Keep notes and quick sketches in a simple idea book – after a few months, you'll have a personal design bank that makes every new order from Hilmaspyssel.se both more thoughtful and more creative.
Frequently Asked Questions (FAQ)
Q: Is soutache difficult to learn if I'm a complete beginner at jewelry making?
A: No, soutache looks more advanced than it is. The most important thing is to start small, choose few colors, and practice even stitches. A pair of simple earrings with a cabochon and two colors of ribbon is a perfect first project. At Hilmaspyssel.se, you'll find all the materials in one place, so you don't have to spend time searching around – choose a pair of cabochons, 2–3 matching soutache ribbons, small beads, and thin thread, and you're ready to go.
Q: What material should I choose for soutache ribbon – does it really matter?
A: Yes, the quality of the ribbon affects both how easy it is to sew and how well the jewelry holds its shape. Viscose ribbon provides a luxurious sheen and soft curves, while polyester ribbon is slightly stiffer and more durable – good for beginners who want stable lines. Many experienced creators combine different types of ribbon in the same piece of jewelry. It's a good idea to test small pieces first to feel the difference before ordering larger quantities.
Q: Do I really need special needles and thread for soutache?
A: Yes, thin beading needles and strong, relatively thin synthetic thread (e.g., nylon or polyester) make a huge difference. Regular sewing needles are often too thick for small beads and can damage the "grooves" of the ribbon. Choose thread that matches the ribbon color to hide stitches. Hilmaspyssel.se has needles and threads suitable for beading work, which reduces the risk of interruptions and frustration.
Q: How do I prevent soutache ribbons from fraying at the edges?
A: The most common trick is to seal the ends immediately after cutting. For synthetic ribbons, a quick touch with a lighter or heat tool (without burning the ribbon) is often sufficient, while viscose and blended ribbons are best treated with a small drop of transparent jewelry glue. Allow to dry completely before you start sewing. Always cut with sharp scissors and avoid "sawing" the ribbon, as this reduces the risk of fraying.
Q: How do I plan a purchase so that the materials are sufficient for several different soutache projects?
A: Start with a color palette rather than individual projects. For example, choose 3–4 main colors of soutache ribbon, neutral base beads (silver, gold, black, crystal), and a few cabochons in the same color scheme. This way, you can create an entire collection – earrings, necklaces, and bracelets – from the same order. On Hilmaspyssel.se, you can filter by color in the soutache ribbon, cabochons, and beads categories, making it easy to build a well-thought-out palette.
Q: How do I care for finished soutache jewelry so that it lasts a long time?
A: Store soutache jewelry flat or hanging so that the ribbons are not unnecessarily bent. Avoid moisture, perfume, and hairspray directly on the jewelry – always apply them before putting on the jewelry. Gently wipe with a soft, dry cloth after use. If a ribbon does come loose slightly at the edge, you can often save the jewelry with a fine needle, matching thread, and possibly a micro-drop of glue on the back.
Conclusion: Make Soutache Your New Creative Favorite
You have now received a complete overview of soutache – from its history and material selection to basic techniques, advanced methods, troubleshooting, and concrete project ideas. The point is clear: with a few carefully selected soutache ribbons, the right beads, and a little patience, you can create jewelry that looks exclusive far beyond its material cost. By understanding how quality, color combinations, and construction are connected, you are stronger than many guides that only scratch the surface.
The next step is to put this knowledge into practice. Choose a first project (e.g., a pair of earrings or a brooch), open Hilmaspyssel.se, follow your shopping list, and order a small but well-thought-out assortment of soutache ribbons, cabochons, and beads. Work methodically, use the checklists in the article, and save your test pieces to see your progress. Then, let each new purchase be the start of at least 2–3 matching projects – this way, you will gradually build up a personal collection of handmade soutache jewelry that you can wear, give away, or sell.