


Jewelry Findings Chains – How to Choose the Right Chain at Hilmaspyssel.se
Do you dream of creating your own jewelry but get stuck right at the question: ”Which chain should I actually choose?” Then you are not alone. Jewelry findings chains are the foundation of everything from simple everyday necklaces to personalized bracelets and trendy earrings – and the right chain makes all the difference for both appearance and durability.
In this guide from Hilmaspyssel.se, we go step-by-step through everything you need to know: different types of chains for jewelry, materials like stainless steel and 925 silver, how to choose the right length and thickness, what clasps and jump rings you need, and how to care for your chains. You will get concrete examples, smart buying tips, and simple DIY ideas so you can confidently plan your next jewelry project and order exactly the right items online.
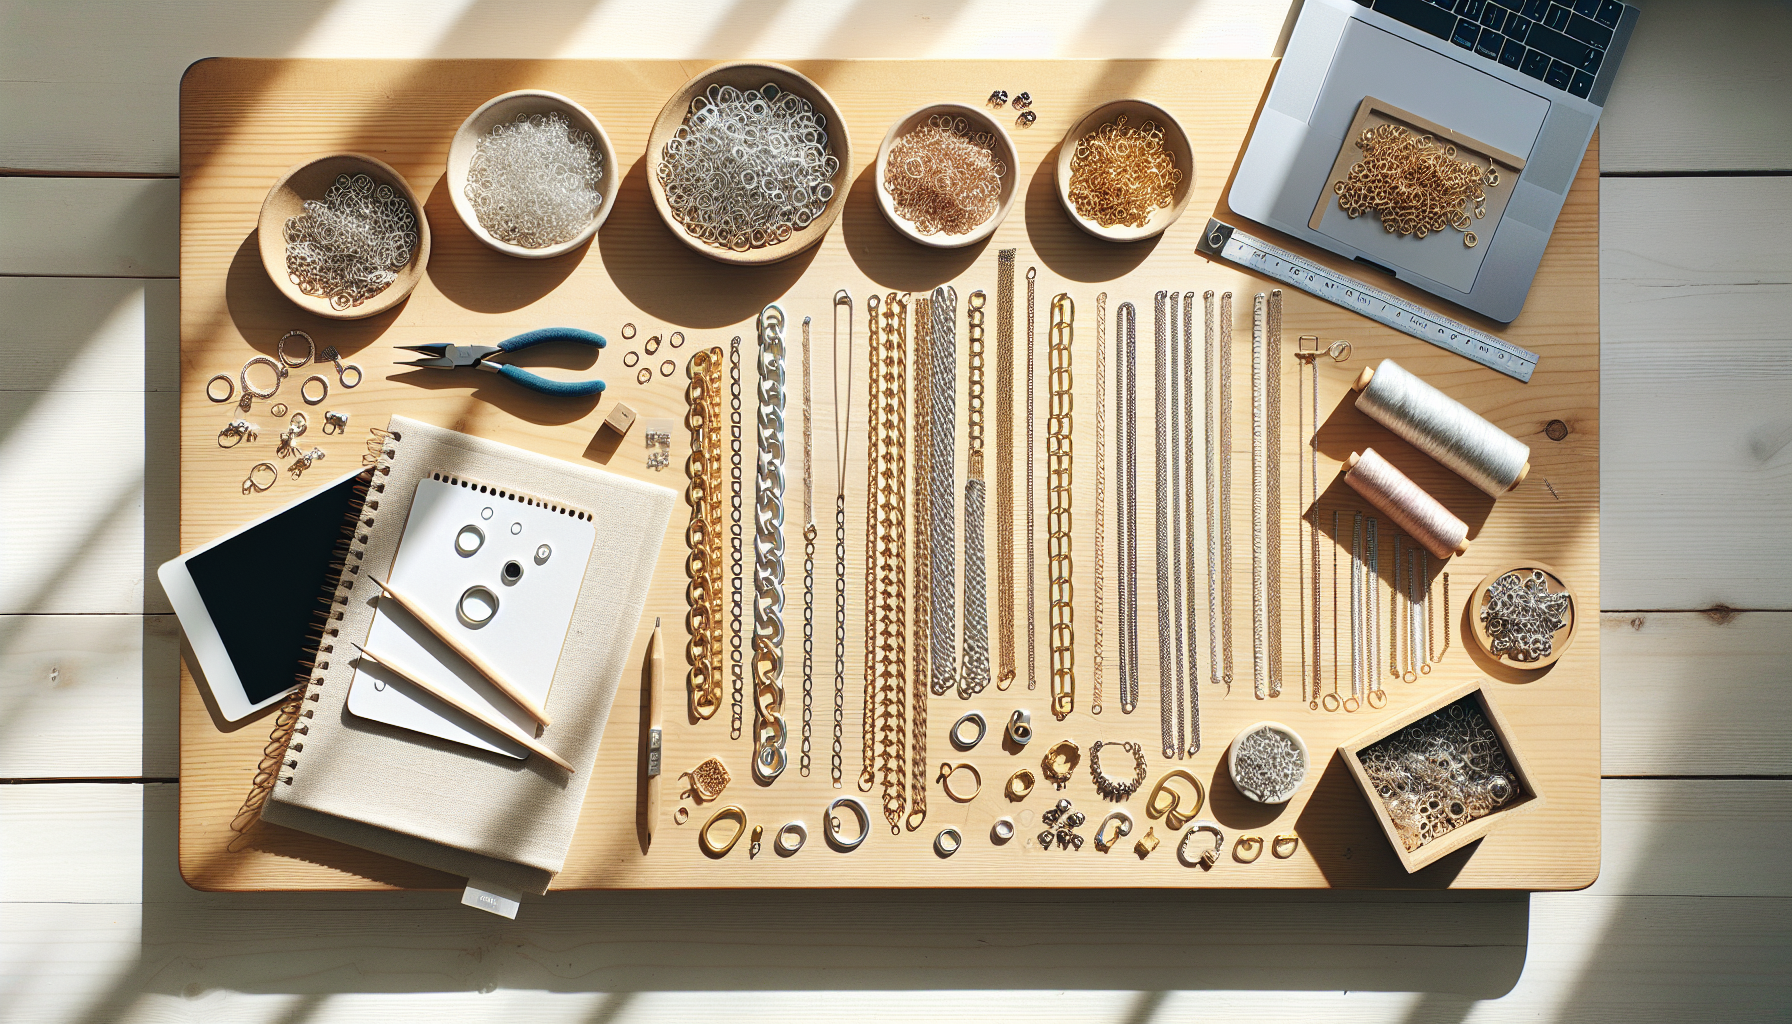
When you start creating your own jewelry, the term jewelry findings chains quickly appears. But what does it actually mean? A jewelry chain is a chain specifically designed for jewelry making – with the right dimensions, finish, and quality to serve as a base for necklaces, bracelets, anklets, and sometimes even earrings. Unlike "regular" chains (e.g., for keys or bags), jewelry chains are often finer, easier to work with, and adapted for charms, beads, and clasps.
Basic concepts: link, size, thickness, length, and finish
When you look at chains at, for example, Hilmaspyssel.se, you will encounter some recurring terms:
-
Link: Each individual loop in the chain. The shape can be round, oval, elongated, twisted, etc.
-
Link size: The measurement of a link, often given in mm (e.g., 2x3 mm). Affects how delicate or robust the chain appears.
-
Thickness: How "sturdy" the chain is. Thicker chains support heavier pendants, thinner ones give a more discreet impression.
-
Length: How long the finished chain you order is – important for the necklace to sit correctly on the body.
-
Finish: The surface and color – e.g., silver-colored, gold-colored, rose gold, or antique finish.
A simple beginner's project could look like this: you choose a thin cable chain, add a lobster clasp, two small open jump rings, and a favorite charm. In just a few minutes, you have created a personalized necklace – entirely from scratch.
Why choose quality chains from a specialty store?
Many who start with jewelry get stuck with cheap chains that quickly discolor, stain the skin, or break. This is where the difference is noticeable with chains from a specialized webshop like Hilmaspyssel.se. The assortment is tailored for jewelry making, with clear measurements, material descriptions, and images showing structure and shine. This allows you to choose the right chain immediately – and get jewelry that looks professional and lasts over time. For those who want to sell their jewelry, or simply avoid tangled and broken chains, quality chains are a small investment that makes a big difference.
Different types of jewelry chains – find the right chain for your project
When you start choosing chains for jewelry, you quickly notice that there are many more variations than "a regular necklace chain." Different link types give completely different expressions, support weight in different ways, and are more or less suitable depending on whether you are making necklaces, bracelets, anklets, or earrings. By understanding the most common chain types, it becomes much easier to filter the assortment at Hilmaspyssel.se and find exactly the right jewelry findings chains for your project.
Common chain types and when to use them
-
Anchor chain: Classic, uniform link that suits almost everything – perfect base chain for necklaces and bracelets, both with and without pendants.
-
Ball chain: Small balls instead of links. Common in simpler men's and unisex gifts, but also nice for keychains and minimalist jewelry.
-
Cable chain: Rounded links that give a soft impression. Good for light charms, thin everyday necklaces, and anklets.
-
Snake chain: Tightly woven, smooth surface that gives an exclusive feel. Best as a solitaire chain or with very small, light pendants.
-
Figaro chain: Mixture of longer and shorter links. Gives a more eye-catching expression – popular for statement necklaces and bracelets.
-
Rolo chain: Round, often slightly stronger links. Durable chain that is excellent for heavier pendants and charm bracelets.
When choosing a chain, you can think like this: simple everyday necklace → thin anchor chain or cable chain, heavy crystals/stones → stronger rolo or figaro chain, earrings and details → fine link in cable or ball chain for lightness and movement.
Match chain type with jewelry style and target group
To further elevate your jewelry, it's smart to consider both style and target group. A romantic piece of jewelry with pearls often looks most beautiful on a thin cable or anchor chain, while a modern, graphic piece can benefit from a straight snake chain. For children and teenagers, ball chains work well – they are easy to shorten, change pendants on, and give a playful impression. For jewelry you want to sell, it pays to have some "standard chains" in your assortment (e.g., anchor chain and rolo chain in different thicknesses) that you know work for many different designs. This way, you can build a clear style, but still vary the expression through the pendants, beads, and charms you combine with the chains.
Material selection – chains in stainless steel, sterling silver, metal, etc.
The choice of material is one of the most important decisions when buying chains for jewelry. It affects not only price and appearance, but also durability, how often the jewelry needs to be polished – and whether it works for sensitive skin. Here we go through the most common materials you will find at Hilmaspyssel.se and how to choose the right one for your specific project.
Advantages and disadvantages of common chain materials
-
Stainless steel: Very durable, colorfast, and often nickel-safe. Perfect for everyday jewelry, bracelets that get a lot of wear, and jewelry you want to sell. Requires minimal maintenance.
-
Silver- and gold-colored metal chains: Affordable and good for beginners, test pieces, and larger DIY projects. Less long-lasting than stainless steel and genuine precious metals, but excellent when you want to experiment cheaply.
-
925 sterling silver: Genuine silver gives a more exclusive impression, ideal for gifts, wedding jewelry, and jewelry you charge a little extra for. Requires more care (can tarnish) but is easy to polish up.
-
Bronze, copper, and antique finish: Gives a warm, vintage, or boho feel. Beautiful in combination with natural stone, leather, and earthy colors. Can darken over time – which many see as part of the charm.
When choosing materials, consider who will wear the jewelry, how often it will be used, and what price range you want to be in. A child's bracelet often benefits most from stainless steel, while an exclusive christening or confirmation piece is elevated by 925 silver.
Allergies, durability, and smart purchases at Hilmaspyssel.se
Allergy concerns are a common worry in search results – with the right information, it's easy to choose wisely:
-
For sensitive skin: Choose chains in stainless steel or 925 sterling silver and always read the product description. Hilmaspyssel.se clearly states the material and any coatings, so look for words like "nickel-safe" or "lead and cadmium-free."
-
For jewelry you want to sell: Invest in materials that are durable and feel serious – stainless steel and sterling silver are often the best combination of quality and price. Consider building a "signature material" into your brand.
-
For budget and prototypes: Use silver- and gold-colored metal chains when testing new designs. Once you are satisfied, upgrade the model to nobler materials before launching it in a webshop or at a market.
A concrete tip is to filter by material category at Hilmaspyssel.se when shopping: start by choosing whether the jewelry should be budget, mid-range, or premium, and let that guide whether you click on metal chains, stainless steel, or 925 silver. This way, you avoid hesitating among hundreds of options and quickly find exactly the chains that match your style, skin sensitivity, and budget.
Size, length, and dimensions – how to choose the right chain
Once you have found the right type of chain and material, the next crucial step is to choose the right size, length, and dimensions. This is where many get stuck – especially when buying online – because the measurements can feel abstract. By understanding how link size, thickness, and standard lengths are related, it becomes much easier to order chains for jewelry that both look good and last over time.
How to interpret measurements and standard lengths
On Hilmaspyssel.se, several measurements are usually given in the product text. Most important are:
-
Width/thickness (e.g., 1.5–3 mm): Affects how delicate or robust the chain appears
-
Link size (e.g., 2×3 mm): Shows the approximate height and width of each link
-
Length (e.g., 45 cm, 50 cm, by the meter): Determines how the chain falls on the body
For necklaces, these guidelines are often used:
-
Choker (35–40 cm): Sits high, nice with open necklines
-
"Princess" (42–45 cm): Classic everyday length for most
-
Matinee (50–60 cm): Perfect for slightly larger pendants or layering
For bracelets, 17–19 cm usually fits most adults, while anklets are often around 22–25 cm. A simple trick is to measure a favorite piece of jewelry at home with a tape measure and use that as a guide when choosing length in the webshop.
Correct dimensions for style, durability, and use
A common question is: "How thick a chain do I need?" A good rule of thumb is:
-
1–1.5 mm: Discreet everyday necklaces, thin chains for small charms
-
1.5–2.5 mm: All-purpose chains for most pendants and bracelets
-
3 mm and up: Statement chains or jewelry with heavier stones/crystals
If you are going to hang a larger crystal or natural stone on the chain, you can advantageously choose a slightly shorter but stronger chain (e.g., 45 cm, approx. 2.5–3 mm thick), so that both durability and balance are good. For a delicate everyday necklace with a small charm, a cable chain or anchor chain of approx. 1.2–1.8 mm in 42–45 cm length is often sufficient.
By always comparing the product's measurements with a piece of jewelry you already own – and reading the measurements carefully – you minimize the risk of mispurchases and get chains that truly suit your projects. Hilmaspyssel.se also facilitates the choice with clear product images where you can see the proportions against, for example, a ruler or coin.
Important accessories for chains – clasps, jump rings, and finishes
For your chains to truly function as durable and beautiful jewelry, the right jewelry findings are needed: clasps, jump rings, and finishes. This is where many beginners get stuck – the chain is chosen, the pendant is ready, but how do you put everything together so it is both durable and looks professional? At Hilmaspyssel.se, you will find all the small parts that make a big difference, but it is important to understand what is what and when to use which accessory.
The basic components: clasps, jump rings, and chain ends
-
Jewelry clasps: Lobster clasps (stable all-around choice for necklaces/bracelets), spring ring clasps (discreet and classic), magnetic clasps (perfect for children and those who want to put on/take off quickly).
-
Jump rings and split rings: Open O-rings and jump rings are used to attach clasps and pendants; closed rings provide extra security for heavy jewelry.
-
Chain ends and crimp beads: Chain ends are crimped or glued onto the end of the chain, crimp beads and wire guardians are often used with jewelry wire for more advanced projects.
When choosing accessories, you should always match the color and finish with your chain: gold for gold-colored chains, silver for silver, rose gold for warm tones, and antique bronze for vintage-inspired jewelry. This makes the entire piece of jewelry feel like a cohesive unit, even if the parts are purchased separately from Hilmaspyssel.se.
Practical examples and smart combinations
A simple, but very useful basic project is a classic necklace:
-
1 chain of desired length
-
2 open jump rings in the same finish as the chain
-
1 lobster clasp
Attach one ring to each end of the chain. To one ring, attach the lobster clasp; the other ring acts as a "loop" to hook into. If you want to add a charm, thread it onto the chain before attaching the clasp, or attach it to an extra jump ring in the middle of the chain.
A common situation where good accessories save both money and time is when a clasp breaks on a favorite piece of jewelry. Instead of throwing everything away, you can quickly give the jewelry new life with a new jump ring + new clasp from Hilmaspyssel.se. This is a simple upgrade project even for beginners – flat nose pliers, round nose pliers, and a few minutes are enough.
How to choose the right accessories for your chains
For your chains to last over time, you need to think as much about the accessories as about the chain itself:
- Choose clasps according to the wearer: magnetic clasps or larger lobster clasps for children and the elderly, discreet spring ring clasps for delicate jewelry.
- Adjust the thickness of the rings to the dimensions of the chain – too thin a ring for a strong chain will be a weak link in the chain, literally.
- Invest in nickel-safe options and matching finishes if you plan to sell your jewelry or give it as a gift.
By having a small assortment of standard clasps, O-rings, and chain ends at home, you can quickly build, repair, and adjust jewelry as needed. At Hilmaspyssel.se, it's easy to replenish your toolbox with basic parts – filter by color, material, and type, and create your own small "clasp and ring library" that makes every chain project both more fun and more professional.
Creative Ways to Use Chains in Your Own Jewelry
Chains are not just “carriers” of charms – they can be the main character in your jewelry. When you start seeing chains as a flexible design tool, a whole new world of creative DIY projects opens up. Here, we go through ideas, trends, and concrete examples that you can easily recreate with the assortment from Hilmaspyssel.se.
Inspiring ideas with chains – from necklaces to bag decorations
-
Layered necklaces: Combine 2–4 thin chains of different lengths (e.g., anchor chains and rolo chains) for a trendy layering look. Add a discreet charm to the longest chain for focus.
-
Chains + beads + charms: Attach small beads, charms, and letter charms with jump rings along a cable chain for a personalized bracelet or anklet – perfect as a gift with a name or initials.
-
Chains in earrings: Use short pieces of chain hanging from ear hooks or hoops for elegant “dangling chains.” Combine with small crystals for extra sparkle.
-
Decorative chains on bags and keychains: Cut a short piece of thicker chain and attach it to a carabiner – decorate with charms for a simple bag charm or keychain.
Here is a quick DIY example: Create a minimalist necklace by choosing a thin snake chain, adding a small moon or heart charm, and finishing with a discreet lobster clasp. Few parts, but a very stylish result.
How to plan your own chain projects – from idea to shopping list
A common problem for beginners is having an idea in mind but not knowing what jewelry findings are needed. A good working method is:
-
Sketch first: Quickly draw the jewelry – mark where the chain goes, where the clasp sits, and where beads/charms are placed.
-
Make a material list: Write down the type of chain (e.g., thin anchor chain), length, color (gold/silver), number of charms, beads, clasps, and jump rings.
-
Match against the assortment at Hilmaspyssel.se: Use the filters for color, material, and chain type. It's a good idea to add a few extra centimeters of chain to your cart just in case – remnants will be perfect for earrings.
As you become more confident, you can start experimenting with asymmetry (a chain on one side, beads on the other), mix metals for a modern look, or create sets – necklaces, bracelets, and earrings that belong together. This way, you gradually build a well-thought-out, personal jewelry collection with the chain as a common thread.
Care, Storage, and Smart Buying Tips at Hilmaspyssel.se
Choosing the right jewelry findings chains is only half the battle – how you care for, store, and purchase them determines how long your jewelry stays beautiful. Here we go through practical routines that are often only mentioned in passing in other guides, but which make a big difference for both hobby creators and those who sell jewelry.
How to care for your chains – cleaning and everyday storage
-
Cleaning metal and stainless steel: Wipe the chain with a soft cloth after use. For light dirt, lukewarm water and a drop of mild dish soap are sufficient; rinse thoroughly and dry completely before storing.
-
Cleaning sterling silver: Use a silver polishing cloth or special silver dip for heavy tarnishing. Avoid leaving the chain in the bath for a long time – always follow the instructions. Rinse and dry thoroughly.
-
Prevent tangles and discoloration: Store chains separately in small zip bags or compartments in a jewelry box. Preferably with a silicone or anti-tarnish strip for silver chains.
An extra tip from the pros is to always remove necklaces and bracelets when you shower, exercise, or sleep. Moisture, sweat, and cosmetics shorten the lifespan, especially of plated chains. By incorporating simple routines into your daily life, you save both money and time in the long run.
Smarter purchases at Hilmaspyssel.se – avoid common mistakes and build the right foundation
When you buy chains and jewelry supplies online, the details are crucial. Actively use the product information on Hilmaspyssel.se:
-
Carefully study measurements and close-up images: Compare the chain's width (mm) with a tape measure at home and look at the link shape in zoomed images to assess how substantial it is in reality.
-
Read the material description: Check if the chain is stainless steel, metal, 925 silver, or another alloy. For sensitive skin – look for "nickel-safe" or specific material indications.
- Build a well-thought-out basic kit:
- For beginners: 1–2 thin standard chains in silver or gold color, a set of lobster clasps, jump rings, and some chain ends.
- For those selling jewelry: invest in rolls of popular chain models (e.g., cable chain, ball chain) in stainless steel + matching clasps and rings for quick production.
Feel free to start with smaller quantities in several variations to test what you like best – once you find your favorites, you can move up to longer lengths or multi-packs for a better price per meter. This way, you gradually build up an assortment of chains and jewelry supplies that are both affordable and durable, while minimizing the risk of incorrect purchases. Hilmaspyssel.se makes it easy to restock the parts you use most, so your creative process never has to stop.
Common questions about jewelry chain supplies
Q: What type of chain is best to start with as a beginner?
A: As a beginner, it's smart to start with a simple cable chain or anchor chain in medium thickness (approx. 1.5–2.5 mm). They are easy to work with, suitable for both necklaces and bracelets, and fit most pendants and beads. Preferably choose chains in stainless steel or high-quality jewelry metal – they will withstand more handling as you practice. On Hilmaspyssel.se, you can filter chains by type and thickness, making it easy to find a good "base chain" to start with.
Q: How do I know if a chain is safe for sensitive skin or nickel allergy?
A: Always look carefully at the product description. Search for words like nickel-safe, nickel-free, or specific materials like stainless steel and 925 sterling silver, which often work better for sensitive skin. Many also miss that clasps and rings must be of the same nickel-safe quality as the chain. A good tip is to make a small "test bracelet" and wear it for a few hours before producing more jewelry – especially if you are making jewelry for sale.
Q: What is the most common mistake when ordering chains online?
A: The most common mistake is misjudging size and length. The chain looks thicker or thinner on screen than in reality. The solution is to always:
- Measure at home with a ruler or a favorite piece of jewelry
- Compare the mm measurements in the product text with a string or an existing chain
- Read if the chain is sold per meter or per piece (finished length with clasp)
On Hilmaspyssel.se, product images and measurements are accurately stated – use them actively before adding to your cart.
Q: How do I prevent my chains from tangling or tarnishing?
A: Store chains separately – either hung up, in small zip bags, or wrapped around a card. Avoid moisture, perfume, hairspray, and storage on a bathroom shelf. For silver and light metals, airtight bags and preferably a small anti-tarnish bag are optimal. Clean regularly with a soft polishing cloth; for stainless steel, lukewarm water and mild soap are often sufficient, while genuine silver benefits from special silver polish now and then.
Q: What chain materials are best if I'm selling my jewelry?
A: If you sell jewelry, durability, hypoallergenic properties, and appearance are extra important. Many creators choose:
- Stainless steel – very durable, colorfast, and popular with customers
- 925 sterling silver – perfect for more exclusive collections
- High-quality gold-colored chains with good plating for a luxurious feel
It can be wise to offer two price levels: simpler metal chains for the budget collection and genuine silver/stainless steel for premium. Hilmaspyssel.se has an assortment in all these categories, so you can build a well-thought-out product line.
Q: How do I get started right away if I've never worked with chains before?
A: Start with a small, clear project:
1. Choose a pre-made chain with clasp or chain by the meter + lobster clasp + two jump rings.
2. Add a simple pendant or charm.
3. Follow a short step-by-step video (or image guide) and assemble everything with flat-nose and round-nose pliers.
4. Write down what worked well and what you want to try next time.
On Hilmaspyssel.se, you can put together a simple starter kit with a chain, clasp, and rings – perfect for your first DIY necklace or bracelet.
Create durable favorite jewelry with the right chains and jewelry supplies
You have now gone through the entire journey from basic concepts of jewelry chain supplies to choosing chain type, material, length, dimensions, the right clasps and rings, creative design ideas, as well as care and smart buying tips. Together, this shows how crucial the chain actually is – both for durability, the feel against the skin, and the overall aesthetic of your own jewelry. With knowledge of stainless steel, genuine silver, different links, and chain models, you will be much more confident when planning your next DIY project or wanting to upgrade your assortment for sale.
The next step is to put inspiration into practice: choose a project (for example, a simple everyday necklace or a personal bracelet), write a short material list with a chain, clasp, and rings – and then compare lengths, materials, and colors directly at Hilmaspyssel.se. Feel free to start with small quantities to try things out, and gradually build up a small "basic stock" of favorite chains and standard accessories. This way, each order will be more accurate, each piece of jewelry more thoughtful – and your own jewelry collection both more personal and more professional.