


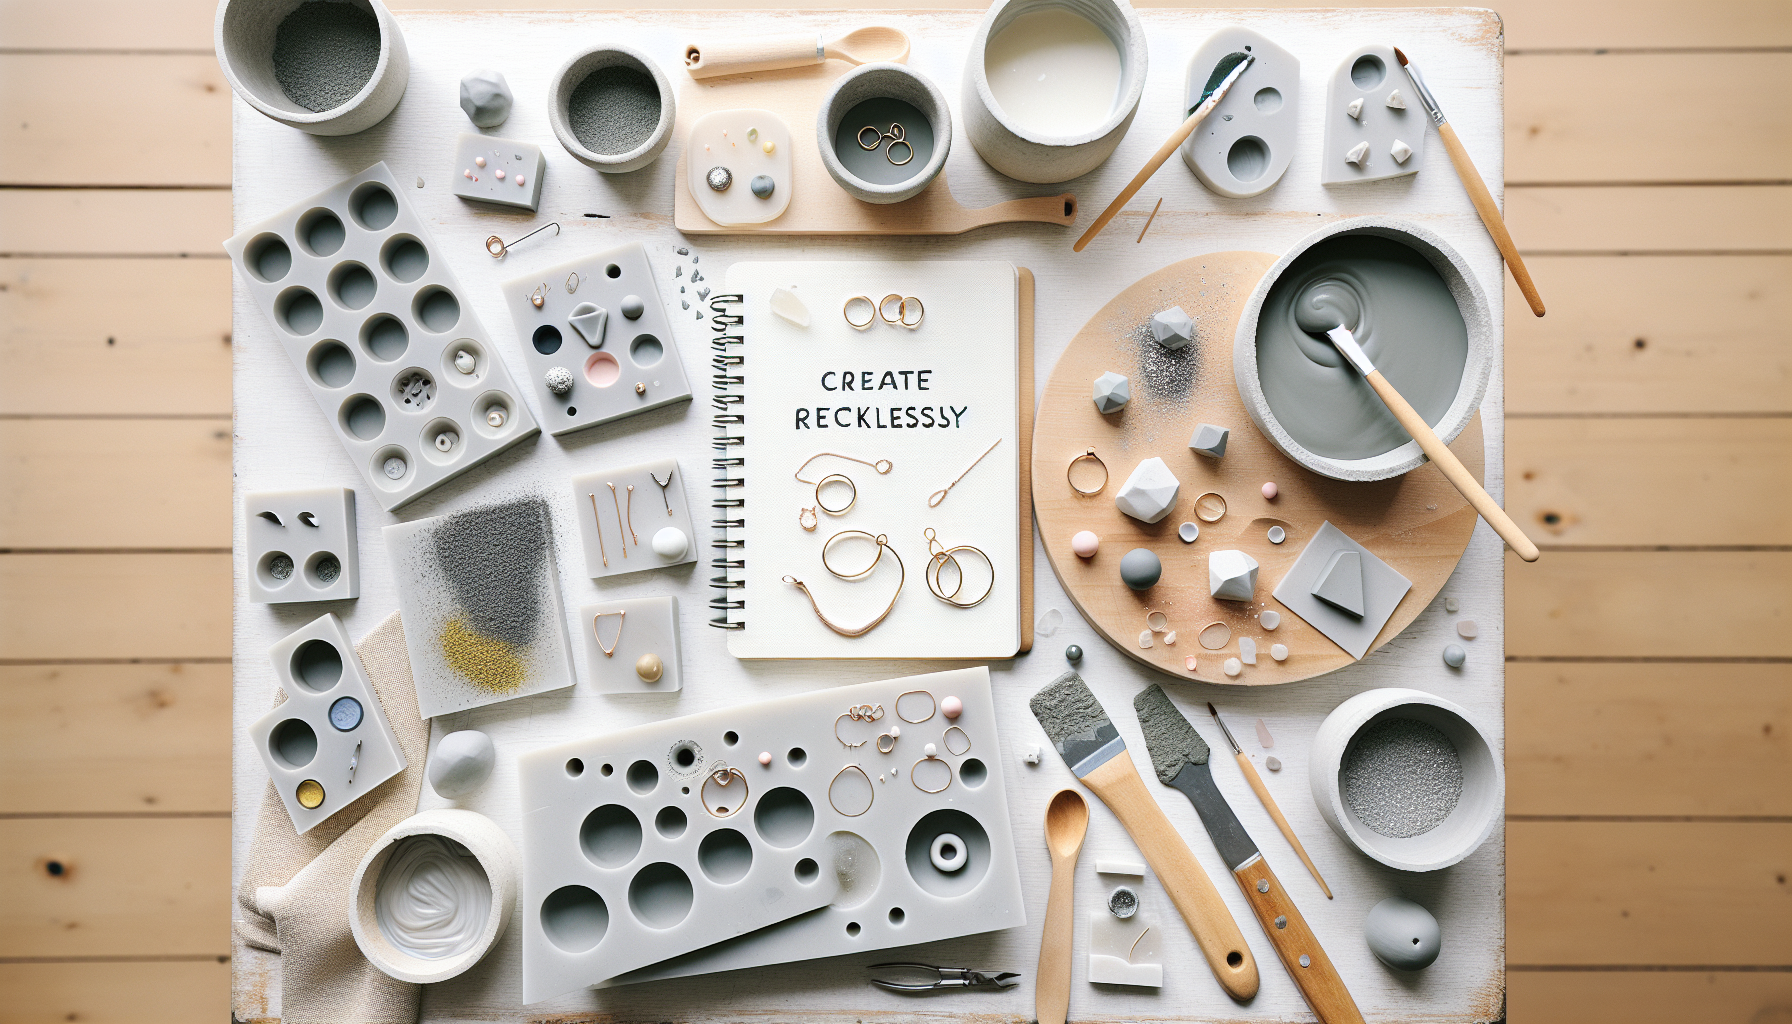
Jewelry Concrete – Create Recklessly with Hilmaspyssel.se
Do you want to create your own unique jewelry but are tired of beads and standard kits? Jewelry concrete is the trendy DIY material that makes it easy to cast personalized necklaces, rings, and earrings with a raw, stylish feel – perfect for those who love Scandinavian, minimalist design. With the philosophy of "Create Recklessly", it's about daring to experiment, mix, cast, and play without the pressure of perfect results.
In this guide, we'll show you step-by-step how to get started with jewelry concrete, what materials you need, concrete casting techniques, creative ideas, and professional tips for durable jewelry. You'll also get practical advice directly linked to the assortment on Hilmaspyssel.se, so you can easily order the right concrete, molds, colors, and accessories and start your first project today.
Jewelry concrete is a specially formulated, finely ground concrete mix developed for casting small, detailed projects such as jewelry, pendants, and decorative mini-objects. Unlike regular coarse concrete, jewelry concrete has a much finer grain size, is often lighter in weight, and provides a smoother, more precise surface – perfect when every millimeter in your mold matters. This makes the material particularly popular among creative DIY enthusiasts who want to combine the raw expression of concrete with the precision of jewelry.
Jewelry concrete compared to regular concrete
When working in miniature format, the difference between regular concrete and jewelry concrete becomes clear:
-
Finer structure: The finely ground sand and cement flow easily into small details, thin edges, and intricate patterns without "clumping."
-
Lower weight: Many jewelry concretes are formulated to be lighter, which is crucial for necklaces, earrings, and rings that need to be worn comfortably.
-
Better strength in small formats: Properly mixed jewelry concrete becomes dense and durable, even in very thin sections, which reduces the risk of cracks in your favorite jewelry.
-
Smooth, even surface: Provides a clean, stylish base that can either be left raw for an industrial feel or decorated with paint, pigments, and metallic effects.
Many articles only mention that jewelry concrete is "finer," but an important added benefit is that it is often easier to work with for beginners – it flows better and fills molds more forgivingly, making the initial learning curve short.
Why jewelry concrete is perfect for DIY, gifts, and modern style
Jewelry concrete is suitable for those who want to create personal DIY jewelry, small interior details, and unique gifts without needing advanced machinery. The trend of industrial, Scandinavian, and minimalist design makes concrete jewelry feel both modern and timeless – they work equally well with an everyday T-shirt as with a stylish black dress.
At Hilmaspyssel.se, you'll find not only the jewelry concrete itself, but also custom silicone molds, jewelry components, and decorations that have been tested for this type of project. This means you don't have to guess and can focus on the fun part: creating. In the next section, we'll delve into how you can embrace the "Create Recklessly" philosophy to truly unlock the full potential of jewelry concrete.
The "Create Recklessly" concept – dare to create without limitations
"Create Recklessly" is more than a slogan – it's a creative approach where jewelry concrete becomes your playful experimental field. Instead of chasing perfection, it's about daring to experiment, pour, mix, break "rules," and see what happens. Jewelry concrete is perfect for this, as the material is inexpensive, readily available, and surprisingly forgiving when you want to try new ideas again and again.
How to let go of performance anxiety when creating
For many creative DIY enthusiasts, the biggest hurdle isn't the technique – it's the fear of failure. Here's how the "Create Recklessly" mindset helps you move forward:
-
Plan a dedicated playtime: Set aside 30–60 minutes where the goal isn't a "finished piece of jewelry" but to try a new shape, color, or texture.
-
Work with scrap materials: Use leftover jewelry concrete, excess pigments, and old molds. This makes each experiment feel less "expensive."
-
Save everything you think is ruined: "Failed" castings can be sanded, drilled, painted, foiled, or combined with new parts to create truly unique jewelry.
When you demystify the process, you suddenly dare to pour a little too much pigment, mix unexpected colors, or press odd objects into the concrete – and that's often when the magic happens.
When mistakes become your most unique jewelry
Many experienced creators testify that their most cherished concrete jewelry was born from "mistakes." A too-rough surface became a raw, industrial look. A crack transformed into a perfect line to fill with metallic paint. A too-deep impression in the mold became a natural spot for an embedded stone. By seeing every mistake as a starting point – not the end – you train your creative eye. The more you dare to "create recklessly," the more personal signature styles you'll discover, and your jewelry will acquire a character that is impossible to mass-produce.
Material Guide – everything you need to start with jewelry concrete
To "Create Recklessly" with jewelry concrete, you need a well-thought-out but simple basic set of materials. Many online guides only mention concrete and molds, but to truly succeed – and avoid unnecessary failures – it's smart to choose the right products and tools from the start. Here, we'll go through everything you need, with concrete examples from the assortment at Hilmaspyssel.se.
Basic materials and molds for jewelry concrete
-
Jewelry concrete (powder) – finely ground, dust-reduced concrete specially formulated for small details and thin jewelry.
-
Water, mixing vessel, and stirring sticks – preferably plastic or silicone vessels that are easy to clean, and disposable sticks/spoons for stirring.
- Jewelry molds – silicone molds with motifs like rings, charms, earrings, and pendants.
-
Recycled molds – e.g., silicone ice cube trays, small yogurt lids, bottle caps, and baby food jar lids (for crafts only, not food afterward).
-
Jewelry findings – eye pins, ear hooks, chains, jump rings, clasps, and ring bases that fit cast parts.
By combining special molds from Hilmaspyssel.se with items you already have at home, you get great variety without the budget running away. A good beginner's trick is to start with a universal mold for charms and a ready-made jewelry kit with basic components, so you can assemble your first pieces of jewelry right away.
Decoration, safety, and smart accessories
To give your concrete jewelry a personal touch, decorations are crucial:
-
Pigments and paints – pigment powders, acrylic paints, and metallic paints for colored concrete or painted details.
-
Effect materials – glitter, metal powder, gold flakes, small stones, sequins, crushed glass, and dried flowers to embed in the concrete.
-
Surface treatment – varnish, wax, or sealer that protects against dirt and moisture and gives a matte or glossy finish.
-
Safety equipment – disposable gloves, optional simple breathing mask, and protection for the work surface (plastic, baking paper, or silicone mat).
Many guides overlook safety, but a dust-reduced powder and gloves make a big difference to the working environment – especially if you cast frequently. Consider a starter kit for jewelry concrete from Hilmaspyssel.se: you get tested products that work together, minimize beginner mistakes, and allow you to focus more on creative crafting than on hunting for individual items.
Step-by-step – How to cast jewelry in concrete
Casting jewelry in concrete sounds advanced, but with jewelry concrete and the right work order, it becomes both simple and surprisingly quick. In this section, we go into more detail than most online guides, focusing on small molds, thin layers, and those little tricks that yield professional results from the very first casting.
Preparation and mixing – the foundation for successful casting
-
Measure the correct amount of jewelry concrete and water: Always follow the mixing ratio on the package. It's better to start with a little less water and add drop by drop until the consistency is right.
-
Aim for "thick pancake batter": The mixture should be pourable but not runny. Too loose a mixture results in porous concrete; too thick will not fill details properly.
-
Mix gently but thoroughly: Stir slowly for 2–3 minutes until all powder is dissolved. Scrape the sides of the vessel so no dry powder hides.
-
Minimize air bubbles: When the mixture is ready – gently tap the mixing vessel on the table a few times to release air.
An extra tip often missing from simpler guides is to let the mixture rest for 1–2 minutes after the initial mixing, and then stir quickly again. This makes the mass more homogeneous and provides an extra fine surface, which is particularly noticeable on smooth pendants and rings.
Casting, drying, and post-processing in detail
-
Fill the mold controllably: Use a small plastic spoon or disposable syringe to fill tiny silicone molds. Work in thin layers and tap the mold gently against the table after each refill.
-
Attach jewelry components directly into the concrete: Carefully push in eye pins or studs when the concrete has started to "set" a little (after 5–10 minutes). This prevents them from sinking all the way down.
-
Allow to dry longer than you think: Small pieces of jewelry often feel dry on the outside after a few hours, but leave them in the mold for at least 24 hours for full strength and reduced risk of cracking.
-
Finishing that elevates the whole: Sand edges with fine sandpaper (400–800 grit) under lightly running water for dust-free sanding. Finish with cleaning and a thin layer of varnish or wax to protect against dirt and moisture.
Think of this process as your basic recipe book. Once you master the flow – mix, cast, dry, sand, seal – you can start experimenting freely with color, textures, and inlays, perfectly in line with the "Create Recklessly" spirit that Hilmaspyssel.se inspires.
Creative design ideas – concrete jewelry projects you can easily do at home
Once you've tried casting a few simple shapes in jewelry concrete, a whole new world of design possibilities opens up. It's about combining the raw, industrial feel with personal details – precisely what makes concrete jewelry so trendy for both everyday wear and special occasions. Below, you'll find concrete project ideas that work equally well for beginners and for those who already sell their creations at markets or on Etsy.
Simple projects that deliver maximum impact
-
Minimalist necklaces and charms: Cast small, clean shapes – circles, rectangles, or drops – and let the raw concrete be the focus. Combine with a simple silver or leather chain.
-
Colored concrete jewelry: Mix in a couple of drops of pigment into the jewelry concrete for soft pastels, or stronger shades for statement jewelry. Alternatively, paint geometric fields or patterns with acrylic paint once the jewelry has hardened.
-
Combination jewelry: Create contrast by combining concrete with metal, wood, or resin. For example, a concrete charm mounted on a gold-plated base, or small concrete inserts in wooden rings.
-
Popular home projects: Try statement earrings, rings with embedded glitter or crystals, and small charms that become keychains or bag charms – perfect as gifts.
Start with a simple shape and vary the color, attachment, and decorations. This way, you can create entire small collections where each piece of jewelry is still unique.
Seasonal ideas and how to find more inspiration
To get even more out of your jewelry concrete, consider season and theme:
-
Christmas gift jewelry: Cast small stars, hearts, or mini-plates with embossed words. Decorate with metallic paint, gold flakes, or red glitter and assemble as necklaces or earrings.
-
Summer projects: Embed dried flowers in the surface by gluing them onto the dry jewelry and sealing with varnish, or combine light pigments with natural-colored cords and wooden details.
-
Theme collections: Create a "Nordic minimalism" series in gray concrete with black details, or a boho-inspired line with concrete + brass + tassels.
For even more ideas, you can use Hilmaspyssel.se as a creative compass. Check out product images, inspiration posts, customer photos, and examples in product descriptions – often, concrete tips on color combinations, shapes, and assembly methods are hidden there. Save your favorites in your own "idea list" and let them guide you next time you sit down to create freely with your jewelry concrete.
Coloring, surface treatment, and decoration – making your jewelry concrete unique
Coloring and decoration are what transform simple cast shapes into personal favorite jewelry. Here, jewelry concrete truly becomes a playful material where you can combine an industrial feel with soft colors, metallic effects, and artistic details. By working with the right pigments, varnishes, and decorations, you get jewelry that is both durable and looks professional – even if you're a beginner.
How to color and shape the expression in your jewelry concrete
-
Pigments in the mix: Blend dry pigment powder into the jewelry concrete to get through-colored pieces. Start with a little pigment, stir thoroughly, and adjust until you find the right shade.
-
Marbling and two-tone effects: Divide the concrete into two to three small bowls, color them differently, and then gently swirl them together in the mold for a marbled, "stoneware" feel.
-
Painting on dry concrete: Use acrylic paint or metallic paint to paint details, edges, or graphic patterns after hardening. Perfect if you want to rescue a "dull" or uneven casting.
-
Surface treatment with varnish or wax: A matte varnish enhances the raw concrete feel, while glossy varnish gives a more exclusive, almost ceramic-like look.
It's a good idea to test several techniques on small test pieces before committing to your favorite project. A simple trick is to always set aside a little concrete in a mini-mold for experiments – there you can try new pigment combinations without risking your main project.
Decorations and details that elevate your concrete jewelry
Decoration is the area where you can truly "Create Recklessly." Some proven ways to create unique surfaces include:
-
Texture and patterns: Gently press stamps, lace, texture mats, or even bubble wrap into the surface before the concrete fully sets. This creates tactile, photo-friendly jewelry that stands out on social media.
-
Embedded effects: Sprinkle glitter, metal flakes, small glass pieces, or crushed stones on the surface, or gently mix a little into the mass. This adds depth and a luxurious feel without overpowering the clean concrete look.
-
Ink techniques and "splash" effects: With alcohol-based ink or thin acrylic paint, you can drip, spray, or splatter color over dry jewelry for an artistic, almost watercolor-like result.
For best durability: always seal paint, ink, and decorations with a suitable varnish. On Hilmaspyssel.se, you'll find pigments, metallic paints, varnishes, and decorations that are well-tested for jewelry concrete. Start with a small basic set – a black pigment, a light pigment, a metallic paint, and a clear varnish – and then build on your creative "palette" as you find your own style.
Common mistakes, troubleshooting, and pro tips for durable jewelry
When you start creating with jewelry concrete, it's easy to get stuck on small mistakes that cause the result to crack, become brittle, or simply not look as you intended. This section collects the most common problems that appear in forums, blogs, and comment sections – and shows you how to concretely solve them so that your concrete jewelry becomes both beautiful and durable over time.
Typical errors – and how to save the project
-
Too much water in the mixture: Makes the concrete porous and brittle. Use measurements or a scale and stick to the recommended mixing ratio. If you've already mixed it too loose – add a little more powder and mix thoroughly.
-
Wrong consistency of the mixture: Too thin a mixture will drain out of details, too thick will create air pockets. Aim for a consistency like "thick pancake batter" and let the mixture rest for 1–2 minutes before casting.
-
Impatience during drying: Removing the jewelry from the mold too early is one of the most common mistakes. Let small pieces of jewelry cure for at least 12–24 hours, preferably longer in high humidity.
- Small damages and unevenness:
- Sand edges and tops with fine sandpaper (grit 240–600).
- Fill small pits with a little new concrete or fine filler, let dry, and sand again.
- "Failed" castings can be painted opaquely, drilled, cut, and repurposed into smaller charms.
By seeing every mistake as raw material, you open up entirely new creative paths – something many experienced creators highlight as the key to their personal style.
How to make extra durable and professional concrete jewelry
For your jewelry concrete pieces to withstand everyday wear, markets, and potential sales, the details are crucial:
-
Always seal the surface: Use a thin layer of varnish, wax, or impregnating agent (adapted products are available at Hilmaspyssel.se) to protect against dirt, moisture, and skin oils.
- Assemble jewelry components correctly:
- Attach eye pins and studs into the DAMP concrete for best grip.
- For extra security, you can drip in a little jewelry glue/epoxy around metal fastenings after curing.
-
Consider the weight: Larger earrings can be heavy. Cast thinner, work with hollowed-out shapes, or combine concrete with lighter materials like wood or resin.
-
Storage and care: Advise the recipient to store the jewelry dry, preferably in a box or on a jewelry hanger, and wipe with a lightly damp cloth when needed – no harsh cleaning agents.
If you want to take your projects to the next level, you can work more "professionally": create small collections with a well-thought-out color scheme, document exact mixing ratios and drying times, and note which molds, pigments, and varnishes you used. This type of "recipe" allows you to repeat your best results, scale up for markets, and simultaneously continue to create freely in true Create Recklessly spirit – but with a stable, reliable craftsmanship at its core.
Frequently asked questions about jewelry concrete and “Create Recklessly”
Q: What distinguishes jewelry concrete from regular concrete and plaster?
A: Jewelry concrete is an extra fine-grained, lighter, and more dimensionally stable concrete mass developed specifically for small details like jewelry and mini-decorations. Compared to regular concrete, you get a much smoother surface, better detail reproduction, and less risk of cracks in thin parts. Unlike plaster, jewelry concrete becomes significantly more durable, withstands more wear, and feels more "authentic" and exclusive in jewelry. Therefore, it is perfect when you want to create jewelry that both looks professional and lasts over time.
Q: Is jewelry concrete heavy to wear as jewelry?
A: Surprisingly – no, not if you cast correctly. Jewelry concrete often consists of lighter aggregate than traditional concrete and is used in very small quantities per piece of jewelry. An earring or a charm often weighs less than a corresponding metal piece. If you want to make larger statement pieces, you can:
-
Hollow cast (make the shape hollow or thinner)
-
Combine with light materials like wood or resin
-
Work flat rather than solid to reduce weight
Q: How water and dirt resistant are jewelry made from jewelry concrete?
A: Untreated jewelry concrete is porous and can absorb color, grease, and dirt – just like other concrete. For jewelry, some form of sealant is almost always recommended:
- Thin acrylic varnish (matte or glossy) for everyday jewelry
-
Wax for a softer, more natural finish
- Extra protective varnish if the jewelry frequently comes into contact with water
Properly sealed jewelry easily withstands normal use, i.e., rain, splashes when washing hands, etc., but it's best to remove them when showering, bathing, and washing dishes for maximum lifespan.
Q: Can I use any molds for jewelry concrete?
A: You can use much more than just specialized molds, but with a few important rules. Silicone molds are best – they are flexible, release easily, and provide fine details. You can also reuse:
- Small plastic lids, silicone ice cube trays, chocolate molds
- Reused packaging (e.g., from makeup or small sweets)
Avoid molds made of thin, brittle plastic that can crack when you try to remove the concrete, and anything that cannot withstand moisture. And never use kitchen molds for food again if you have used them for concrete.
Q: What do I do if my casting cracks or looks bad?
A: This is where “Create Recklessly” really comes in – see failures as raw material. You can:
-
Sand rough edges and deliberately reshape it to be more angular
-
Paint over the surface with acrylic or metallic paint to hide imperfections
-
Drill small holes and make the piece part of a larger design
-
Crush pieces and use them as "stones" in new jewelry or resin projects
Often, these salvaged projects become the most unique and personal.
Q: What is the easiest project for a total beginner?
A: A perfect starter project is a simple pendant or keychain in a small silicone mold. You only need jewelry concrete, water, a mold, an eye pin, and possibly varnish. Mix to the consistency of thick pancake batter, fill the mold, insert the eye pin, let dry, lightly sand, and varnish. At Hilmaspyssel.se you will find both starter kits, molds, and jewelry parts – so you can get started right away without looking for materials in several different places.
Q: How does jewelry concrete fit into today's jewelry and interior design trends?
A: Jewelry concrete hits several strong trends simultaneously: minimalism, industrial feel, handmade, and sustainability. The raw concrete creates a beautiful contrast against gold, silver, and natural materials and feels both modern and timeless. Furthermore, many Swedish DIY enthusiasts appreciate being able to create their own, long-lasting jewelry instead of buying mass-produced items – which makes jewelry concrete particularly timely.
Conclusion: Let jewelry concrete be your playground for creative courage
You have now received a complete guide to how jewelry concrete, creative techniques, and the mindset of “Create Recklessly” can help you create personal, durable, and unique jewelry. We have covered what jewelry concrete is, what materials you need, exactly how to cast, how to color and decorate – as well as how to avoid common mistakes and turn them into creative opportunities. Together, this gives you a solid foundation, but also the freedom to experiment far beyond the "templates".
The next step is simple: choose a small first project and order a starter kit or the individual products you need from Hilmaspyssel.se. Book your own "play session", mix a small batch of concrete, and try at least two new ideas each time – a shape, a color, or a decoration you haven't tried before. Document your favorite recipes, create your own mini-collections, and share your results on social media. Above all: dare to create "recklessly" – with jewelry concrete, only your imagination sets the limits.