


Pearl Silk: How to choose the right thread for durable beaded jewelry (with help from Hilmaspyssel.se)
Do you want to string beads for a necklace that drapes beautifully, feels luxurious, and lasts over time? Pearl silk is a classic choice for bead stringing – especially when you want to knot between the beads for a more exclusive, professional result. At the same time, it's easy to get stuck asking questions like: what thickness suits my beads, what color will look best, and how do I prevent the thread from fraying or the knots from slipping?
In this guide, we'll go through how to choose the right pearl silk, match it with beads of different shapes and sizes, and build a lasting finish – from jewelry clasps to rings and extension chains. You'll also get practical tips to avoid common mistakes and create jewelry you can wear yourself or sell, with materials and jewelry components gathered in one place at Hilmaspyssel.se.
Pearl silk is a classic silk thread for bead stringing used when you want to give necklaces and bracelets a soft, elegant drape and a more exclusive feel. Unlike elastic thread or wire, pearl silk is designed for traditional bead stringing – especially when you want to knot between the beads for a professional, "pearl necklace" look. When you shop at Hilmaspyssel.se, you can also supplement the thread with beads and jewelry components in the same place, making planning and purchasing easier whether you're creating for yourself or for sale.
Pearl silk vs. other threads: what's the difference?
The choice of thread affects both durability and appearance. Here's a quick comparison to make it easier to choose the right material for your project:
-
Pearl silk: Supple and luxurious drape, perfect for knotting between beads and classic beaded jewelry.
-
Nylon thread: Often durable and affordable, good for everyday jewelry where you want to minimize maintenance (but doesn't provide the same traditional feel).
-
Elastic thread: Quick and easy for bracelets without clasps, but less "premium" and can stretch over time.
-
Wire (jewelry wire): Stable and shape-retaining for heavier beads, faceted stones, and designs that require extra rigidity (but won't be as soft in the drape).
A common question is: "Is pearl silk too delicate?" When used correctly, it holds up very well – especially if you knot between the beads and create neat, secure finishes with the right jewelry components.
Decision matrix: choose pearl silk when... (and choose something else when...)
Choose pearl silk when you want a classic pearl necklace, are working with round beads (e.g., glass or freshwater pearls), and want to create a handmade premium feel. Prefer wire for really heavy natural stones or sharp bead holes, and avoid pearl silk for jewelry that is often exposed to water, exercise, or children's play – where nylon or elastic thread might be more practical.
Section 2: Choose the right pearl silk: thickness, color, twist, and strength
The right pearl silk is the difference between a necklace that feels luxurious and supple – and one that becomes stiff, frays, or wears out too soon. Since Hilmaspyssel.se is an "all-in-one" store for beads and jewelry components (clasps, chains, charms, etc.), it's extra easy to choose thread based on the specific beads and finish you plan to use. The goal is always the same: a durable, professional stringing that suits both hobby projects and jewelry you want to sell.
How to match thickness and bead holes (without guessing)
A good rule of thumb is that the pearl silk should fill the bead hole "just right" – it should slide through without forcing, but also not be so thin that the beads rub against each other and the knots become small and unstable.
-
Always test with 3–5 beads first: String a few beads and try tying a knot – then you'll immediately see if the thread feels too thick or too thin.
-
Consider the knots: If you plan to knot between each bead, the thread needs to fit in the hole and be able to "grip" so the knot stays tight.
-
Account for bead variation: In mixes (different shapes/sizes), some beads may have narrower holes – in that case, choose a slightly thinner thread rather than getting stuck in the middle of your work.
This mini-test is a simple "insurance" before you cut to full length and start attaching clasps and finishes.
Color, twist, and strength – the design strategy that elevates the whole
The color of the thread actually affects how the pearls are perceived from a distance. Choose tone-on-tone for a soft, exclusive expression (especially with pearls in light shades), or contrast for a more modern statement where each pearl gets a clearer outline. With transparent or light-reflecting pearls, a neutral thread color can create an "almost invisible" effect.
Regarding twist and durability: choose a thread that feels even and stable, especially if you're making jewelry for daily wear. If you're working with heavier pearls or sharper edges in the bead holes, it might be smart to either increase the strength or plan for protective knotting and careful finishes. With Hilmaspyssel.se's wide assortment of beads and jewelry components, you can also adapt clasps and finishes to your thread choice – for a finish that looks as professional as it holds up.
How to create a professional knotted pearl necklace (step-by-step)
A knotted pearl necklace is a classic for a reason: it looks luxurious and handcrafted, the pearls are protected from rubbing against each other, and if the thread ever breaks, not everything falls off at once. With pearl silk, you also get a soft, elegant drape that suits everything from subtle everyday jewelry to more eye-catching statement designs. And when you can buy beads, clasps, and other jewelry components in one place (like at Hilmaspyssel.se), it becomes easier to plan the entire piece from the start.
Preparations that make a difference
Spend five minutes on planning – it often saves an hour later:
-
Measure and try the length: remember that knots "eat" a few millimeters per bead, especially with small beads and many knots.
-
Test the bead sequence on a tray: mix sizes, shapes, and colors until the rhythm feels right; take a quick photo so you remember the order.
-
Check the bead holes: feel for sharp edges that could abrade the silk – especially on faceted glass or stone beads.
Once you have the beads and thread ready, make sure you also have jewelry clasps and possibly a small extension chain ready, so you don't have to compromise at the end.
Knotting technique + quick troubleshooting
The basic method is simple: string a bead, tie a knot close to the bead, and repeat. For even knots, it helps to maintain the same tension in the thread each time and "push" the knot into place with your fingernail or a knotting tool.
Common problems – and quick solutions:
-
Knots that slip: tie the knot a little slower and lightly moisten with your fingertip for better friction before tightening.
-
Uneven spacing: pull the knot towards the bead before fully tightening; work with small adjustments.
-
Thread twisting: let the work hang freely now and then so it "unwinds" before you continue.
Finish with a stable knot and a well-thought-out termination towards the clasp – it's the final detail that makes your necklace feel truly professional and durable.
Tools and jewelry components that complete the whole (Hilmas Pyssel as a complete solution)
Pearl silk itself provides a soft, exclusive drape – but it's the tools and jewelry components that determine whether your necklace actually feels "store-bought" or homemade. The advantage of Hilmaspyssel.se is that you can gather both beads and all necessary components in one place: from jewelry clasps and chains to charms and ear-wires if you want to make matching earrings. This saves time, reduces mispurchases, and makes it easier to create a coherent design.
Basic equipment for pearl silk (what you actually need)
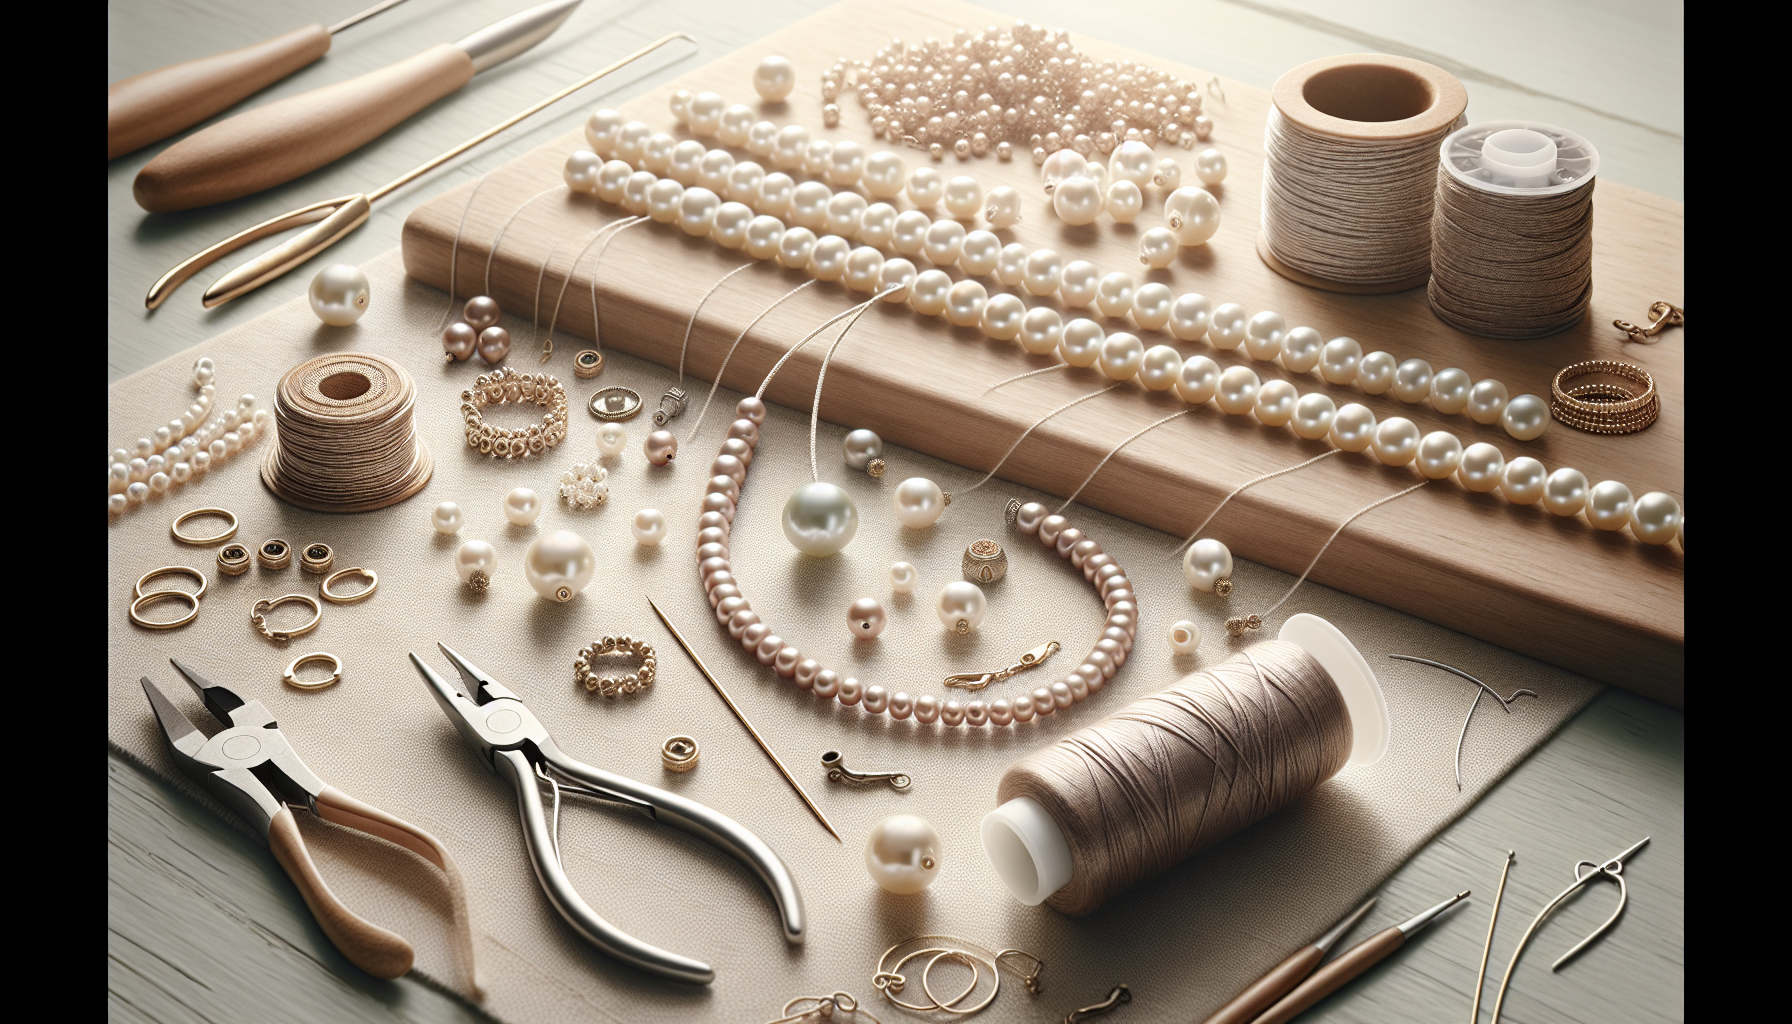
For a professional result, these are your "must-haves" – and why they matter:
-
Beading needle / thin needle: Makes stringing faster, especially with smaller holes or many beads in a row.
-
Sharp scissors or thread cutters: Provides a clean cut that reduces fraying and makes knots neater.
-
Knotting tool or tweezers (optional but smart): Helps you pull the knot tight against the bead without damaging the thread.
-
A little jewelry glue (micro-dot): Secures end knots and reduces the risk of the knot coming undone over time.
-
Finishes/crimp cups (calottes): Conceals the knot and creates an elegant transition to clasps and rings.
What's often missing in guides is the "flow thinking": lay everything out in order before you start (thread, beads, finishes, clasps). That way, you avoid panic when you're left with a fully strung necklace and realize you're missing a ring or that the clasp doesn't match the metal of your other components.
Build a kit – beginner vs. for those who sell
If you want to work efficiently (and consistently), you can think in terms of kits:
-
Basic kit: pearl silk, needle, scissors, crimp cups, rings, and a jewelry clasp in a metal color you frequently use.
-
Plus kit for selling: extra clasps, extension chain, standardized ring sizes, and a pair of ear-wires for "set" production.
When you buy beads and jewelry components together – as at Hilmas Pyssel – it becomes easier to maintain consistent quality and quickly switch between everyday jewelry and more eye-catching statement designs.
Section 5: Matching pearl silk with pearls – color, shape, size, and style
Once you've chosen your pearl silk, the next key to a professional result is matching the thread with the right type of pearls. Since Hilmaspyssel.se brings together pearls in many colors, shapes, and sizes along with jewelry components, it's easy to pre-build a design that is both durable and looks exclusive – whether you're creating for yourself or for sale.
How the pearl type affects your choice of pearl silk
Different pearls "behave" differently on silk, especially when you knot between each pearl. Consider this when planning your pearl strand:
-
Round glass and freshwater pearls: Provide a soft, classic drape. Perfect for knotted pearl necklaces where the silk enhances the premium feel.
-
Faceted pearls: Can have sharper edges that abrade. Choose a thread thickness that fills the hole well and check that the holes are smooth (a quick "pull test" with a scrap of thread will reveal the friction).
-
Natural stones and heavier pearls: Add more weight and pull to the jewelry. Here, even knots and stable finishes become extra important – and sometimes a different thread type might be better if you know the jewelry needs to withstand tough use.
An often-missed trick: first, build a "test section" with 10–15 pearls and 3–4 knots. Then you'll immediately see if the combination gives the right drape, if the knots sit neatly, and if the thread color enhances the pearls' tone.
Design principles + 4 inspiration recipes that work every time
Start with three simple principles: balance (harmonious sizes), rhythm (repetition of color/shape), and focal point (a center pearl or a pendant). Then try one of these recipes:
-
Classic pearl strand: Tone-on-tone pearls + silk in a similar shade for a cohesive, timeless look.
-
Modern mix: Base of neutral pearls + 3–5 accent pearls evenly repeated for a "designer feel."
-
Bridal/gala feel: Light thread, knots between each pearl, and a discreet extension chain for a perfect fit.
-
Scandinavian minimalist: Few pearls, clear spacing, and a clean clasp – let the material speak for itself.
When the pearl silk and pearls are matched correctly, the jewelry not only looks better – it also becomes easier to assemble with clasps, rings, and any pendants for an overall professional look.
Section 6: Durability, care, and lifespan – how to make your pearl jewelry last
Pearl silk provides a soft, exclusive drape and a classic feel – but as a natural fiber, it requires a little more care than, for example, nylon. If you want your knotted pearl necklace to last a long time (whether you're making it for personal use or for sale), it comes down to two things: correct construction and proper daily care. Here, it's a great advantage to be able to supplement with good jewelry components – clasps, rings, and finishes – from the same place, like Hilmaspyssel.se, so that the whole piece is consistent and professional.
What wears out pearl silk the most (and how to prevent it)
The most common "invisible" causes of pearl jewelry losing its shape or breaking are moisture, chemicals, and friction. Consider this:
-
Moisture and water: Remove jewelry when showering, bathing, and exercising – pearl silk can swell and dry unevenly, which weakens the fibers over time.
-
Perfume, hairspray, and skin creams: Apply first, let dry, then put on the jewelry. This reduces both discoloration and degradation of the thread/knots.
-
Friction in bead holes: Sharp edges or uneven drill holes act like sandpaper. Test by pulling a piece of thread back and forth through the bead before stringing the entire strand.
Unique routine: do a quick "3-minute check" every 10 uses – feel if the knots have loosened, if the thread is visible between the beads, or if the clasp is loose.
Quality control and safety – especially important if you sell
Do you want to deliver a piece of jewelry that feels secure and well-made? Implement a simple QC checklist:
-
Pull test: Gently pull the jewelry in several directions (do not yank). Nothing should slip or snap.
-
Clasps and rings: Ensure that jewelry clasps, rings, and any extension chains are completely closed and do not have sharp edges.
-
"Fail-safe" with knots: Knots between beads mean that if the thread were to break, not everything falls off at once – a major safety factor.
With the right care instructions (preferably as a small care card) and carefully selected components from Hilmaspyssel.se, you'll get pearl jewelry that maintains its shape, retains its premium feel, and stands the test of time.
For those who want to sell: pricing, product texts, and customer experience with pearl silk
Selling pearl jewelry isn't just about beautiful design – it's about being able to justify the value of your craft. With pearl silk and knotting between beads, you get a premium feel and a construction that many customers perceive as "real" pearl necklaces. When you can also buy beads and jewelry components (such as jewelry clasps, chains, charms, and ear-wires) collectively from Hilmaspyssel.se, it becomes easier to maintain consistent quality and a coherent expression in your collection.
Price so you actually profit
A common pitfall is only calculating material cost. Instead, create a simple, repeatable calculation:
-
Materials (BOM): beads + pearl silk + jewelry components (clasps, rings, crimp cups) + packaging – also account for waste and test thread
-
Time (crafting time): stringing, knotting, assembly, quality control, and photography – set an hourly rate that feels reasonable for you
-
Markup/overhead: tool wear, platform/fees, marketing, shipping materials, and returns
Unique angle: create a "standard product" (e.g., 42 cm knotted necklace) and price it first. Then it will be easier to price variations (longer, different beads, different clasp) with clear additions.
Product descriptions that sell (and reduce questions/returns)
Write like a professional jewelry studio – concise, clear, and reassuring:
-
Material & technique: "Knotted between each bead on pearl silk" (signal of quality and safety)
-
Measurements: length, any extension chain, bead size, and weight if the jewelry is heavy
-
Clasp & finish: type of clasp, color/finish, and if matching earrings (ear-wires) are available
-
Care instructions: perfume last, avoid bathing, store flat – shows you care about longevity
Always conclude with a "ready to ship" checklist: pull test, checking for sharp edges in bead holes, and a small care tag in the package. This enhances the customer experience and strengthens your brand over time.
Frequently Asked Questions
Q: What thickness of pearl silk should I choose for my pearls?
A: Start with the pearl's hole size and how you want to finish the jewelry. A good rule of thumb is that the thread should pass through the pearl at least twice (if you want to be able to make knots and have some leeway), but still fill the hole enough so that the knot "stays" neatly next to the pearl. Always test by threading 3–5 pearls first and make a test knot before stringing the entire necklace. If you have pearls of mixed sizes, you may need to choose the thickness based on the smallest hole size and compensate with double knots on larger pearls.
Q: Do you always need to knot between the pearls when using pearl silk?
A: No, but knots often give a more professional and exclusive result. They also reduce friction and protect the surface of delicate pearls (e.g., freshwater pearls) and act as a "safety" if the thread breaks. If you are making a minimalist everyday piece with small, smooth pearls, you can skip knots – but then the choice of jewelry components and finishes becomes extra important.
Q: What are the most common mistakes with pearl silk – and how do I avoid them?
A: Three classics are: 1) Too thin thread which causes knots to slip, 2) too short thread (always leave extra for finishes and knots), 3) sharp bead holes that cut the thread. Prevent this by test-threading, feeling for sharp edges, and using appropriate findings that protect the thread. Hilmaspyssel.se is convenient here as you can complement your order with the right pearls and jewelry components in the same order.
Q: What tools and accessories are most useful when stringing on pearl silk?
A: An efficient basic kit includes a beading needle, sharp scissors, a knotting tool (optional but time-saving), and a little jewelry glue to secure knots/finishes. For the finish, you usually need jewelry clasps, rings, and findings/end pieces – plus a chain/extender chain if you want to offer adjustable length (extra valuable if you are selling).
Q: How long does a pearl necklace on pearl silk last and when should I re-string it?
A: The lifespan depends on use, perfume/moisture, and friction. As a guideline: if the thread looks fuzzy, discolored, or stretched, or if the knots start to loosen, it's time to re-string. For jewelry you wear often, re-stringing every 1–3 years may be reasonable, while party necklaces often last longer with proper storage.
Q: I want to sell knotted pearl jewelry – how do I price it reasonably?
A: Calculate material cost (pearls + pearl silk + clasps/other jewelry components) and add time cost for stringing/knotting, then add a markup for overhead (tools, packaging, waste). Knotting and pearl silk signal craftsmanship and a premium feel, which often justifies a higher price – especially if you can clearly describe the material, length, clasp type, and care instructions in your product text.
From pearl silk to finished jewelry – with a professional overall look
Pearl silk is one of the most rewarding materials when you want to create pearl necklaces and bracelets with a beautiful drape, a premium feel, and the ability to knot between the pearls for both an exclusive look and extra security. With the right thickness, color choice, and finish, you get a piece of jewelry that looks well-made – whether you make it for yourself or for sale. The key is to think holistically: pearls, thread, and jewelry components should interact to ensure the result is durable and beautiful over time.
Next step: choose a project (e.g., a classic knotted pearl strand), gather pearl silk, pearls, and finishes like jewelry clasps, rings, and possibly an extender chain. At Hilmaspyssel.se, you'll find everything in one place – from pearls in many shapes and sizes to jewelry components that also include chains, pendants, and ear-wires if you want to make a matching set. Decide on your design, do a quick quality check (pull test + check for sharp bead holes), and start stringing – your next professional piece of jewelry is closer than you think.