


Beading Needles from Hilmaspyssel.se – Your Guide to the Right Needle for Every Beading Project
Are you tired of needles getting stuck in beads, bending, or simply not fitting through the holes? With the right beading needles, jewelry making, bead embroidery, and bead weaving become both easier and more enjoyable. At Hilmaspyssel.se, you'll find a wide range of specialized needles for beads – from extra-thin needles for seed beads to flexible wire needles for jewelry wire and elastic thread.
In this guide, we'll cover everything you need to know to choose the right beading needle: what types are available, how to match needles with beads and thread, practical technique tips, and inspiring project ideas. You'll also get concrete examples, smart beginner tips, and advice on storage and durability, so you can shop confidently at Hilmaspyssel.se and create beaded works with a more professional result.
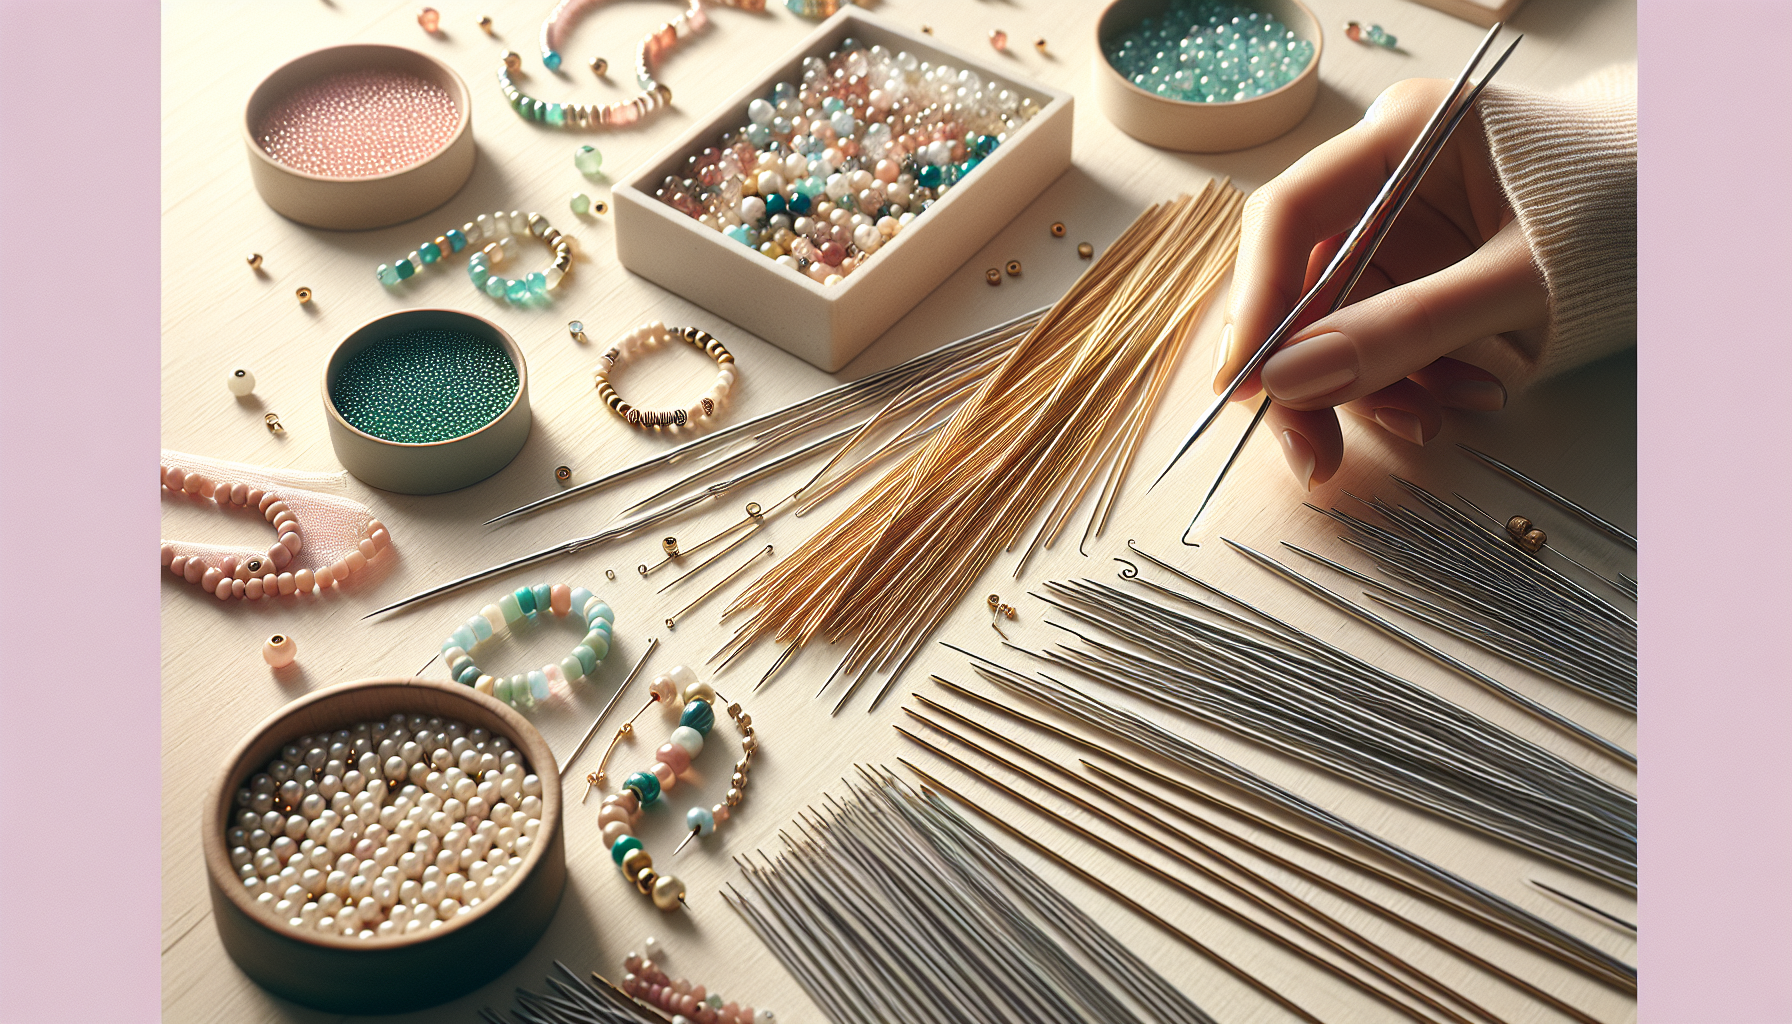
Beading needles are one of those small tools that make an enormous difference in both jewelry making and detailed beading projects. Unlike regular sewing needles, beading needles are specifically designed to pass through tiny bead holes – such as those on rocaille and seed beads – without getting stuck or breaking the bead. At Hilmaspyssel.se, you'll find several variations of beading needles, adapted for different techniques and materials, making it easier to achieve a professional result even at your kitchen table.
How Beading Needles Differ from Regular Sewing Needles
To understand why a beading needle is so valuable, you need to look at its characteristics:
-
Length: Beading needles come in both short and long varieties. Longer needles facilitate bead weaving and bead embroidery where you need to pass many beads in one continuous motion.
-
Thickness: They are usually extremely thin to be able to pass through small beads multiple times, which is necessary for techniques like bead weaving and peyote.
-
Eye: The eye of a beading needle is either very small or designed to be in line with the needle's thickness, minimizing the risk of getting caught on the edges of the beads.
-
Flexibility: Many beading needles are more flexible than sewing needles and can bend easily through tight passages without breaking immediately.
This combination of properties allows you to work with thin threads, small glass beads, and intricate patterns without frustrating interruptions.
Common Uses for Beading Needles
Beading needles are not only used for classic bracelets and necklaces. They are key tools in:
-
Jewelry making: Fine threading of necklaces, earrings, and bracelets with small seed beads, faceted glass beads, or metal beads.
-
Bead embroidery: Beading stitched onto fabric, felt, or leather to create embroidered brooches, hair accessories, and textile decorations.
-
Bead weaving and loom beading: When weaving beads on a loom, thin, longer needles are required to pass through each row smoothly.
-
Decorations: Embellishing clothes, accessories, interior details, and holiday decorations with beads of various sizes.
By choosing the right beading needle for the right technique, you not only get better-looking results – you also save time, reduce bead waste, and make the entire crafting experience significantly more enjoyable. In the next section, we'll take a closer look at the different types of beading needles you'll find at Hilmaspyssel.se and how they differ in practice.
Different Types of Beading Needles at Hilmaspyssel.se
When you start comparing beading needles, you quickly realize that "a needle" isn't just any needle. At Hilmaspyssel.se, there are several different types of beading needles, carefully selected to suit everything from simple threading of children's beads to advanced bead weaving with micro seed beads. By understanding the differences between the most common models, it becomes much easier to choose the right needle from the start – and avoid unnecessary hassle in the middle of your project.
The Most Common Beading Needles – Thin, Long, and Flexible
Here are the main categories you'll encounter in the Hilmaspyssel.se assortment:
-
Extra-thin beading needles for seed beads: Narrow, with a small eye, perfect for size 11/0 and 15/0 rocaille beads and crystal beads with small holes.
-
Long beading needles for bead embroidery and bead weaving: Provide good reach through multiple layers of fabric or through wide bead sequences on a loom.
-
Flexible wire needles / wire needles: Two-part eye that opens around the thread, ideal for jewelry wire, elastic thread, and thicker cords.
-
Standard beading needles of medium length: All-round option for necklaces, bracelets, and simpler jewelry remakes.
Once you know which technique you want to use – for example, bead weaving, embroidery, or just straight strung necklaces – it becomes easy to match the technique with the needle type. Many experienced crafters have at least one set of each type in their box to always be ready for the next idea.
Material, Pros and Cons – How to Choose Smart
Most beading needles at Hilmaspyssel.se are made of hardened steel or nickel-plated steel, sometimes with a gold or silver finish for better visibility against dark surfaces. This provides:
-
Stiffness and precision: Steel needles hold their shape better when working through dense bead rows or thick fabric.
-
Long durability: Used correctly, they can last through many projects before needing to be replaced.
-
Thin but durable profile: Narrow enough for small bead holes, but robust enough for repeated back-and-forth threading.
Short, stiff needles work best for bracelets and necklaces where you primarily thread straight through the beads. Longer needles provide fluidity in bead embroidery and bead weaving, while flexible wire needles are unbeatable when you need to get jewelry wire through many beads in a short time. By combining 2–3 different needle types from Hilmaspyssel.se, you can cover almost all common beading techniques and achieve both better results and a more relaxed, efficient workflow.
How to Choose the Right Beading Needle – Step-by-Step Guide
Choosing the right beading needle is a bit like choosing the right brush for a painting – it affects both the enjoyment of the work and the final result. At Hilmaspyssel.se, there are several different needle types, and by considering bead size, thread type, and technique, it becomes easy to find a needle that works in practice – not just in theory.
Steps 1–3: Beads, Thread, and Technique
-
1. Start with the bead hole size:
If you are using small seed beads (e.g., 11/0 or 15/0), you will need an extra-thin beading needle of a fine size. For larger glass, wood, or acrylic beads, you can choose a slightly thicker needle that is more durable.
-
2. Match the needle with the thread:
For nylon and FireLine thread, thin, stiff needles work best. For elastic thread and jewelry wire, flexible wire needles are smartest, as they open around the thread and are easy to thread. -
3. Adapt to the technique:
For bead weaving and advanced bead weaving (Peyote, RAW), long, thin needles are ideal. For simpler bracelets and necklaces, shorter beading needles that are comfortable to handle are often sufficient.
A concrete example:
– If you are using 11/0 seed beads on FireLine: choose an extra-thin, long beading needle.
– For elastic bracelets with larger acrylic beads: choose a flexible wire needle that can handle both thicker thread and multiple passes.
How to Find the Right Beading Needle on Hilmaspyssel.se
On the product pages at Hilmaspyssel.se, you'll find important details that many overlook: measurements (length), thickness, and recommended use. Always compare:
-
The needle's thickness against the bead holes – if you're unsure, choose thinner rather than thicker.
-
The length – longer needles for embroidery/bead weaving, shorter for smaller jewelry and fiddly details.
-
Material and flexibility – steel for stability, flexible needle for wire and elastic projects.
A good approach is to build a small "test kit" with 2–3 different needle types and try them out on your most common beads. This way, you'll quickly find your favorites and avoid classic mistakes like broken needles, frayed thread, and beads that simply won't go through.
Practical Tips for Using Beading Needles Most Effectively
Choosing the right beading needles is only half the battle – how you use them in practice determines whether your beading project will be a joy or a struggle. With a few simple but thoughtful routines, you can save time, spare your hands, and achieve a significantly nicer end result. Here we collect practical tips that are often only mentioned in passing in other guides, but which make a big difference in reality.
Threading, Bead Holes, and Gentle Handling
-
Thread smartly: Cut the thread diagonally, lightly moisten the very tip, and flatten it between your fingers before threading it through the needle's eye. This reduces the risk of the thread fraying. Nylon thread can sometimes be lightly waxed for extra stability.
-
Handle tight bead holes: Use extra-thin beading needles for seed beads and rocaille beads, and gently clear the bead hole by passing the needle through the bead a few times without thread first. If you feel clear resistance – swap the bead instead of forcing the needle through.
-
Avoid bent and broken needles: Let the needle do the work. If you pull hard at angles or try to "force" the needle through beads, it will bend easily. Hold the thread close to the bead and pull straight, not sideways.
A good working method is to work on a bead mat or felt, so that beads and needles don't slide around. This gives better control, especially when working with very thin needles and small seed beads.
Ergonomics, Lighting, and Common Beginner Mistakes
Many who bead for a long time unnecessarily experience neck and hand pain. Sit at a table where you can rest your forearms, use good lighting (preferably a desk lamp with cool white light), and take micro-breaks to stretch your fingers and shoulders.
Avoid these common mistakes:
-
Too thick a needle for small beads: The result will be cracked or scratched beads and an unnecessary number of broken needles. Always have at least one thin beading needle in your standard kit.
-
Too short a needle for bead embroidery: For larger embroidery and bead weaving, a longer needle will be significantly more practical because you can pick up several beads in one go.
-
Too stiff a needle for curved sections: For rounded shapes, small corners, or tight spaces, a flexible wire needle works better and reduces the risk of breakage.
By combining the right needle type with good ergonomics and gentle technique, you not only get more durable beading needles – you also get a more consistent, professional result on all your projects. Hilmaspyssel.se makes it easy to supplement with exactly the needles you need to work this way.
Create Your Own Jewelry with Beading Needles – Inspiring Project Ideas
Beading needles are at the heart of many jewelry projects, and at Hilmaspyssel.se, you'll find needles suitable for everything from super simple bracelets to advanced bead embroidery. In this section, you'll get concrete project ideas that show exactly which type of beading needle and thread work best, so you don't have to guess and can focus on the joy of creating.
Easy Projects for Beginners
- Straight strung bracelet with glass or acrylic beads
- Recommended needle: short, slightly stiffer beading needle that can handle larger bead holes
- Recommended thread: elastic thread or nylon thread
-
How to do it: Thread the beads in a simple sequence, tie a secure knot, and hide the knot in a bead or bead cap.
-
Simple necklace with accent beads
- Recommended needle: medium-long beading needle for smooth threading
- Recommended thread: jewelry wire with crimps
- How to do it: Alternate smaller beads with a few larger accent beads, finish with clasp components.
These projects are perfect for those who want to get to know different beading needles without complicated techniques – the result will still be beautiful and have a "store-bought feel" immediately.
Intermediate and Advanced Projects with Beading Needles
- Bead woven bracelets (loom beading)
- Needles: long, thin beading needles that easily pass through multiple rows of seed beads
- Thread: FireLine or strong nylon thread
-
Added value: You practice precision and gain control over the tension in the thread.
-
Bead weaving (e.g., Peyote, Right Angle Weave)
- Needles: extra-thin beading needles for 11/0 and 15/0 seed beads
- Thread: special thread for bead weaving
-
Tip: Choose needles in several sizes from Hilmaspyssel.se so you can pass through the same bead multiple times.
-
Bead embroidery on fabric or felt
- Needles: long, narrow beading needles that pass through both fabric and small beads
- Thread: embroidery floss or strong polyester/nylon
- Project ideas: brooches, hairpins, bag decorations, edge embroidery on clothes.
By matching each project with the right type of beading needle, you get straighter rows, more even bead tension, and a more professional end result – whether you're a beginner or an advanced crafter. Hilmaspyssel.se makes it easy to put together a small "project kit" where needles, thread, and beads interact perfectly.
How to Care for Your Beading Needles – Durability and Storage
Beading needles are one of the most used tools in jewelry making and bead embroidery – and yet, care and storage are often overlooked in online guides. If you take care of your needles properly, you'll avoid unnecessary interruptions when the needle suddenly breaks in the middle of a project, and you'll also save money over time. Here, we'll go through how to care for your beading needles from Hilmaspyssel.se so they stay straight, sharp, and rust-free for as long as possible.
How to Extend the Lifespan of Your Beading Needles
-
Clean the needle after use: Wipe the needle with a soft cloth or a damp cotton pad, especially after working with metal beads, waxed beads, or colored glass beads that can leave residue.
-
Avoid moisture and skin oils: Don't leave needles on your workspace. Moisture, sweat, and spilled drinks can accelerate rust, even on nickel-plated steel needles.
-
Gently straighten slightly bent needles: Place the needle between two flat surfaces (e.g., two credit cards) and gently press. If it's severely bent or frays the thread – replace it immediately.
By making it a routine to always wipe down your needles and put them back in their case even when you take a break, you reduce the risk of both rust and microscopic damage to the metal. This makes a big difference with thin beading needles for seed beads, where even the slightest bend can make them difficult to guide through small bead holes.
Smart, Safe Storage and When to Replace a Needle
-
Store in a needle case or small box: A simple plastic or metal case protects the tip and prevents needles from getting lost at the bottom of your craft box. Many also use magnetic mats on their workspace for quick access.
-
Child and pet-safe storage: If you have children or pets at home – choose a box with a snap-on lid and store it in a closed drawer or on a shelf.
-
Replace worn needles in time: Signs that it's time to discard a needle are: discoloration/rust, the thread frays at the eye, the tip feels blunt, or the needle repeatedly bends.
Working with fresh beading needles from Hilmaspyssel.se not only results in prettier outcomes – it also makes the crafting itself more enjoyable and relaxed. When planning your next order, consider adding an extra pack of needles, so you always have a clean, straight, and sharp needle ready when creativity strikes.
Shop Beading Needles at Hilmaspyssel.se – How to Get the Most Value for Your Money
Knowing which beading needle you need is one thing – quickly finding the right product online is another. At Hilmaspyssel.se, there's a wide assortment of beading needles, but with the right strategy, you can avoid guessing and instead build a well-thought-out basic kit that lasts a long time and suits your favorite projects.
How to Smartly Navigate the "Beading Needles" Category
When you enter the beading needles section at Hilmaspyssel.se, start by looking at product names and measurements:
-
Length and thickness: Check millimeter measurements and needle size (e.g., 10, 11, 12) against your most common beads.
-
Material and design: Choose steel or nickel-plated needles for durable projects and possibly gold/silver color if you want to match metals in your jewelry.
-
Product images and descriptions: Zoom in on the eye, read recommended uses (e.g., seed beads, bead embroidery, wire).
A simple trick is to start from a concrete project: "I want to make bead woven bracelets" and then filter/search for long, thin beading needles that specifically mention bead weaving or beadwork in the description.
Build Your Perfect Beading Needle Kit – Level by Level
To get the most value for your money, it pays to think in terms of kits, not individual products:
-
Beginner: 1–2 packs of medium-length standard beading needles + a simpler flexible wire needle. Perfect for elastic bracelets and straight necklaces.
-
Hobbyist: Add extra-thin needles for 11/0–15/0 seed beads and a longer needle for bead embroidery or loom beading.
-
Advanced Beader: Have several sizes of thin needles, at least one set of long embroidery needles, and wire needles for jewelry wire and more technical constructions.
Always combine beading needles with matching thread, beads, and jewelry components in the same order – then you can test different needles immediately and quickly find your personal favorites without extra shipping costs. This way, Hilmaspyssel.se becomes not just a store, but your complete toolkit for everything related to beading and jewelry making.
Frequently Asked Questions about Beading Needles
Q: Which beading needle should I choose if I am a complete beginner?
A: As a beginner, a small basic kit will get you far: a thin, straight steel beading needle (e.g., size 10–12) for seed beads and small glass or metal beads, as well as a slightly thicker, shorter needle for larger acrylic and wooden beads. At Hilmaspyssel.se, you can look for sets with mixed sizes – that way, you can try them out without buying ten different packs right away.
Q: How do I know if my needle is too thick for the beads I want to use?
A: If the needle gets stuck halfway through the hole, you have to force it through, or if the bead cracks, the needle is too thick. A simple test is to try with thread first: if the thread goes through easily but the needle does not, choose a thinner beading needle. For very small seed beads (11/0, 15/0), extra-thin beading needles specifically made for bead weaving are often needed.
Q: Can I use the same beading needle for all types of thread?
A: Partially, but the result will be better if you match the needle to the thread:
- Nylon/polyester thread: works with most thin steel needles
- FireLine/PE line: often requires a narrow but strong needle that doesn't cut into the line
- Elastic thread: works best with flexible wire/thread needles with a large eye
- Jewelry wire: almost always best with a flexible beading needle made of metal wire
Q: How long does a beading needle actually last?
A: The durability depends on material, use, and storage. A quality steel needle can last for months or years in hobby use if you:
- Don't force it through overly tight bead holes
- Clean it lightly after use, especially with metal or brightly colored beads
- Store it dry, preferably in a needle case or box
Replace it immediately if the needle starts to rust, becomes significantly bent, or jagged – otherwise, you risk both thread breakage and scratched beads.
Q: What is the difference between regular sewing needles and actual beading needles?
A: Sewing needles are usually shorter, stiffer, and have a larger eye, while beading needles are longer, thinner, and more flexible with a minimal eye that easily slides through small bead holes. For simple children's crafts, sewing needles sometimes work, but for jewelry making with seed beads, rocaille beads, and bead weaving, real beading needles are almost a must to avoid frustration.
Q: How can I most quickly get started with beading needles and jewelry making?
A: A good approach is:
- Choose a simple project, e.g., a straight strung bracelet.
- Order a small kit from Hilmaspyssel.se: beading needles, elastic thread, a couple of bags of beads.
- Follow a short step-by-step guide (many are available for free online) and focus on technique, not perfection.
- Once you feel confident, try a thinner needle and smaller beads for bead weaving.
This way, you'll quickly learn which type of beading needle you prefer – without an expensive or complicated start.
Conclusion: The right beading needles make all the difference in your bead projects
When you choose well-thought-out beading needles for your jewelry and beadwork, everything becomes both easier and neater. In this guide, you've gained a comprehensive overview: what beading needles are, the different types available, how to match needles with bead type, thread, and technique, as well as practical tips for use, storage, and durability. Along with the inspiring project ideas, you now have a solid foundation for developing your creativity and avoiding common beginner pitfalls like incorrect thickness or a needle that's too short for embroidery.
The next step is to put this knowledge into practice. Visit Hilmaspyssel.se and explore the beading needles category – compare length, thickness, and material, and put together a small basic kit that suits your favorite projects. Start with a simple bracelet or a beaded woven bracelet and try different needles side by side. This way, you'll quickly find your personal favorites and can build a durable, efficient craft supply that makes every new piece of jewelry both more enjoyable to create and more beautiful in the final result.