


Papier-mâché beads – how to make your own unique beads with Hilmaspyssel.se
Do you want to create your own beads that are both cheap, easy, and durable – without needing expensive special materials? Then papier-mâché beads are a perfect craft. From something as simple as newspaper, glue, and a little paint, you can make personalized jewelry, decorations, and gifts that no one else has. At the same time, you get a recycled craft that is kind to both your wallet and the environment.
In this guide from Hilmaspyssel.se, we cover everything you need to know to succeed: which materials work best, how to make paper pulp step-by-step, how to shape and dry the beads, and how to paint, decorate, and varnish for a professional result. You also get creative project ideas, tips for crafting with children, and advice on storage and durability – plus concrete product suggestions from Hilmaspyssel.se that make crafting extra smooth.
Papier-mâché beads are handmade beads formed from moistened, glue-mixed paper pulp instead of glass, plastic, or metal. The result is surprisingly durable, feather-light beads that you can use for everything from jewelry to interior details. Once you learn the basics, it's quick to make your own paper beads from materials you already have at home – old newspapers, flyers, or printouts.
How do papier-mâché beads differ from regular beads?
The biggest difference is the material and the creative freedom:
-
Extremely lightweight: Perfect for large statement jewelry and earrings that don't weigh down earlobes.
-
Moldable at all stages: You determine the size, shape, and texture – round, oval, organic, or completely sculptural.
-
Sustainable crafting: You can recycle paper that would otherwise be discarded, making the beads both environmentally friendly and economical.
-
Paintable and decorable: The surface absorbs paint well and can be sanded, painted, patterned, and varnished for a professional finish.
Many guides only mention “mix paper and glue,” but few explain that by varying paper type and amount of glue, you can control everything from density to how smooth the beads become. This is where the true magic of sustainable crafting with papier-mâché lies.
Why are paper beads suitable for schools, preschools, and home crafting?
Papier-mâché beads are an optimal project for groups: the material is inexpensive, easy to get, and can be adapted to age and skill level. In schools and preschools, children train fine motor skills, color theory, and recycling awareness while creating something tangible – a bracelet, a keychain, or a garland for the classroom. At home, paper beads are perfect for cozy craft sessions where everyone can participate at their level, from simple ball rolling to more advanced shaping. The result is personalized beads with a story, not mass-produced from a store.
Material Guide – Everything you need to make papier-mâché beads at home
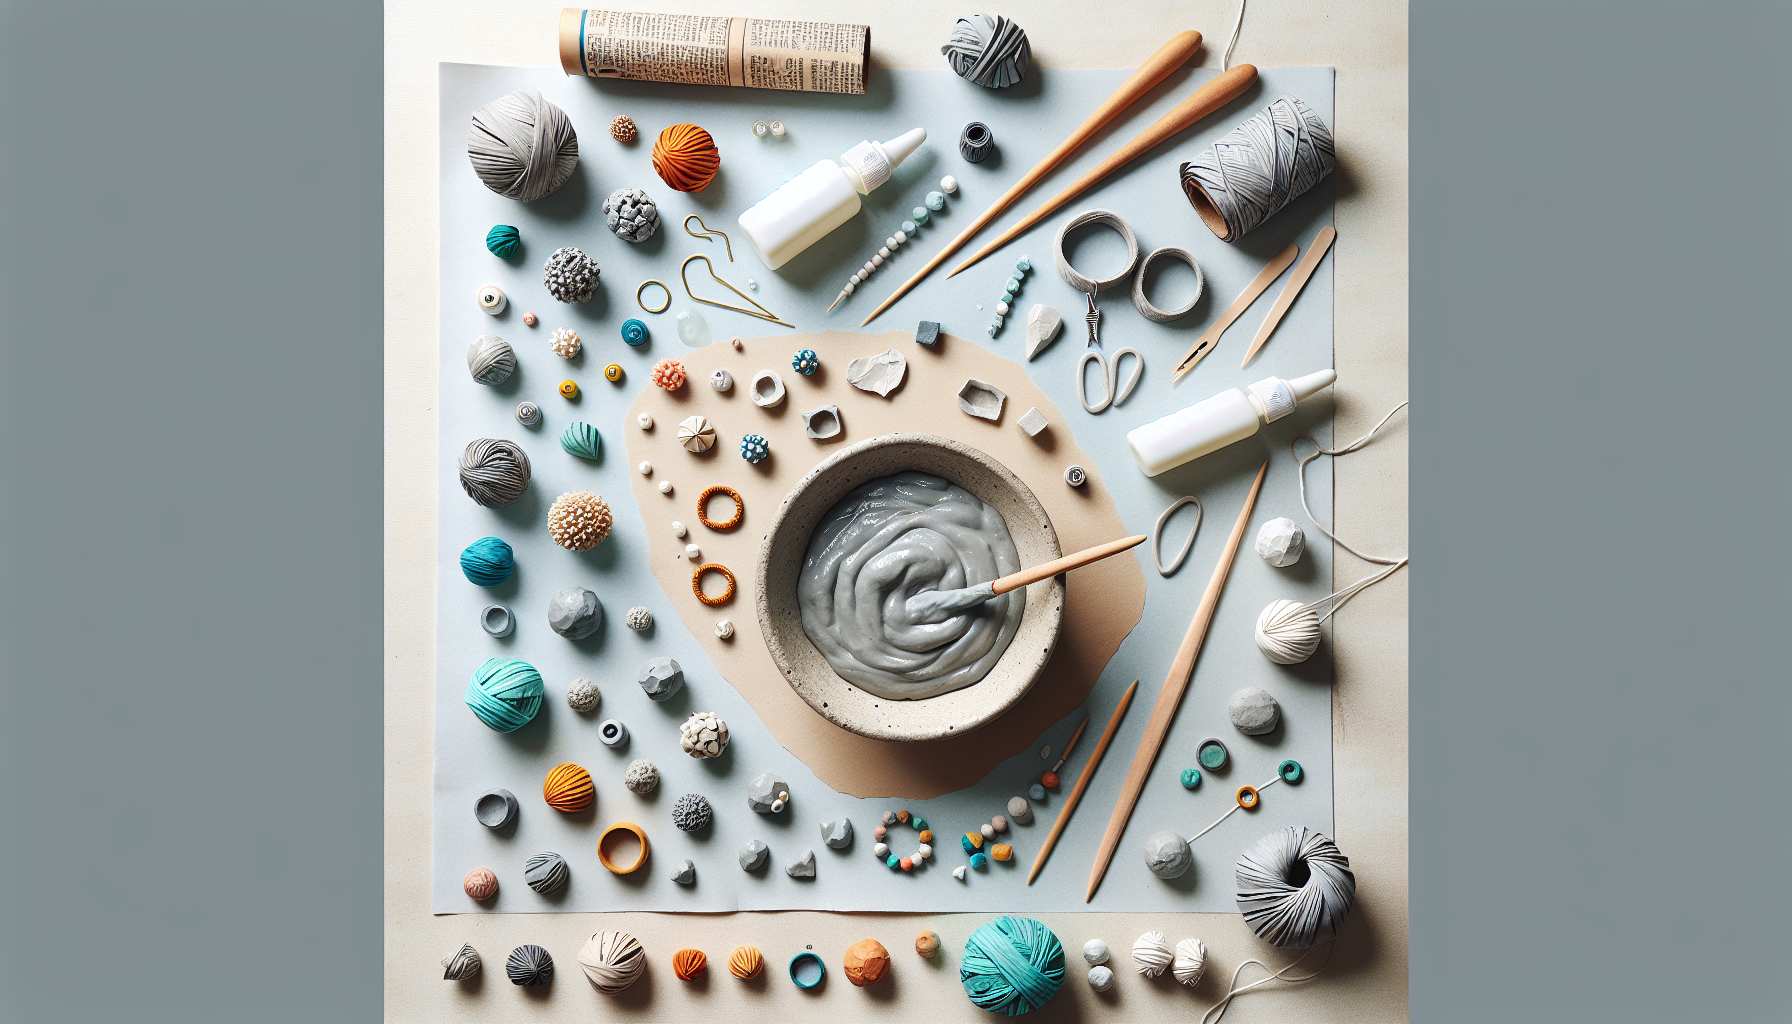
To succeed with papier-mâché beads, it's all about the right materials in the right combination. You don't need an expensive craft studio – much of it you already have at home, and the rest you can easily supplement with cleverly selected craft materials from Hilmaspyssel.se. Here we go through exactly what you need to get strong, smooth, and easy-to-work-with beads that last a long time.
Paper, glue, and basic tools
Start by choosing paper based on the expression and durability you want:
-
Newspaper & flyers: Perfect base for paper pulp, easy to shape, cheap, and good for recycling.
-
Copy paper & old school papers: Provides denser, more durable beads – good for jewelry that will be used frequently.
-
Tissue paper & wrapping paper: Thin paper that gives a softer texture and can be used both in the pulp and as a decorative layer.
-
Old books & wallpaper samples: Slightly stiffer, provides stable pulp and beautiful texture, especially if you allow prints and patterns to be partially visible.
As a binder, the following work:
-
Wood glue (white glue): Produces strong, durable beads – ideal for jewelry.
-
Wallpaper paste: Convenient for larger batches of paper pulp, especially for group or school projects.
-
Homemade glue (flour + water): Inexpensive and environmentally friendly, perfect for sustainable crafting with children.
Basic tools you should have ready:
-
Bowl and spoon/whisk for mixing the pulp
-
Scissors or craft knife for cutting/tearing paper
-
Needles, skewers, toothpicks, or straws for making bead holes and drying beads in a row
Paint, surface treatment, and smart material choices
For your papier-mâché beads to look professional, you need good paint and sealant:
-
Acrylic paint: Opaque, durable, and fast – perfect when you want bright, intense colors.
-
Watercolor & felt-tip pens: Creates soft transitions and vibrant patterns, good for nature-inspired beads.
-
Decoupage, napkins & patterned paper: Glued onto the bead for unique patterns and textures.
-
Varnish, Mod Podge, or clear spray lacquer: Seals the surface, adds shine, and makes the beads more resistant to moisture and wear.
A couple of extra tips often missing from simpler guides:
- Choose thinner paper (flyers, newspaper) if you are a beginner – it will be easier to get an even pulp.
- Use slightly stronger paper (copy paper, book pages) if you know the beads will be keychains or everyday jewelry.
- Invest in quality glue and varnish from a craft store like Hilmaspyssel.se if you want the beads to last for several years.
By combining recycled paper with well-chosen glue and varnish products, you get papier-mâché beads that are both durable, beautiful, and climate-smart – ready to be transformed into jewelry, home decor, and personalized gifts.
Step-by-step – How to make simple papier-mâché beads (start here)
Making your own papier-mâché beads at home is easier than most people think – and with the right workflow, you'll get smooth, durable beads right from the start. In this section, we provide a clear step-by-step guide based on proven techniques from the best online craft guides, adapted for Swedish conditions and materials you can easily find via Hilmaspyssel.se.
Prepare paper pulp – the foundation for beautiful beads
-
Tear the paper finely: Tear newspaper, copy paper, or mixed scrap paper into really small pieces for an even pulp.
-
Soak thoroughly: Place the pieces in a bowl with warm water for at least 1–2 hours, preferably overnight for thicker paper.
-
Blend into pulp: Use an immersion blender or whisk vigorously until you get a smooth paper pulp without large pieces.
-
Add glue: Mix in wood glue or homemade flour glue until the pulp feels like firm, moldable dough – not too wet, not crumbly.
A good guideline is to be able to roll a small ball in your hand without it sticking too much. If the pulp sticks to your fingers, more paper is needed; if it cracks, more glue or a little more water is needed.
Shape, make holes, and dry – how to succeed every time
-
Roll the beads: Pinch off a small piece of pulp (about pea-sized for small beads, hazelnut-sized for larger ones) and roll it between your palms. Lightly moisten your fingertips if the surface feels rough.
-
Vary the shape: Try round, oval, or elongated beads by rolling more in one direction or gently pressing the sides.
-
Make holes: Carefully push a needle, toothpick, or skewer straight through the bead. Roll the bead slightly on the stick to make a neat hole.
-
Dry correctly: Either air dry on a stick or rack for 24–48 hours, or dry in an oven at approx. 80–90 °C with the door ajar for faster results.
To avoid cracks, it's better to have a slightly longer drying time and even heat than too high a temperature. A pro tip is to spin the beads occasionally during drying so they don't "flatten" against the surface. When you have 10–15 identical basic beads ready, you have the perfect set for your first simple bracelet – ready to be decorated in the next step.
Decoration & design – Paint, pattern, and seal papier-mâché beads
Once your papier-mâché beads are dry, the most fun part begins: giving them color, pattern, and shine. Here you can create everything from discreet, Scandinavian-style minimalist beads to colorful boho jewelry – all from the same simple base bead. By choosing the right colors, techniques, and varnish, you can achieve a surprisingly professional-looking result, even as a beginner.
Colors, patterns, and finishes – how to succeed with the design
- Acrylic paint for opaque and durable results: Perfect when you want bright colors, block colors, or graphic patterns. It's better to paint several thin layers than one thick one to avoid drips.
- Watercolor, markers, and ink for soft transitions: Creates beautiful, vibrant color shifts. Works particularly well on smooth, finely sanded beads.
- Decoupage with napkins or thin papers: Apply small pieces of patterned paper to the bead with decoupage glue (e.g., Mod Podge) for floral, graphic, or text patterns.
-
Metallic, glitter, and pearl paint: Ideal for festive jewelry, Christmas crafts, and children's projects. Use sparingly as an accent on edges or in patterns for a luxurious feel.
Feel free to try pre-made color palettes:
- Boho-style: turquoise, copper, ocher, dark petrol
- Scandinavian simplicity: white, grey, sand, natural beige
-
Childlike colorfulness: primary colors, stripes, polka dots, and rainbow gradients
Professional finish – sanding, varnishing, and smart shortcuts
To ensure your beads withstand everyday use, the surface treatment is crucial. Light sanding with fine sandpaper between paint layers gives a smooth, almost "store-bought" feel. Always finish with clear varnish – either brush-on varnish or spray varnish depending on your preference:
- High-gloss varnish creates shiny, "ceramic-like" beads
- Satin-matte varnish suits those who prefer a more natural, subdued look
-
Water-based clear varnish is a good choice for crafting with children
A practical tip is to thread the beads onto a skewer or wire when painting and varnishing. This allows you to reach all sides without leaving fingerprints, and you can rest the entire stick across two jar rims while the beads dry. At Hilmaspyssel.se, you'll find paints, brushes, and varnishes that work excellent together, making it easy to build your own little "design studio" for papier-mâché beads at home.
Creative projects – Jewelry, decor, and gifts with papier-mâché beads
Once your papier-mâché beads are shaped, painted, and varnished, the most fun part begins: transforming them into personalized jewelry, unique decor, and thoughtful gifts. Here you'll find concrete ideas that go beyond the usual "make a necklace" tips in other guides, and you'll also see how you can plan projects smartly with materials from Hilmaspyssel.se.
Papier-mâché bead jewelry – from simple to statement
- Necklace with statement beads: Create 5–7 larger beads (2–3 cm) in harmonious colors and thread them onto a sturdy cotton cord or leather cord. Alternate with wooden beads for extra stability and style.
- Bracelets that mix materials: Combine small papier-mâché beads with metal spacers, waxed thread, and elastic jewelry cord. This provides both durability and a more "finished" look.
- Super lightweight earrings: Use 1–2 small beads per ear, attach to ear hooks, and finish with a mini charm if desired. Perfect for those who can't wear heavy earrings.
-
3 quick evening projects: 1 rainbow-colored bracelet, 1 long boho necklace, 1 pair of matching earrings – achievable in one evening if the beads are already ready.
Here's a smart setup: create a "jewelry kit" for yourself or as a gift with cord, jewelry components, some metal beads, and a selection of handmade beads. Much can be supplemented with standard components from Hilmaspyssel.se so you don't have to chase materials in several places.
Home decor & gifts – small details that make a big difference
Papier-mâché beads work just as well in the home as they do on your wrist:
- Keychains & bag charms: Attach 2–3 beads to a keyring or carabiner along with a tassel made of ribbon or yarn.
- Garlands and window hangers: Thread beads onto string along with pieces of paper, fabric, or wooden figures and hang in windows, above the headboard, or around a shelf.
- Personalized bookmarks: Use a ribbon or a stiff piece of cardboard as a base and glue/sew 1–2 small beads at the end. Perfect teacher gift or present for the book lover.
-
Gift tags with bead details: Tie a mini bead onto the string of a handmade tag – a simple detail that makes the package feel luxurious and thoughtful.
Think in terms of "project boxes": one box for jewelry, one for decor, one for gift ideas. Fill them with your own beads and supplement with cords, hooks, and glue from Hilmaspyssel.se. Then you'll always have a ready DIY kit when you need a quick but personal gift.
Crafting with children – safety, simplicity, and educational tips
Making papier-mâché beads with children is one of those craft projects that feels calm, creative, and meaningful. Here you can combine recycling, color theory, and fine motor skills all at once – without needing expensive equipment. With the right approach, the process is just as fun as the result, and you can easily adjust the difficulty level according to age.
Safety first – the right materials for small hands
-
Choose non-toxic glue and paint: Opt for child-friendly, water-based products labeled for children. At Hilmaspyssel.se, you'll find several options adapted for preschool and school.
-
Adapt tools to age:
– Younger children: blunt scissors, plastic needles, straws instead of sharp skewers.
– Older children: regular scissors, needles, and skewers – but always under supervision.
-
Protect clothes and surfaces: Use plastic aprons, old shirts, and cover the table with oilcloth or parchment paper.
To reduce stress about mess, you can prepare paper pulp or strips in advance and let the children focus on rolling, color, and shape. This makes crafting more accessible, especially in larger groups of children.
Playful learning – simple setups for home, preschool, and after-school care
-
For the youngest (approx. 3–5 years):
– Let them roll beads from dry paper strips around straws.
– Pre-colored paper or newspaper pages mean you avoid wet pulp.
– Sort the beads by color – good for language and concept training.
-
For school children:
– Work in themes: "ocean" (blue/green beads), "rainbow", "nature" (earth tones).
– Counting exercises: count beads, build pattern sequences (red–blue–green–red...).
– Let the children design their own bracelets or bookmarks to take home or sell at a bazaar.
-
For groups:
– Divide the process into stations: pulp, shaping, painting, varnishing.
– Order larger packs of glue, brushes, and paint via Hilmaspyssel.se to avoid material shortages in the middle of the session.
When children get to decide colors, shapes, and what the beads will become, both creativity and self-esteem grow. Document the projects with photos and let the children talk about their creations – this makes papier-mâché beads a complete educational project, far beyond "just crafting."
Storage, durability, and recycling – how to get more out of your papier-mâché beads
Once your papier-mâché beads are finished, painted, and varnished, you naturally want them to last a long time – both as jewelry and as decoration. Here we'll go through how to store them smartly, how to make them extra durable against wear and moisture, and how you can creatively reuse both materials and "failed" beads.
Smart storage for long lifespan
-
Store dry and dark: Place the beads in a jar, box, or container with a lid. Avoid damp basements and direct sunlight, which can fade colors over time.
-
Separate hard materials: Do not store delicate paper beads among heavy metal beads – use small bags or compartments to avoid scratches.
-
Allow the varnish to cure completely: Wait at least 24–48 hours after the final varnish layer before placing the beads in sealed containers, so they don't stick together.
By considering storage already when planning your project, you can adapt glue, varnish, and paper to how the beads will be used – everyday jewelry, for example, requires more durable surface layers than a light window decoration.
Make the beads more durable and recycle everything
-
Choose the right glue and varnish: A strong wood glue or good wallpaper paste, combined with several thin layers of clear varnish, makes for significantly more durable papier-mâché beads.
-
Extra protection against moisture: For jewelry that risks rain and moisture – apply 2–3 extra layers of waterproof varnish and let dry thoroughly between each layer.
-
Give "failed" beads new life: Sand uneven beads with fine sandpaper, repaint in a dark base color, or mash them and mix into new paper pulp.
Before you throw away a piece of paper or a bead – ask yourself: could this become a new papier-mâché bead? Old newspapers, flyers, wrapping paper, and even misprinted printouts can become the next batch of unique beads. In this way, your projects will not only be creative but also a tangible and fun upcycling craft that saves both money and the environment.
Frequently Asked Questions about Papier-Mâché Beads
Q: How durable are papier-mâché beads – do they break easily?
A: When made correctly, papier-mâché beads are surprisingly durable. The key is enough glue in the pulp, a properly dry core, and at least 2–3 layers of varnish. If you use wood glue/wallpaper paste in the pulp and then clear varnish (preferably spray), the beads will normally withstand everyday wear and tear in jewelry and decorative items. However, avoid prolonged moisture, showering, and bathing – they are still made of paper. If you want to maximize durability, you can give them an extra thin layer of varnish after a few days of use.
Q: Can I use any paper for papier-mâché beads?
A: Almost any dry, untreated paper works, but the results will vary. A good rule of thumb is:
-
Newspaper: soft pulp, easy-to-shape beads, slightly rougher surface
-
Copy paper/book paper: denser, harder beads, smoother finish
-
Tissue paper/napkins: perfect for decoupage details and thin layers on top
-
Wallpaper samples: adds texture, but requires more soaking
Avoid very glossy, plastic-like, or waxed paper – the glue will adhere less effectively. Test small batches first and preferably note which papers gave the best results.
Q: How do I avoid cracks when the beads dry?
A: Cracks are usually due to the pulp being too dry or drying too quickly. Remember to:
-
The pulp should feel like firm porridge – not crumbly
-
Roll the beads compactly, without air pockets
-
Let them dry slowly at room temperature, not directly on a radiator or in strong sunlight
-
Turn the beads occasionally so they dry evenly all around
If you still get small cracks, you can fill them with a little new pulp or spackle with glue + paper fluff, let dry, and then sand lightly before painting.
Q: Are papier-mâché beads safe for children to craft with?
A: Yes, it's an excellent children's craft – if you choose non-toxic glue and child-friendly paints. For younger children, it's better to skip needles and instead roll beads around straws or skewers. Adults can help with drilling holes and possibly oven drying. At Hilmaspyssel.se, you'll find glue, paint, and varnish marked for children, making it easy to assemble a safe craft kit for school, after-school care, or home.
Q: How do I make my papier-mâché beads more water and wear-resistant?
A: For extra durability, you can:
-
Mix a little wood glue directly into the paper pulp for a harder core
-
Prime with a thin layer of acrylic paint before decorating – this seals the surface
-
Varnish in several very thin layers (preferably 3 thin rather than 1 thick)
- Use clear spray varnish for even coverage, especially on small beads
For frequently used jewelry, such as keychains or bracelets, it's worth investing the extra time in more layers of varnish.
Q: What do I do with failed or ugly beads – do I have to throw them away?
A: Absolutely not – this is where the upcycling mindset comes in. You can:
-
Sand and repaint beads that just turned out ugly in color
-
Crush broken beads and mix them back into new paper pulp
-
Hide them as a core inside larger beads by covering them with new pulp
In this way, almost nothing goes to waste, and you get even more unique papier-mâché beads from all your craft materials.
Create more with less – time to let papier-mâché beads move into everyday life
You have now received a complete overview of how you can transform simple recycled paper into personalized papier-mâché beads – from material selection and paper pulp, via shaping, painting, and varnishing, to creative projects, children's crafts, and smart storage. Together, the steps show how sustainable crafting can be both beautiful, affordable, and surprisingly durable when you work with the right glue, paint, and clear varnish.
Now it's your turn to try it in practice. Start with a small project – for example, a simple bracelet or a colorful children's craft – and build on it as you feel comfortable with the technique. At Hilmaspyssel.se, you'll find glue, brushes, acrylic paint, varnish, and jewelry components that are carefully selected for this type of crafting. Visit the online store, put together your own "papier-mâché bead kit," and decide today what your first piece of jewelry, decorative item, or gift you will create. Your unique beads are found nowhere else – and that's precisely what makes them so valuable.