


Needles for Sewing, Crafts, and Jewelry – a Guide from Hilmaspyssel.se
Have you ever struggled with fabric that puckers, beads that crack, or uneven seams – without understanding why? Often, it’s not the thread or the technique that’s the culprit, but the wrong type of needle. At Hilmaspyssel.se, you'll find a wide range of needles for sewing, embroidery, jewelry making, and creative DIY projects, carefully selected to ensure a neater and more durable result.
In this guide, we will go through different needle types, when to use which needle, and how to choose the right model for fabric, beads, and materials. You’ll get practical examples, common mistakes to avoid, and a simple buying guide to help you shop smartly online at Hilmaspyssel.se – making your next projects both more enjoyable and significantly more successful.
Needles may seem like small and obvious tools, but without the right needle, both sewing and craft projects quickly fall apart – literally. For those shopping at Hilmaspyssel.se, it is therefore valuable to understand what a needle actually is, how it is constructed, and why different projects require different types of needles. By understanding the basics, it becomes easier to both choose the right product and achieve a neater, more durable result.
Brief History and Basic Definition
Humans have used needles for thousands of years, from simple bone and wooden needles to today's precision-ground steel and specialized needles for textiles and jewelry:
-
In sewing, both hand-sewing needles and sewing machine needles are considered needles – they are used to pass thread through fabric or other material.
-
In embroidery, embroidery needles with larger eyes and blunter tips adapted for embroidery floss are often referred to.
-
In hobby and crafts, the term also includes felting needles, safety pins, and various decorative needles.
-
In jewelry making, many people search for "needles" when they actually mean beading needles, headpins, and eye pins – all serving as a supporting base for beads and components.
By viewing needles as "small tools that create connections" – between fabric pieces, beads, or layers of material – it becomes clearer why the choice of needle affects both appearance and durability.
Different Needle Types and Why Quality Matters
There are a few main types you often encounter, especially in the Hilmaspyssel.se range:
-
Sewing machine needles: Adapted to machine type and material, e.g., denim needles, stretch needles, or universal needles. The wrong type causes skipped stitches and uneven seams.
-
Hand-sewing needles: In various lengths and thicknesses for everything from fine embroidery to heavy mending. A needle that is too thick can leave visible holes in the fabric.
-
Beading needles: Extra thin and often longer to pass through small beads without cracking them.
-
Safety pins and special needles: For assembly, marking, decoration, and techniques such as felting and quilting.
High-quality needles are straighter, stay sharp longer, and reduce the risk of tangles, broken thread, and unsightly holes. By understanding these differences from the outset, you will save time, material, and frustration in upcoming sections where we delve deeper into each needle type and how to use them most effectively.
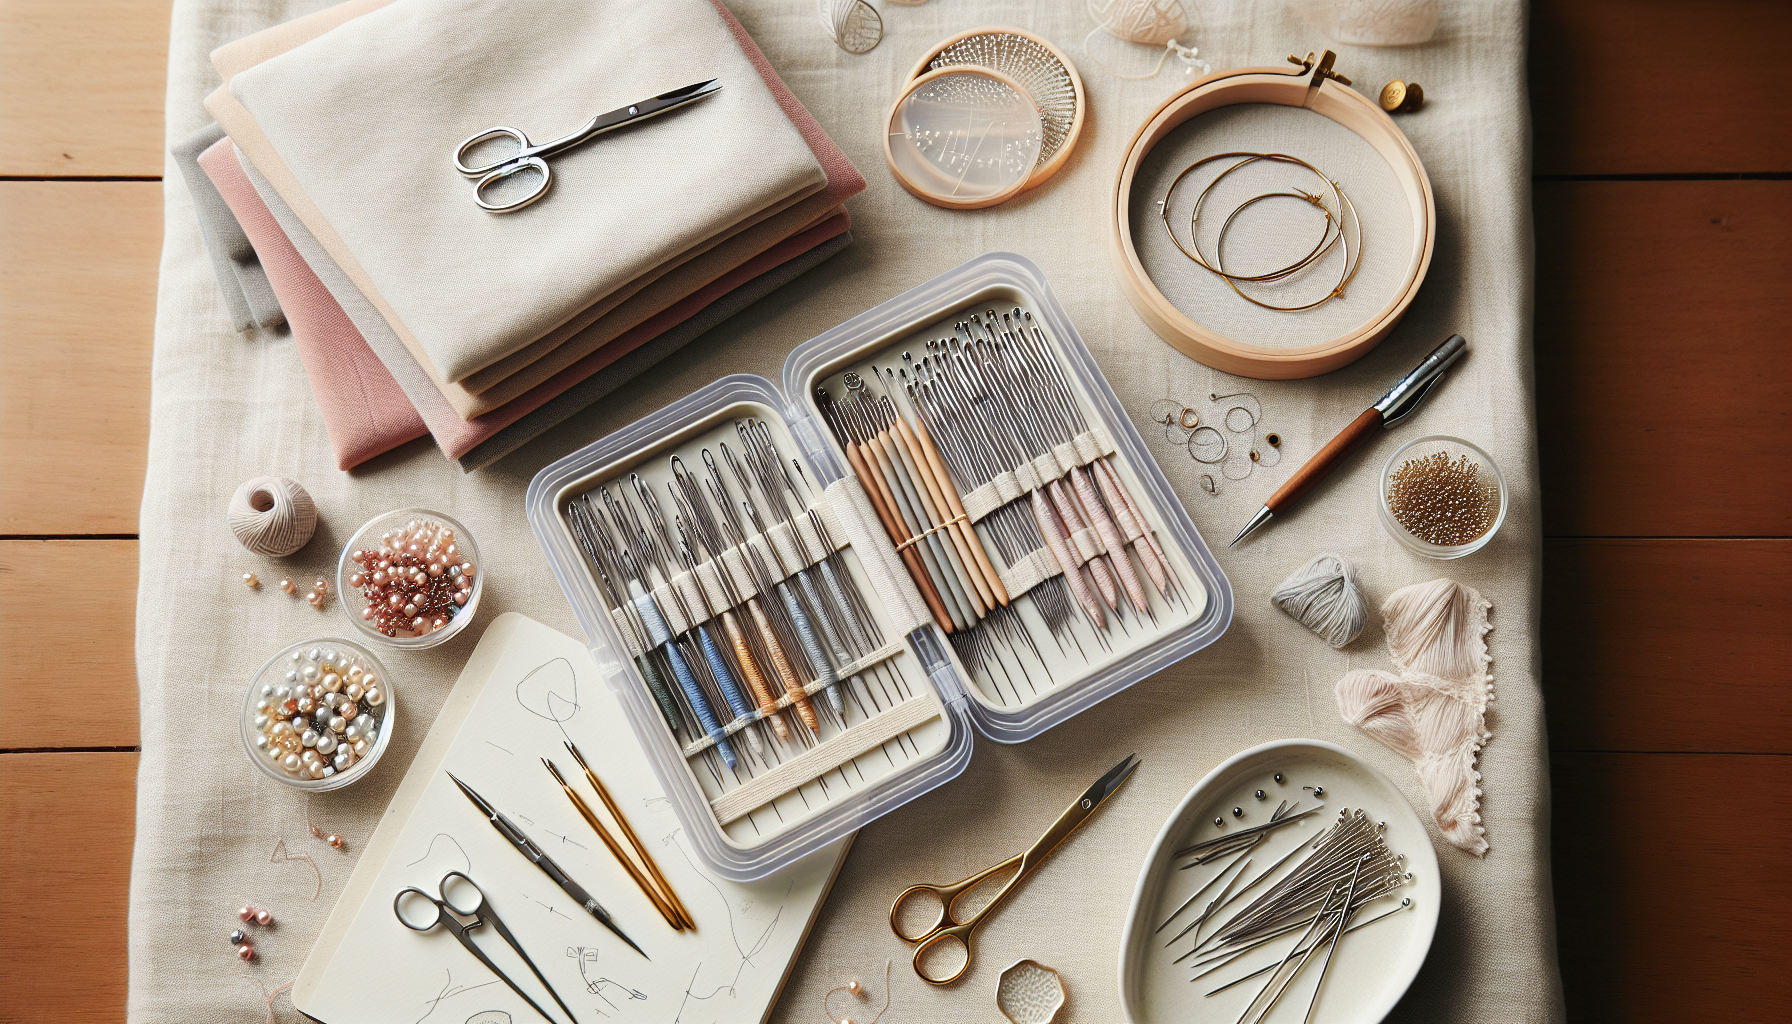
Different Types of Needles at Hilmaspyssel.se and Their Uses
When you start looking for needles, you quickly realize that there isn't a "one size fits all." At Hilmaspyssel.se, you'll find a wide selection of needles for sewing, embroidery, beading, and jewelry making – all adapted for different techniques and materials. By understanding the differences between the most common needle types, it becomes much easier to choose the right one immediately and avoid cracked beads, skipped stitches, or unsightly holes in the fabric.
Overview: Needle Categories in the Assortment
Here are some of the most frequently requested needle categories – and how they are used in practice:
-
Common sewing and embroidery needles: For hand-stitched seams, hems, mending, and traditional embroidery on fabric.
-
Beading needles and jewelry needles: Thin, flexible needles for stringing small beads and working with bead embroidery or jewelry.
-
Safety pins and marking needles: Perfect for attaching name tags, temporarily holding fabric together, or creating simple brooches.
-
Specialty needles: For example, felting needles for needle felting or extra-thin needles for quilting and appliqué.
Many guides only mention basic functions, but an extra step is to connect each category to a specific project: a cotton dress, a beaded bracelet, a child's name tag, or a felted keychain. This makes it clear which needle is actually needed.
Practical Examples: How to Choose the Right Needle for Everyday Use
To make the choice even easier, you can start with your specific project:
-
Sewing cotton fabric: Choose a regular sewing or embroidery needle of medium thickness. It's sharp enough for woven fabric without making unnecessarily large holes.
-
Bead embroidery on fabric: Use a thin, long beading needle that easily passes through both fabric and small beads without cracking them.
-
Attaching decorations to clothing: For permanent decorations – sew them on with a suitable hand-sewing needle. For interchangeable details, such as badges or smaller embellishments, safety pins are a flexible and gentle choice.
By always starting with the question "What am I going to make – and with what material?" you can quickly filter out the right needle type at Hilmaspyssel.se. This saves time, reduces frustration, and results in a significantly more professional end product, even in small hobby projects.
Choosing the Right Needle for the Right Material – a Practical Guide
Choosing the right needle for the right material is one of the most important factors for a neat and durable result. Many problems such as skipped stitches, broken threads, unsightly holes in the fabric, or cracked beads are simply due to the needle not matching the material. Here, we'll go through how to think practically when shopping for needles at Hilmaspyssel.se, whether you're sewing, embroidering, or making jewelry.
How Thickness and Length Affect the Result
-
Thickness: A thin needle is suitable for thin, delicate materials (e.g., silk, chiffon), while a thicker needle is needed for heavier materials (e.g., denim, felted wool). A needle that is too thick creates visible holes – a needle that is too thin won't penetrate the fabric.
-
Length: Longer needles provide good control for hand-sewing stitches and quilting, while shorter needles are more stable for precision work or tight stitches.
-
Tip shape: Sharp tip for woven fabrics, ball point for knits and stretchy fabrics, and extra sharp needle for dense weaves and microfiber.
A practical rule of thumb: If the fabric "puckers" in front of the needle or you have to force it through – choose a thicker needle. If you see clear holes after the stitches – go down a size.
Concrete Material Guides and Examples
-
Cotton & linen: Choose a universal sewing machine needle in size 70–80 for everyday garments. Hand sewing: medium-fine sewing needle. Perfect for, e.g., cushion covers or simple summer dresses.
-
Denim & heavy fabrics: Use a denim needle in size 90–100. For a pair of homemade jeans, you could, for example, choose a denim needle 100 and strong polyester thread to avoid needle breakage in thick seams.
-
Knitted & jersey fabrics: Choose a stretch or jersey needle with a ball point (80–90) to avoid skipped stitches and broken fibers. Perfect for t-shirts, leggings, and children's clothing.
-
Silk & thin materials: Opt for a microtex or fine universal needle (60–70). For hand embroidery on thin fabric, extra-thin embroidery needles work best.
-
Beads (glass, crystal, seed beads): Use thin, long beading needles that easily pass through small holes without cracking the beads – especially important when working with seed beads and crystal beads.
-
Felt, imitation leather, ribbons & cords: Here, sturdier needles are needed, often with a sharper tip. For needle felting (felting), special felting needles with barbs are used, which can be found in specialized categories at Hilmaspyssel.se.
Common Mistakes – and How to Avoid Them
One of the most common mistakes is to use "one and the same needle for everything" until it breaks. This often leads to:
-
Skipped stitches in knits: Often due to the wrong tip or a worn needle. Switch to a jersey needle and check that the needle is straight and sharp.
-
Ugly holes in thin fabrics: Occurs when the needle is too thick. Go down one or two sizes and test on a scrap of fabric first.
-
Cracked beads: Caused by a beading needle that is too thick or worn. Use a thin needle and always test on a single bead before starting your jewelry piece.
By adapting the needle type, thickness, and length to the material even before you start the project, you save both time and irritation – and achieve a significantly more professional result. The next time you plan a project, let the material dictate which needle you add to your cart at Hilmaspyssel.se.
Needles for Jewelry Making – Beading Needles, Headpins, and More
Needles for jewelry making function more like small, discreet tools that hold the entire design together – without the right needle or pin, the jewelry literally falls apart. At Hilmaspyssel.se, you'll find a wide selection of beading needles, eye pins, headpins, and earring findings that are suitable for everything from simple beginner projects to more advanced jewelry designs. Here, we'll go through how the different "needles" differ and what you should choose for your projects.
Important Needles and Pins for Jewelry
-
Beading needles for stringing and embroidery: Extra thin and often longer needles that make it possible to string small seed beads, crystals, and glass beads without cracking them. Perfect for bead embroidery, woven bracelets, and detailed beading crafts.
-
Eye pins and headpins: Metal pins with a flat end (headpin) or a pre-formed loop (eye pin). Used to create pendants, charms, and links in necklaces and bracelets. You bend a loop yourself with round-nose pliers to secure the beads in place.
-
Earring needles: Earring hooks, earring posts, and hoops are often referred to as "earring needles" in searches. They are the foundation of every earring, where you attach beads and decorations using headpins or eye pins.
Together, these components allow you to build stable, attractive, and durable jewelry that can withstand daily wear. By choosing the right dimensions (thickness and length), you avoid common problems such as cracked beads or crooked, wobbly pendants.
Practical Examples and Smart Combinations
A simple but appreciated beginner project is a classic beaded earring. Thread one or more beads onto a headpin, bend a nice loop with round-nose pliers, and attach it to an earring hook – done in minutes. For extra small beads, like seed beads, first use a thin beading needle to string them onto thread and then incorporate them into the earring as a small cluster detail.
At Hilmaspyssel.se, you can advantageously combine needles and pins with matching jewelry components:
-
Beading needles + jewelry wire for elegant, strung necklaces
-
Eye pins + spacer beads for links in bracelets and chains
-
Headpins + glass or crystal beads for teardrop-shaped pendants
By always having a small basic stock of beading needles, eye pins, headpins, and earring hooks at home, you can quickly test new ideas without having to wait for your next order. This makes your jewelry making both more creative and more efficient.
Safety Pins and Specialty Needles for Decoration and Assembly
Safety pins and various types of specialty needles are often the "invisible heroes" in sewing, hobbies, and DIY projects. At Hilmaspyssel.se, you'll find everything from classic small safety pins to longer and more decorative variants, as well as specialty needles that make assembly, quilting, and felting both easier and neater. This section will help you choose the right type – whether you're labeling children's clothes, building layers in a quilt, or creating your own brooches.
Types of Safety Pins and How to Use Them
-
Small safety pins: Perfect for name tags in children's clothes, temporary fabric fastening, and discreet mending.
-
Larger safety pins: Used when you need more strength, for example, for thicker jackets, blankets, or multiple layers of fabric.
-
Decorative safety pins: With color, shape, or extra details – ideal for jewelry, brooches, and creative badges.
-
Quilting and curved safety pins (where available): Make it easier to reach through multiple layers without pulling the fabric.
By choosing the right safety pin, you avoid skewed seams, unnecessary holes in the fabric, and lost labels. Many underestimate how much a stable safety pin can simplify everything from trying on garments to advanced quilting.
Specialty Needles for Decoration, Felting, and Creative Projects
Specialty needles open up entirely new expressions in your crafting. At Hilmaspyssel.se, you'll find, for example:
-
Felting needles for felting: With small barbs that "pull together" the wool – perfect for shaping figures, details, and patterns in wool.
-
Appliqué and quilting needles: Thin and often longer needles that make it easier to attach small pieces of fabric without leaving large holes.
-
Needles for badges and brooches: Pre-made needle bases that you can glue or sew fabric, felt, beads, or embroidery onto.
Two concrete DIY ideas you can try right away:
-
Personalized fabric badge: Cut out a felt circle, decorate with embroidery or beads, and glue a brooch pin to the back. Perfect for backpacks or jackets.
-
Quilting aid with safety pins: Pin all layers (top, batting, backing) together with curved safety pins before quilting – this keeps everything still and results in a more even finish.
By having a small assortment of safety pins and specialty needles at home, you can quickly solve practical problems, but also transform simple materials into personalized accessories. When planning your next project at Hilmaspyssel.se – don't just think about fabric and thread, but also about which needles can enhance both function and design.
How to Care for Your Needles – Durable and Safe Crafting Tools
To achieve even stitches, smooth seams, and durable jewelry, it's not enough to have the right type of needle – you also need to take care of your needles properly. Many problems such as skipped stitches, broken threads, or cracked beads are simply due to worn or damaged needles. With a few simple routines, you can extend the lifespan of your favorite needles from Hilmaspyssel.se and at the same time make your projects both safer and more enjoyable.
When to Change Your Needle? Signs of Wear You Shouldn't Miss
-
Visibly bent or crooked needle: Change immediately – a bent needle can damage fabric, thread, and your sewing machine.
-
Dull or damaged tip: If the needle leaves marks, pulls at the fabric, or cracks beads, the tip is worn out.
-
Discoloration or coating: Glue, starch, or paint can stick and make the needle drag through the material.
-
Time rule for sewing machine needles: Many experienced sewers change their needle after 6–8 hours of active sewing or before each new project involving thicker materials.
By having a small stock of extra needles at home – for example, a set of common sewing needles, beading needles, and a few extra sewing machine needles from Hilmaspyssel.se – you avoid compromising on the result when a needle suddenly gives out in the middle of a project.
Storage, Cleaning, and Safe Handling
-
Smart storage: Use pincushions, small boxes, or magnetic plates to keep things organized. Feel free to separate needles by type and thickness in labeled compartments.
-
Child and pet-safe: Always store needles high up or in containers with lids if you have children or pets. A magnetic jar is especially practical if a needle accidentally falls to the floor.
-
Cleaning needles: Wipe off needles that have been used with glue, interfacing, or starch with a lightly dampened cloth or an alcohol wipe. Let them dry thoroughly before putting them back.
-
Quick checklist before starting: Check that the needle is straight, that the tip feels sharp, and that the eye is free of burrs that could damage the thread.
When you make needle care a natural part of your crafting routine, you not only get neater results – you also save time, money, and frustration. By combining quality needles from Hilmaspyssel.se with proper care, you build up a small toolkit you can rely on, whether you're sewing, embroidering, quilting, or making jewelry.
How to Shop Smart for Needles Online at Hilmaspyssel.se
Buying needles online can feel confusing – different lengths, thicknesses, points, and uses. At Hilmaspyssel.se, the selection is wide but structured so you can quickly find the right needle for your specific sewing or crafting project. In this section, we'll go through how to navigate the assortment, how to plan your purchases, and how to smartly combine needles with other products for a complete crafting kit.
How to Find the Right Needle in the Webshop
Start in the main needle category and use the filters strategically:
-
Filter by type: e.g., choose sewing machine needles, hand-sewing needles, beading needles, safety pins, or specialty needles.
-
Filter by application: sewing, embroidery, jewelry making, quilting, felting, etc.
-
Filter by size and thickness: ideal when you already know what material you'll be working with.
-
Read product descriptions carefully: Hilmaspyssel.se often provides material recommendations and practical tips directly in the description.
It's a good idea to start with your next project: are you going to sew children's clothes from jersey, mend jeans, or make bracelets? Then search directly for the material or technique and match it with the recommended needle type. This way, you avoid incorrect purchases and unnecessary interruptions in the middle of your creative process.
Build up a smart basic stock of needles
To avoid panic orders, it is wise to have a small "standard stock" at home:
-
For sewing beginners: mixed pack of hand-sewing needles, universal sewing machine needles, a few twin needles and a box of safety pins.
-
For jewellery makers: beading needles in various thicknesses, headpins/eyepins, earring posts and extra jewellery wire.
-
For crafts and decoration: felting needles, longer needles for assembly, decorative safety pins and marking pins.
-
For everyone: pin cushion or magnetic plate, small storage box and extra needles in the sizes you use most.
A practical tip is to create your own list of needles you always want to have at home and save it as a favourite in your browser. Also use Hilmaspyssel.se's account function to see previous orders and quickly place a similar order when you start running low. At the same time, look at related products – such as thread, beads, jewellery components and storage solutions – so you get everything you need in one package with convenient shipping terms and short delivery time.
Frequently asked questions about needles at Hilmaspyssel.se
Q: How do I know which needle to choose for my project?
A: Always start with two questions: what are you going to do and what material are you going to work with. For thin cotton and ordinary patchwork, a standard sewing or embroidery needle works perfectly. For heavy fabrics like denim, a thicker, stronger needle is needed, while beading work requires thin, long beading needles. On Hilmaspyssel.se you can filter by application area and material, which makes it easy to find the right one even if you are a beginner.
Q: How often do I need to change needles?
A: More problems than you think – skipped stitches, fraying thread, ugly holes in the fabric – are due to worn needles. A rule of thumb is to change sewing machine needles after 6–8 hours of effective sewing, or when you change material type. Hand sewing needles and beading needles should be changed when you see the slightest bend, rust spot or feel that the tip has become blunt. If you have invested in fine fabric or exclusive beads, a fresh needle is a cheap insurance for a nice result.
Q: Which needles are best for children's and beginner crafts?
A: For children and inexperienced hands, blunt needles and plastic needles are a good choice, for example embroidery needles with larger eyes for thicker thread or yarn. Safety pins with lockable heads reduce the risk of pricking when decorating. On Hilmaspyssel.se you will find several variants that are perfect for school crafts, beginner embroidery and simple jewellery projects where safety and easy handling are more important than extreme precision.
Q: What is the difference between cheap and high-quality needles?
A: Cheap needles may look similar at first glance, but the difference is noticeable in tip, hardening and smoothness. Quality needles go straighter through the material, last longer, are better polished and reduce the risk of the fabric tearing or beads cracking. Especially for tight seams, quilting or dense bead stitching, it pays to choose needles from established brands – something Hilmaspyssel.se focuses on in its assortment.
Q: How do I prevent beads from cracking or fabric from getting holes?
A: Always use as thin a needle as possible for the material and also adjust the thread thickness. For small seed beads, an extra thin beading needle and a fine beading thread are needed. For delicate fabrics such as silk or viscose jersey, a sharp, thin needle is crucial. It is a good idea to test first on a piece of fabric or on a bead you can "sacrifice" before starting the actual project.
Q: Can I use the same needles for both sewing and jewellery making?
A: In practice, it is better to have separate needles. Sewing and embroidery needles are optimised for textiles, while jewellery needles, headpins and eyepins are adapted for metal, beads and jewellery components. If you use the "wrong" needle, it will wear out faster and the result will often be uneven. A smart tip is to build up a small basic set for textiles and another for jewellery – both are gathered and clearly divided at Hilmaspyssel.se.
Conclusion: The right needles make all the difference in your projects
Throughout this guide, you have seen how crucial the choice of needles is – whether you are sewing, embroidering, felting, quilting or making jewellery. We have covered basic needle types, specific applications, how to match needle with material, how to use safety pins and special needles creatively, and how to care for your needles for safer and better results over time. Together, this gives you a solid knowledge boost that many shorter online articles lack.
The next step is to put the knowledge into practice. Start by sorting through your old needles, discarding worn ones and creating a small basic set adapted to your most common projects. Then visit Hilmaspyssel.se, filter out the needle categories you need and supplement with thread, beads, jewellery components and smart storage. In this way, you can start your next sewing or craft project with the right needle from the beginning – and get both nicer, more durable and more fun results.