


Headpins & Eye Pins – Your Guide to Jewelry Making at Hilmaspyssel.se
Have you ever wondered how small details can make a big difference in your jewelry and craft projects? Headpins and eye pins are two indispensable tools that add character to everything from handmade earrings to unique charms. When you want to create durable and attractive jewelry, the choice of the right jewelry material plays a central role – and at Hilmaspyssel.se, you'll find one of Sweden's widest selections.
Whether you're a beginner or experienced in jewelry making, it's easy to feel unsure about which pins are suitable and how to best use them. In this article, you'll find answers to the most common questions, plenty of tips, and inspiring examples to help you take your projects to the next level. Let us guide you to the right choice and show you how headpins and eye pins can open up a world of creative possibilities!
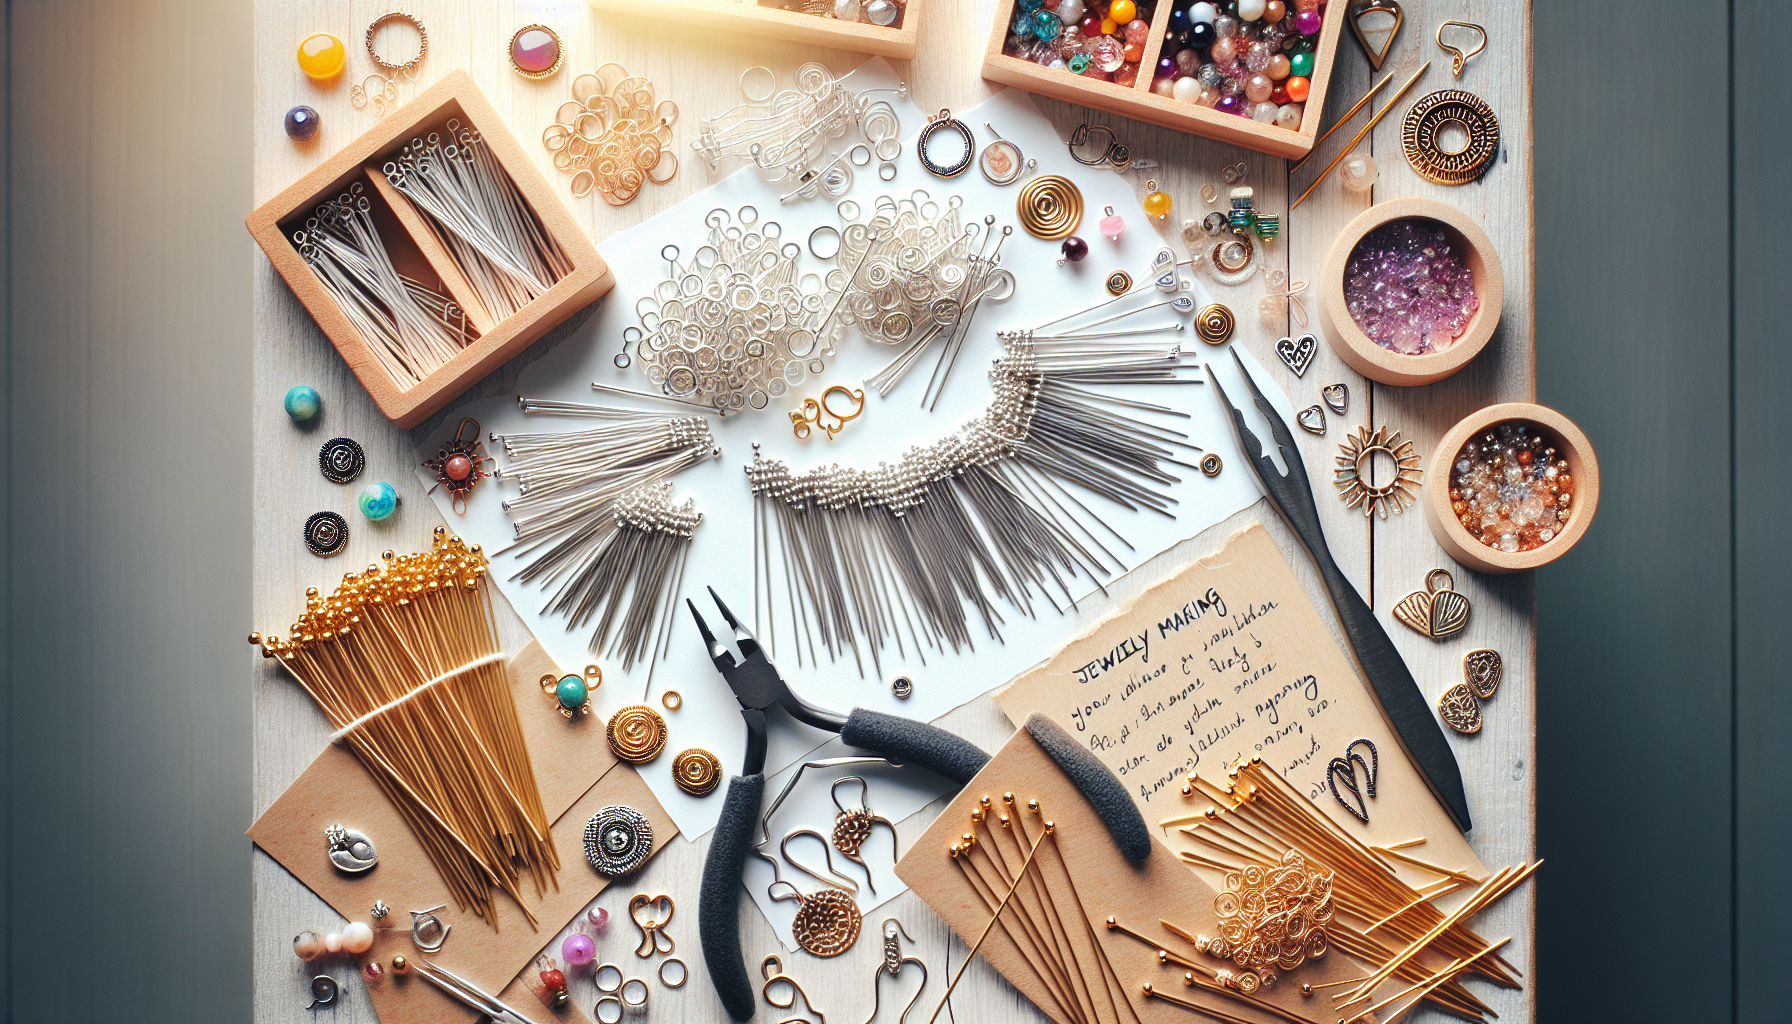
As you enter the world of jewelry making, you'll quickly encounter headpins and eye pins – two of the most basic and versatile components in crafts and handmade jewelry. But what really distinguishes these two varieties, and how do you best use them? Here we clarify the differences and help you understand their role in creative projects, all based on insights from leading content and experts in the field.
The Difference Between Headpins and Eye Pins
- Headpins have a small "head" or stop at one end that prevents beads from sliding off – much like a nail with a head. Perfect when you want to create dangling decorations or attach individual beads to earrings, pendants, or charms.
- Eye pins, on the other hand, have a loop at one end. This allows you to attach the piece to a chain, an ear wire, or another jewelry component. They are often used when you want to link several parts together, such as rosaries, chains, and custom-designed earrings.
-
Material and uses vary: both headpins and eye pins are available in materials such as stainless steel, silver-plated, brass, or gold-plated, making them suitable for both simple jewelry and more elaborate projects.
Next time you make a pair of earrings and want the bead to rest securely at the bottom, choose a headpin. If you want to create a link between two elements instead, then the eye pin is the obvious choice. A classic example: string a bead onto your eye pin, form a new loop at the other end, and connect it with additional parts – the possibilities are endless.
Practical Examples from Jewelry Making
Whether you're a beginner or an experienced jeweler, headpins and eye pins open the door to a wide spectrum of design possibilities. In addition to their obvious uses in earrings and necklaces, they are also used to create small charms for keychains, bookmarks, or decorative elements in scrapbooking. By simply varying materials and lengths, you can create everything from discreet, minimalist jewelry to colorful statement pieces – and you'll find a wide selection of both types most conveniently at Hilmaspyssel.se.
Why Headpins and Eye Pins Are Invaluable in Jewelry Making
Understanding the central role headpins and eye pins play in jewelry making makes it easier to take your craft projects to the next level. These small but powerful components are not only used to attach beads and pendants, but they also provide structural stability and increase the durability of finished jewelry. Many experienced jewelers emphasize that the correct use of pins is crucial for both the appearance and function of the jewelry.
Create Stable and Durable Jewelry
- Stability and security: Headpins make it possible to create stable charms, pendants, and earrings without the risk of parts coming loose or beads sliding off.
- Easy to customize: By forming loops yourself with eye pins, you can secure multiple parts and build jewelry with complex or personal designs.
-
Versatility in use: Both headpins and eye pins can be used for everything from minimalist earrings to advanced multi-layer necklaces.
If you want to create jewelry that lasts over time, the correct choice and handling of pins are crucial. A tip from experienced crafters is to use quality materials and ensure that the loops are fully closed for best durability.
Creative Possibilities and Beautiful Results
Headpins and eye pins open up a whole world of creative techniques. For example, you can create unique earrings by threading beads onto headpins, then bending and attaching them with a neat loop. For advanced necklaces, eye pins are indispensable when you want to connect several beads or links into detailed patterns. Many also appreciate that pins are available in different lengths, thicknesses, and metals – making it easy to match them both functionally and aesthetically with various beads and pendants from Hilmaspyssel.se.
In short – when you want to take your jewelry and decorations to the next level, headpins and eye pins are indispensable building blocks that provide both freedom and control over the design. The combination of stability, ease of use, and creative possibilities makes them a clear favorite among both professionals and beginners in jewelry making.
Different Sizes, Materials, and Finishes – How to Choose the Right One for Your Project
Choosing the right headpins and eye pins is crucial for achieving the desired result in both design and functionality. Hilmaspyssel.se offers a wide range of sizes, materials, and finishes, making it possible to tailor your jewelry projects to your own style and needs. By understanding the differences between the various options, you can ensure that your work is both durable and aesthetically pleasing.
Lengths, Thicknesses, and Materials – Find the Optimal Choice
-
Lengths: Standard lengths such as 20, 30, 40, and 50 mm are most common, and the choice depends on whether you are creating small decorations or larger pendants. Short pins are perfect for earrings and small charms, while longer pins are suitable for pendants and charming bookmarks.
-
Thicknesses: The most common dimensions at Hilmaspyssel.se are 0.6 mm and 0.7 mm, which provide a good balance between strength and flexibility. For heavier beads, stronger pins are recommended.
-
Materials: Stainless steel, brass, silver-plated, and sterling silver are some of the most popular options. Stainless steel is extra durable and hypoallergenic, brass gives a warmer tone, and silver is suitable for more luxurious projects.
Many articles mention materials generally, but it's important to also consider which finish best highlights your beads and jewelry.
Finish and Style – Add Your Unique Touch
A beautiful finish enhances the overall impression and allows you to match the metal with, for example, mother-of-pearl, crystal, or glass beads:
-
Gold-plated pins add an elegant and luxurious touch to, for example, party earrings or wedding jewelry.
-
Copper or antique finish is excellent for vintage-inspired projects and combines beautifully with earthy colors.
-
Silver-colored or matte surfaces work excellently for everyday jewelry and minimalist designs.
Tip: Always match the finish of the headpins or eye pins with other parts of the jewelry for a uniform and professional result.
The Value of the Right Material Choice – Long Lifespan and Personality
By carefully selecting the size, material, and finish of your headpins and eye pins, you create jewelry that lasts over time and reflects your personal style. Investing in quality materials from Hilmaspyssel.se is a guarantee that your finished projects will be both beautiful and durable. The conclusion is simple: the right choice of basic material makes a difference, whether you are a beginner or an experienced jewelry maker.
How to Use Headpins and Eye Pins – Step by Step
Working with headpins and eye pins opens up endless possibilities in jewelry making and crafting, but it's important to know how the process works in practice. To help you easily get started and succeed with your projects, here is a clear step-by-step guide, directly inspired by methods from experts and Sweden's most popular jewelry guides.
Step by Step: Attach Beads with the Right Technique
- Start by choosing the right pin depending on whether you want a stop (headpin) or a loop for hanging (eye pin).
- Thread the bead or decoration onto the pin, ensuring that the hole is not too large so that the bead slides off the headpin's stop.
- Gather your tools: For best results, you will need round nose pliers (for bending loops), wire cutters, and possibly flat nose pliers to hold the pin.
- Form a loop: If you are using a headpin, trim off excess length and create a small loop with the round nose pliers just above the bead. If you have an eye pin, there is already a loop, so you can attach the piece directly to a chain or ear wire.
- Attach to the desired jewelry finding such as an ear wire, chain, or link, and gently close the loop completely.
A common mistake is making loops that are too large, causing the beads to fall out – always use the right tools and adjust the loop size as needed.
Tips for Smoother and More Attractive Results
Take your time to practice bending loops evenly; spend a few extra minutes on adjustment for a professional final result. If the pin is too long, always cut it with wire cutters and file the edge to avoid sharp edges. For beginners, it's recommended to start with brass or copper, as these materials are easiest to shape. Hilmaspyssel.se has a wide range of both pliers and pins in various materials and finishes, making it easy to find what suits your project.
By following this method and being meticulous from the start, you will get durable jewelry that both looks professional and lasts over time. Feel free to experiment and dare to try different loop shapes and placements to find your own unique style.
Creative Ideas with Headpins and Eye Pins
Using headpins and eye pins in crafts and jewelry making opens up a world of creative possibilities. These small but important components serve as the foundation for personal accessories and unique decorations. Whether you are a beginner or an experienced jewelry maker, there are countless ways to let your imagination flow and create something truly your own with materials from Hilmaspyssel.se.
Inspiration for Jewelry and Crafts
Here are some inspiring ways to use headpins and eye pins in your next project:
- Earrings: Create elegant earrings by threading beads onto headpins and forming a loop at the top for easy attachment to an ear wire.
- Charms and Pendants: Quickly make personalized charms by combining beads and charms on eye pins, perfect for bracelets and necklaces.
- Bookmarks and Decorations: Use headpins to attach mini beads or small figures to bookmark clips – an excellent gift idea!
-
Mixed Techniques: Combine headpins, eye pins, and various jewelry components from Hilmaspyssel.se to create three-dimensional effects or theme-based jewelry.
By experimenting with different beads and charms, especially from a large assortment like Hilmaspyssel.se offers, it's easy to find your unique expression. Dare to try different color combinations, materials, and sizes to see what suits your style best.
Maximum Variation with Minimal Material
Working with headpins and eye pins is not only creative, but also resource-efficient. With a small set of pins and a few different beads, you can create several different pieces of jewelry or decorations. This makes crafting both affordable and sustainable. Don't forget to get inspired by Hilmaspyssel.se's DIY guides and community, where you can find and share more ideas!
How to Find the Right Headpins and Eye Pins at Hilmaspyssel.se
Choosing the right headpins and eye pins can feel overwhelming when the selection is large, but with a few smart strategies, it becomes both easy and inspiring. At Hilmaspyssel.se, you'll find a wide range of pins in different materials, lengths, and finishes – whether you're a beginner or an experienced jewelry maker. Here's a guide to finding the products that best suit your craft project.
Navigate the Selection with Smart Tools
Finding what you're looking for quickly is made easier thanks to efficient filtering and clear categories on Hilmaspyssel.se. Use the filters to select length, thickness, material (e.g., stainless steel, silver, or brass), and your preferred finish such as gold-plated, copper, or antique style.
- Compare products easily by using product descriptions where length and material are clearly indicated.
- Save time by creating a wishlist or favorites list with pins you frequently use.
- Search function with relevant keywords makes it easy to find specific headpins or eye pins for your project.
These tools facilitate both sorting and selection, making it easy to find the right items even when the assortment is extensive.
Advantages of Shopping at Hilmaspyssel.se
Hilmaspyssel.se stands out by offering a well-curated and high-quality assortment at competitive prices. Thanks to detailed information about each product, you quickly get an overview and comparisons are made easier – something many other stores often miss. In addition, deliveries are fast, and you can always count on personalized customer service.
Don't forget to check out the inspiration pages and blog posts on Hilmaspyssel.se to see other people's projects and their own guides. With the right search tips, and by carefully comparing products, you'll get the most out of both the assortment and your creativity.
Create Personal and Sustainable Jewelry – Environmental Awareness and Upcycling
Creating your own jewelry is not just about creativity and design – it's also a fantastic opportunity to think sustainably. By using headpins and eye pins from Hilmaspyssel.se, you can easily give new life to old jewelry, utilize scraps from previous projects, and choose eco-friendly materials. The trend of upcycling and environmental awareness is hotter than ever in the crafting world, and there are many inspiring ways to contribute to a greener future.
Reuse and Renew with Headpins and Eye Pins
- Creative Reuse: Collect beads and parts from broken or outdated jewelry and combine them with new headpins and eye pins. This way, you can create unique charms, earrings, or pendants with personal character.
- Eco-Friendly Material Choices: Many headpins and eye pins at Hilmaspyssel.se are available in durable materials such as stainless steel, recycled brass, or nickel-free alternatives. These materials are robust and have less environmental impact than cheaper single-use products.
-
Practical Eco-Tips: Always save scraps and small parts – sometimes a small eye pin is all it takes to make a new favorite accessory. Remember to choose products marked "eco-friendly" when you shop.
By making upcycling a natural part of your creative process, each piece of jewelry becomes more than just an accessory – it becomes a story of care and environmental consideration.
Examples of Sustainable Craft Projects
Explore projects such as upgrading an old chain, creating bookmarks from leftover jewelry parts, or combining vintage beads with new headpins for a modern twist. Feel free to share your own upcycled designs in Hilmaspyssel.se's community and inspire other crafters to think environmentally friendly. Through smart material choices and conscious reuse, you can contribute to reduced waste and at the same time create beautiful, personal jewelry that lasts over time.
Common Questions and Smart Solutions about Headpins and Eye Pins
For those curious about starting to use headpins and eye pins, or who are already well on their way, questions often arise regarding practical use, material choices, and problem-solving. Here we've gathered the most commonly searched questions and the best answers, so you can feel confident and inspired throughout your craft project – whether you're shopping at Hilmaspyssel.se or just seeking knowledge for your next creative adventure.
Questions about Usage and Materials
-
How do you prevent headpins from bending when working?
Choose the right thickness and material, such as stainless steel for extra stability. Always use good quality jewelry pliers, and bend gently to minimize the risk of damage. -
What length of headpin/eye pin is best for my project?
Shorter pins (around 20 mm) are perfect for pendants and earrings, while longer variations (up to 50–60 mm) offer greater design freedom for necklaces and larger decorations. -
What do you do if the bead slides off the headpin?
Place a smaller bead or metal crimp between the head of the headpin and the main bead to keep everything in place, especially if the hole in the bead is large.
Hilmaspyssel.se offers guides and video tutorials on these steps, making it easy to learn from both experts and other hobby enthusiasts.
Problems and Solutions from the Crafting Community
When something goes wrong, having access to tips from other creators is invaluable. On Hilmaspyssel.se, you'll find a vibrant craft forum where you can ask your own questions and get smart solutions. Examples of common tips:
- If loops are uneven: Use round nose pliers and take your time when forming the loop; practice quickly yields results.
- If pins break: Try working slower or switch to more pliable materials such as brass.
- If you want to extend a headpin: Link two pins together with a loop to get the desired length.
Remember that you'll also find linked guides and inspiring projects directly at Hilmaspyssel.se. This means you not only solve problems but also discover new creative techniques and can share your own best tricks!
Frequently Asked Questions and Smart Solutions (FAQ)
Q: What is the most important thing to know about headpins and eyepins when starting with jewelry making?
A: The most important thing is to understand the function of each pin – headpins are used to create a stop so that beads don't slide off, while eyepins make it possible to attach and connect different parts. Choosing the right length and thickness is also crucial for a neat and durable result. Feel free to experiment in small projects to discover what works best for your specific ideas.
Q: What trends are emerging in crafts and jewelry making where headpins and eyepins are used?
A: Currently, personalized jewelry combining different materials, colors, and shapes is popular. Upcycling old jewelry and unique beads has grown strongly, and with headpins and eyepins, you can easily give new life to older materials. Minimalist pendants and "Layering" of several small pendants on chains have also become a clear feature in Swedish craft trends.
Q: What common mistakes do beginners make when working with headpins and eyepins?
A: Beginners sometimes use pins that are too thick for small beads, or bend loops too quickly, which can make them crooked or weak. Another common mistake is cutting too short, making it difficult to create a secure loop. Tip: Practice forming even loops and cut a bit longer rather than too short. Feel free to use pliers specifically designed for jewelry making available at Hilmaspyssel.se.
Q: Which tools and accessories are most useful for working with headpins and eyepins?
A: Some of the most useful tools are round-nose pliers for perfect loops, wire cutters for shortening pins, and flat-nose pliers for holding and bending without scratching the metal. A bead board or work mat helps keep track of small parts. At Hilmaspyssel.se, you'll also find special starter kits with everything you need to get started right away.
Q: How can I quickly start using headpins and eyepins in my own jewelry?
A: Start by choosing some beads and matching headpins or eyepins. Thread the bead, bend a loop or create a finish using pliers, and attach to ear hooks or a chain. Feel free to follow a simple step-by-step guide (available on Hilmaspyssel.se) or watch short instructional videos on the platform's craft community. Experimenting with colors, materials, and techniques will quickly give you more confidence in your creations!
Q: How can I solve problems if loops or jewelry components become crooked or unstable?
A: Always start by using the correct type of tools and working methodically. If the loop becomes crooked, gently open it with a slight bend and carefully adjust with round-nose pliers. Practice on scrap pieces before making your final jewelry component. At Hilmaspyssel.se, you'll find detailed guides and can ask other crafters for smart solutions.
Q: Are there any online resources or inspiration to learn more about headpins and eyepins?
A: Yes, there's plenty of inspiration at Hilmaspyssel.se with guides, material lists, and videos. In their community and on social media, you can also get tips, ask questions, and share your own projects. Other recommended resources include YouTube channels focusing on crafts and jewelry, as well as Swedish DIY forums for extra feedback and ideas.
Create magic with your jewelry – let headpins and eyepins be your creative toolbox
Whether you are a beginner or an experienced jewelry maker, headpins and eyepins have proven to be indispensable for both durability and style in your projects. With the right size, material, and finish, you can create personalized jewelry that truly stands out and lasts over time. Hilmaspyssel.se offers a wide range and provides inspiration, guides, and smart solutions to help you succeed maximally with your craft ideas.
Dare to try new techniques, reuse materials, and explore all the variations that these simple but powerful components offer. Visit Hilmaspyssel.se to find materials, get expert tips, and become part of the community. Feel free to share your projects and inspire others – together we renew Sweden's jewelry culture, one craft at a time!