


Making Your Own Earrings with Hilmaspyssel.se – A Complete Guide to Creative Jewelry
Do you want to start making your own earrings but are unsure what materials to choose, what tools you need, or how to actually assemble a pair of stylish, durable pieces? Then Hilmaspyssel.se is the perfect starting point. Here you'll find everything from ear hooks and beads to chains and ready-made jewelry components – all in one place, suitable for both beginners and more experienced crafters.
In this guide, we'll walk you step-by-step through designing, planning, and creating personalized earrings that feel trendy, durable, and completely unique. You'll get concrete material tips, clear instructions, professional tricks for a beautiful finish, ideas for upcycling, and advice on care, as well as how to give away or even sell your earrings. The goal is for you to feel confident enough to start creating immediately – with the support of the assortment and inspiration from Hilmaspyssel.se.
Making your own earrings has evolved from a niche hobby to an integral part of slow fashion and creative crafting at home. More and more people want jewelry that feels personal, sustainable, and well-thought-out – not mass-produced accessories that everyone else wears. With simple jewelry components from Hilmaspyssel.se, you can create unique earrings that reflect your style, your everyday life, and your festive occasions, without it having to be expensive or complicated.
Advantages of DIY Earrings: More Than Just Jewelry
-
Personal expression: You decide colors, shape, length, and feel – perfect if you're tired of "standard models" in stores.
-
Sustainability and slow fashion: By creating your own earrings, you can upcycle old jewelry, use quality components, and build a smaller but more thoughtfully curated jewelry wardrobe.
-
Economically smart: A few bags of beads, ear hooks, and jump rings are enough for many pairs of earrings – perfect for personal use and gifts.
-
Creative relaxation: Many find jewelry making meditative; you get a break from screens and the fast pace, yet still feel like you're creating something tangible.
Beyond these clear advantages, you also gain the freedom to customize earrings to suit your face shape, hair color, outfit, and occasion – something ready-made jewelry rarely accounts for.
Trends, Styles, and Where to Find Inspiration
Currently, several strong trends are evident: large statement earrings, playful beaded earrings in color, boho-inspired designs, and asymmetrical pairs where the right and left earrings differ. To find your own style, you can try:
-
Minimalist: Thin chains, small metal charms, discreet colors – perfect for work and everyday wear.
-
Boho and vintage: Natural materials, antique-finished metals, and soft earth tones.
-
Colorful and child-friendly: Acrylic beads, cute charms, and shorter lengths that can withstand play.
-
Party and wedding: Glass and crystal beads, longer designs, shimmering gold or silver metal.
For inspiration, easily combine Pinterest, Instagram, and nature with all the practical offerings from Hilmaspyssel.se. There you'll find materials, ready-made ideas, and examples that will help you go from a saved image to a finished earring – in your very own way.
Material Guide – The Right Jewelry Components and Tools from Hilmaspyssel.se
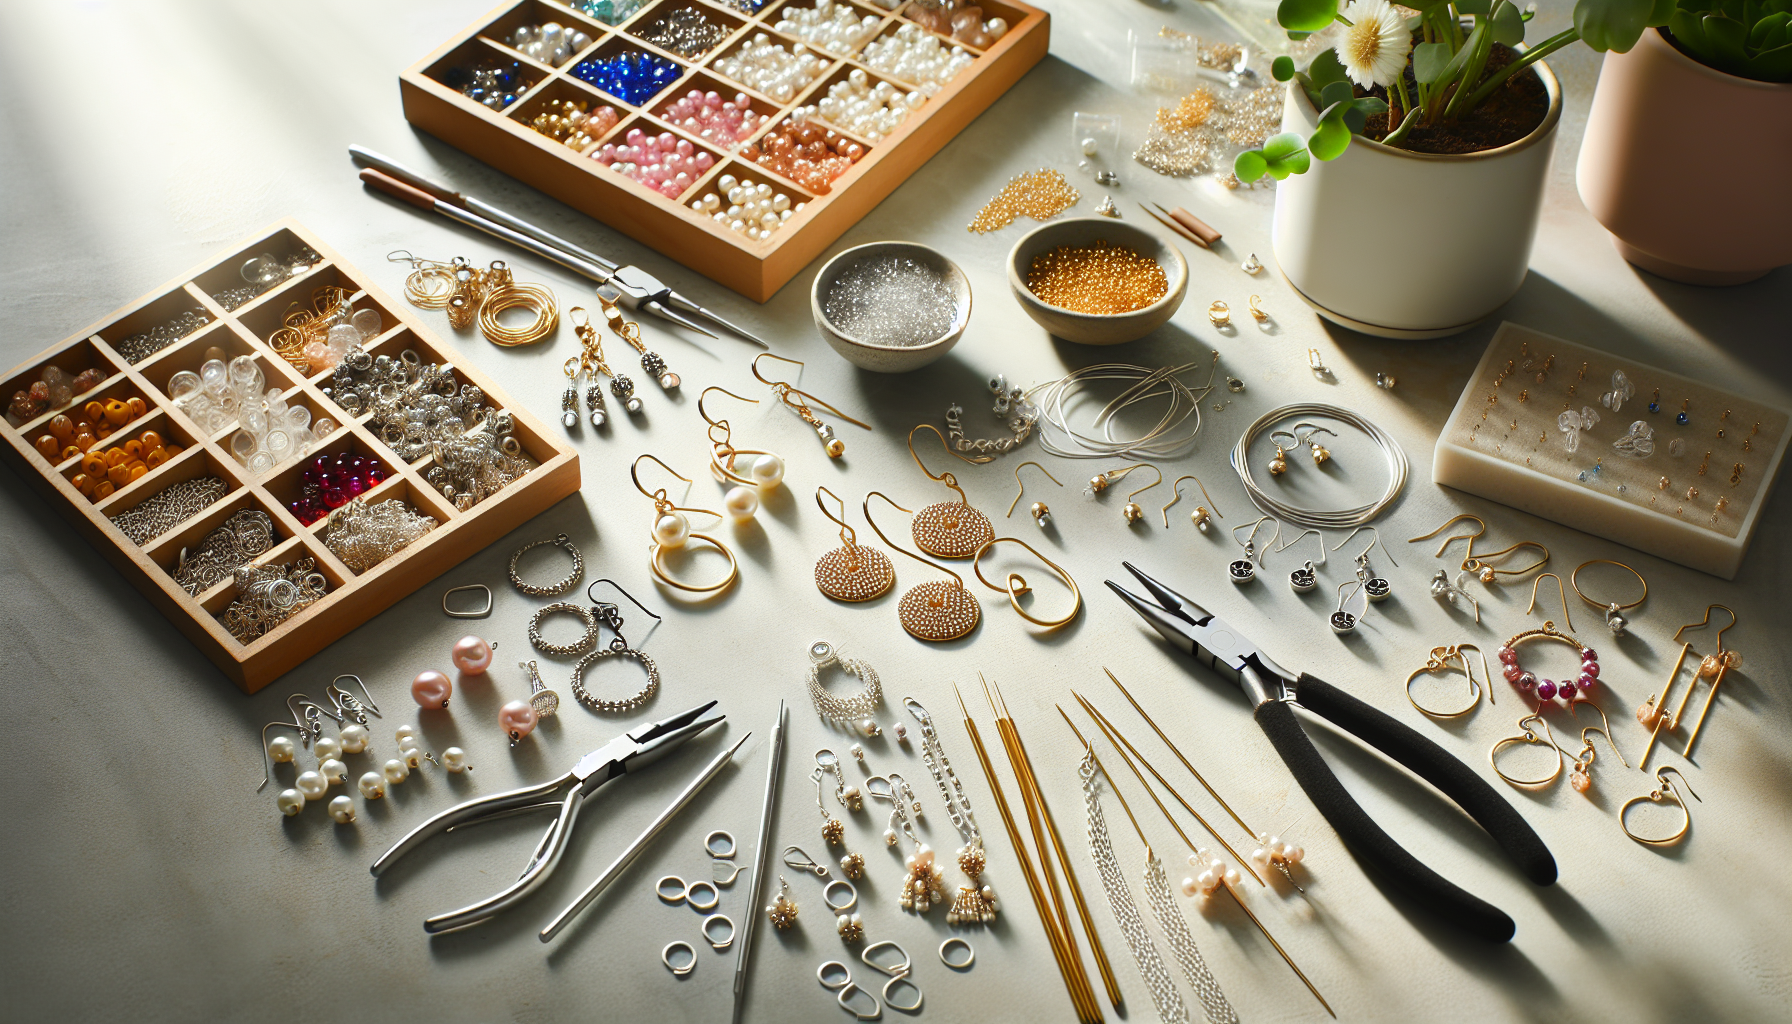
When you want to start making your own earrings, the right materials and tools are half the battle. With well-chosen jewelry components, the result will be more attractive, more durable, and more comfortable to wear. Hilmaspyssel.se has everything you need in one place, but it can be difficult to know what's what the first time you shop – that's why we'll guide you step-by-step here.
Basic Materials: Jewelry Components You Almost Always Need
For most earrings, some basic components recur:
-
Ear hooks, posts, hoops, and clips: Ear hooks suit most designs, posts are perfect for small "studs", hoops for ring-shaped earrings, and clips are ideal if you or the recipient doesn't have pierced ears.
-
Beads and charms: Glass, acrylic, wood, and semi-precious stone beads offer different weights and feels. Charms and cabochons quickly add a personal touch without advanced techniques.
-
Chains, jump rings, and connectors: Thin chains create movement, jump rings connect all parts, and connectors/findings make your earrings look professionally finished.
Already at this stage, consider what you want to create: lightweight everyday earrings, luxurious party earrings, or child-friendly designs. This will help you choose the right combination of parts and the correct size for hooks and rings, for example.
Hypoallergenic Options, Tools, and Smart Starter Kits
Many wonder which materials work for sensitive ears. A rule of thumb is to choose:
-
Nickel-free as a base if you want to keep the budget down
-
Surgical steel or stainless steel for durable everyday jewelry
-
Sterling silver when you want a more exclusive feel and good skin compatibility
To work smoothly, you also need:
-
Round nose pliers – for neat, even loops
-
Flat nose pliers – for holding and closing rings without marks
-
Wire cutters – for cutting pins, wire, and chains
-
Tweezers and jewelry wire – for intricate tasks and more advanced constructions
If you're a beginner, you can save both time and money by choosing starter kits or ready-made material packages from Hilmaspyssel.se, where someone has already matched beads, metals, and basic components for you. If you're more experienced, you can build further with loose parts and create entirely your own combinations. This way, both your material supply and your creativity grow at a suitable pace.
Preparations Before You Start – Planning, Design, and Smart Workflows
Before you start stringing beads and bending pins, it's worth spending a few minutes on planning. Thoughtful preparation is what distinguishes "okay" earrings from those that feel professional and well-crafted. Here's a practical overview of how to plan your design, adapt earrings to the wearer, and make your workspace both safe and efficient.
From Idea to Thoughtful Design
-
Sketch your idea: Make simple hand sketches or use an app. Mark the approximate length, shape, and where the weight will be.
-
Create a mood board: Collect images from Pinterest, Instagram, and Hilmaspyssel.se for colors, shapes, and styles you like.
-
Choose a color palette in advance: Decide on 2–4 main colors. This reduces the risk of "scattered" projects and makes it easier to create matching sets.
-
Consider wearing comfort: Plan so that the earrings aren't too heavy or too long for everyday wear.
When you already consider balance, symmetry, and weight at the idea stage, it also becomes easier to order the right amount of material from Hilmaspyssel.se and avoid unnecessary mispurchases.
Adapt Design and Create a Smart Crafting Corner
- Base it on the wearer:
- Face shape: Longer, narrower designs flatter a round face; rounder shapes soften angular features.
- Occasion: Shorter, discreet earrings for work; longer and glittering for parties or weddings.
-
Age: For children – lighter materials, rounded shapes, and secure clasps.
- Build a functional workspace:
- Good lighting: Preferably a directed lamp so you can see small details.
- Storage: Small boxes or compartment organizers for beads and findings, preferably labeled.
-
Non-slip surface: A mat or tray so beads don't roll away.
-
Consider your body: Sit relaxed, keep your wrists straight, and let the pliers do the work – not your fingers.
By having structure in both your ideas and your workspace, you reduce common beginner mistakes like crooked loops, lost beads, and sharp edges. You save time, material, and energy – and can focus more on the fun part: creating unique earrings that truly feel like you. Hilmaspyssel.se then becomes your secure base, where you can easily replenish exactly the parts you need for your next well-thought-out project.
Step-by-Step: Make Your Own Earrings – From Simple to More Advanced Design
Now it's time to transform ideas and materials into actual earrings. In this section, we'll go through clear step-by-step projects, from the first simple pair to more advanced designs. The goal is for you to be able to follow the instructions directly – whether you're a beginner or have tried making jewelry before.
Simple Beginner Model – Beaded Earrings on Posts
-
Materials: ear hooks, headpins, 1–3 beads per earring, small bead stoppers/crimps
-
Steps: thread on beads, bend the pin with round nose pliers, create a smooth loop, attach to the ear hook
-
Tips: start with slightly larger beads – they are easier to grip and give a quick "wow effect"
This model is perfect for practicing basic techniques: making neat loops, maintaining proper spacing, and making both earrings the same length. If the loop is crooked, gently open it, snip off a millimeter, and try again – metal "tolerates" a few attempts.
Intermediate and Advanced Earrings – Clusters, Chains, and Statement
-
Cluster earrings:
-
Materials: several small beads, short pins or jewelry wire, jump rings, ear hooks
-
How to make: create small individual bead dangles and attach several to the same jump ring for a full cluster.
-
Chain earrings in different lengths:
-
Materials: thin chain, jump rings, ear hooks, possibly small charms
-
How to make: measure out different lengths, cut with wire cutters, attach to the same ear hook for an elegant, movable effect.
-
Hoop and statement earrings:
-
Materials: hoop bases, beads/charms, possibly several sections of chain
-
How to make: thread beads directly onto the hoop or build sections with chain and connectors for more drama.
Always finish by checking the length, weight, and comfort. Hang the earrings on a card or hold them up to a mirror – you'll quickly see if the balance is right before making the final adjustments. This way, you gradually build up both your technique and confidence in your earring making.
Techniques for Beautiful and Durable Earrings – Pro Tips for the Hobbyist
Once you've mastered the basics of making your own earrings, the next step is to make them look and last like store-bought quality jewelry. Here, we focus on the most important techniques that make the biggest difference in both appearance and durability – things often only briefly mentioned in other guides but crucial for the final result.
Loops, Bead Mounts, and Chains – The Details That Define the Whole
-
Perfect loops: Use round nose pliers and always bend the pin at 90° before forming the loop. Twist around the tip of the pliers in one continuous motion instead of "pinching" a little at a time – this creates rounder and more even loops.
-
Identical earrings: Measure the length of pins and chains before you start, and use one finished earring as a "template" when making the second, so the pair is symmetrical.
-
Secure beads: For heavy beads – especially glass and genuine stone – pins or jewelry wire are more stable than thread. For cabochons and flat decorations, use a jewelry adhesive that dries clear and is suitable for metal.
-
Tangle-free chains: Always cut the chain with wire cutters, and open jump rings by twisting them sideways (twist) instead of pulling them apart – this helps them maintain their shape better.
When you work calmly and methodically with these steps, you'll quickly notice how your earrings feel more "professional." Small adjustments like always closing loops completely, wiping away glue residue, and checking the flexibility of each link make a big difference in both durability and how comfortable the jewelry is to wear.
Finish and Durability – How to Get "Store-Ready" Earrings
A common deficiency in many guides is tips on final finishing. Before you call your earrings complete, go through a simple checklist:
-
Smooth edges: Trim excess pin as close to the loop as possible and lightly touch the end with a file or fine sandpaper so nothing scrapes against the skin.
-
Even length: Hang both earrings side-by-side (e.g., on a piece of paper or earring card) and adjust chains or connectors until the length perfectly matches.
-
Cleaning and shine: Wipe metal earrings with a soft cloth to remove fingerprints and any glue smudges. For silver and stainless steel, you can use a jewelry polishing cloth for extra shine.
-
Durable construction: Avoid rings that are too thin for heavy pendants and reinforce delicate areas with double jump rings where needed.
By spending a few extra minutes on the finish, you'll get earrings that both look exclusive and hold up to everyday use. This is also where the difference becomes clear if you want to give away or sell your jewelry – a well-executed finish signals quality and makes your creations from Hilmaspyssel.se feel ready for the jewelry display's spotlight.
Color, Shape, and Style – Design Earrings That Truly Feel Like You
Once you've mastered the basic techniques, the next step is to create earrings that truly reflect your personal style. This is where the most inspiring DIY guides online differ from simpler ones – they don't just focus on how to do it, but also on why you choose certain colors, shapes, and combinations. With the selection available at Hilmaspyssel.se, you can create everything from elegant everyday earrings to playful statement pieces that catch the eye.
Color and Shape That Enhance Your Design
-
Effective color combinations: Start with complementary colors (e.g., blue–orange), tone-on-tone (different shades of blue), or a neutral base with a distinct accent color.
-
Seasonal inspiration:
– Spring/summer: soft pastels, mother-of-pearl, floral tones
– Autumn: rust, mustard yellow, dark green, copper
– Winter/Christmas/New Year: deep red, emerald, silver, gold, black
-
Form and silhouette: Elongated, slender earrings lengthen the neck, while round and full shapes give a softer expression.
Also consider who will wear the earrings: a pair of discreet studs with small cabochons are suitable for work, while larger, glittery dangles are perfect for parties or weddings. Adjust the size, color, and weight according to both the occasion and personality.
Create Collections and Your Own Signature Style
-
Create small collections: Make sets where earrings match bracelets and necklaces with the same beads or metal color. This gives a more thoughtful and "designed" impression – extra good if you want to start selling.
-
Play with trends in your own way: Try asymmetrical earrings, where one earring is longer or has a different charm, or deliberately create "mismatched" pairs that are still unified by color or material.
-
Upcycle + new: Combine parts from old jewelry, buttons, or small fabric scraps with new jewelry components from Hilmaspyssel.se. This gives unique character and is also a sustainable choice.
When you find recurring elements – perhaps a certain metal color, special beads, or a typical shape – you begin to build a signature style that others recognize. It is precisely this sense of recognition and personality that makes your handmade earrings more interesting than mass-produced jewelry and gives you a clear common thread if you later want to showcase or sell your creations.
Care, Storage, and Next Steps – Selling, Gifting, and Developing Your Jewelry Making
Once your earrings are finished, the next important part begins: taking care of them so they stay beautiful for a long time, and deciding what you want to do with your creations going forward. With proper care, smart storage, and thoughtful presentation, handmade earrings can look and feel like professional jewelry – whether you wear them yourself, give them away, or start selling them.
Care, Cleaning, and Storage of Your Earrings
-
Clean metal: Wipe metal earrings with a soft, dry cloth after use. For sterling silver, you can use a polishing cloth or mild silver polish. Avoid strong chemicals on beads and stones.
-
Gentle handling of beads and gemstones: Glass and crystal beads cannot withstand hard impacts. Wooden beads are best kept dry. Never soak beaded jewelry in cleaning solution for a long time.
-
Protect from perfume and moisture: Apply perfume, hairspray, and lotion before putting on your earrings to reduce the risk of discoloration and adhesive failure.
-
Smart storage: Store earrings in small pouches, compartmentalized boxes, or on earring cards so they don't scratch each other. Here you can easily make your own cards from cardboard and decorate with stamps or washi tape.
Having a separate small box or jewelry pouch for your handmade earrings makes it easy to keep them organized and quickly see which models you already have – perfect when planning new collections.
Sell, Gift, and Grow with Hilmaspyssel.se
When you feel confident, you can take your jewelry making to the next level:
-
Gift as personal presents: Create earrings in the recipient's favorite colors and make your own gift packaging – small folded boxes, envelopes, or cards with holes for the earring hooks. It looks thoughtful and professional.
-
Start selling your earrings: Do a simple calculation: material cost + time + reasonable profit margin. Research what similar jewelry costs at markets and on social media to find a realistic price point.
-
Where to sell: Local markets, craft fairs, Instagram, Facebook groups, or through friends and colleagues. Good, bright photographs of the earrings, preferably on a person or an earring display card, make a big difference for sales.
-
Build further with the help of Hilmaspyssel.se: Use the site as your regular base for refilling materials, new bead types and jewelry components, as well as inspiration via blog, newsletter, and ready-made kits. This saves time and helps you maintain a clear theme in your creations.
In this way, every pair of earrings becomes more than just a piece of jewelry – they become part of your creative journey. With proper care, thoughtful presentation, and reliable material support from Hilmaspyssel.se, you can gradually develop from a beginner to a confident jewelry maker.
Frequently Asked Questions about Making Your Own Earrings
Q: I'm a complete beginner – what's the minimum I need to make my own earrings?
A: You can go a long way with just a few things: ear hooks, headpins (or eye pins), a few beads/charms, and a simple jewelry plier (preferably a combination plier with both round and flat nose parts). At Hilmaspyssel.se, you'll find starter kits where all the basics are already selected for you, reducing the risk of buying the wrong parts. Start with a pair of simple dangle earrings and gradually add more tools and materials as you discover what you enjoy working with.
Q: Which material should I choose if I have sensitive ears or am prone to allergies?
A: If you have sensitive skin, surgical steel, stainless steel, sterling silver (925), or clearly nickel-free components are usually best. Avoid cheap, unmarked metal alloys. Hilmaspyssel.se has ear hooks and hoops where the material is specified in the product text, so you can choose safer options. An extra tip is to always try them on for a couple of hours at home first, so you can see how your ears react before wearing the earrings all day.
Q: How do I make my homemade earrings look "professional" and not like a school craft project?
A: The secret lies in the finish: make sure all loops are completely closed, that lengths match exactly, and that no sharp edges protrude. Use round nose pliers for even loops, gently file trimmed headpins, and wipe metal with a soft cloth. Choose a cohesive color palette and repeat the same metal color in all components (e.g., all gold or all silver). Small connectors from Hilmaspyssel.se can also significantly elevate the design.
Q: How do I prevent my earrings from breaking or losing beads after a while?
A: Use the correct technique and the right type of components. Open jump rings by twisting them sideways – never by pulling them apart – so they retain their strength. Always finish jewelry wire with wire guardians or properly crimped crimp beads. Do not choose headpins that are too thin for heavy beads; adjust the dimension according to weight. A simple quality test is to gently pull and wiggle each component before wearing the earrings; if something feels loose, adjust it immediately.
Q: How should I store my earrings to keep them looking good for a long time?
A: Store them in a dry and dust-free place, preferably in small zip-lock bags or jewelry boxes. Keep silver and brass components separate from moisture to reduce tarnishing. Hanging storage, such as earring boards or hooks, is perfect for longer styles so chains don't tangle. At Hilmaspyssel.se, you'll find small boxes and bags suitable for both home storage and when you want to gift or sell your earrings.
Q: Am I allowed to sell earrings I make from parts bought on Hilmaspyssel.se?
A: Yes, as a general rule, you are allowed to sell your own designs made from general jewelry components such as beads, chains, and metal findings. What you are not allowed to do is copy someone else's finished design directly or sell products marked with protected trademarks (e.g., licensed logo charms). A good approach is to develop your own signature style with recurring colors and shapes. Hilmaspyssel.se is well-suited as a supplier when you want to scale up, as you can easily buy the same components again for new collections.
Q: What do I do if I get stuck in the idea phase and don't know what to create?
A: Start with simple frameworks: for example, choose "small everyday earrings in silver + blue" or "long party earrings in gold + green." Limitations breed creativity. Create a small mood board with images from Pinterest/Instagram and combine it with actually laying out beads and components on the table. Try three quick prototypes without judging the result – often the third leads to a really good idea. Hilmaspyssel.se also offers inspiring material kits that can give you a clear starting point.
Conclusion: From First Bead to Your Own Jewelry Style
You have now come all the way from idea and inspiration to finished, handmade earrings – with the right materials, thoughtful designs, safe techniques, and smart care. You have seen how DIY earrings can combine creative freedom, sustainable fashion, and personal expression, while also learning professional tricks that make your jewelry look store-ready. Whether you want to make simple everyday earrings, bold statement pieces, or thoughtful gift sets, you now have a clear toolbox to work from.
The next step is to start – preferably today. Choose a simple model, order a starter kit or your favorite components from Hilmaspyssel.se, and set aside some time for creation. Experiment, adjust, learn from small mistakes, and gradually develop your own signature style. When you're ready, you can start giving away your earrings, building small collections, or even selling them. Visit Hilmaspyssel.se to restock materials, find new ideas, and take your jewelry making to the next level.