


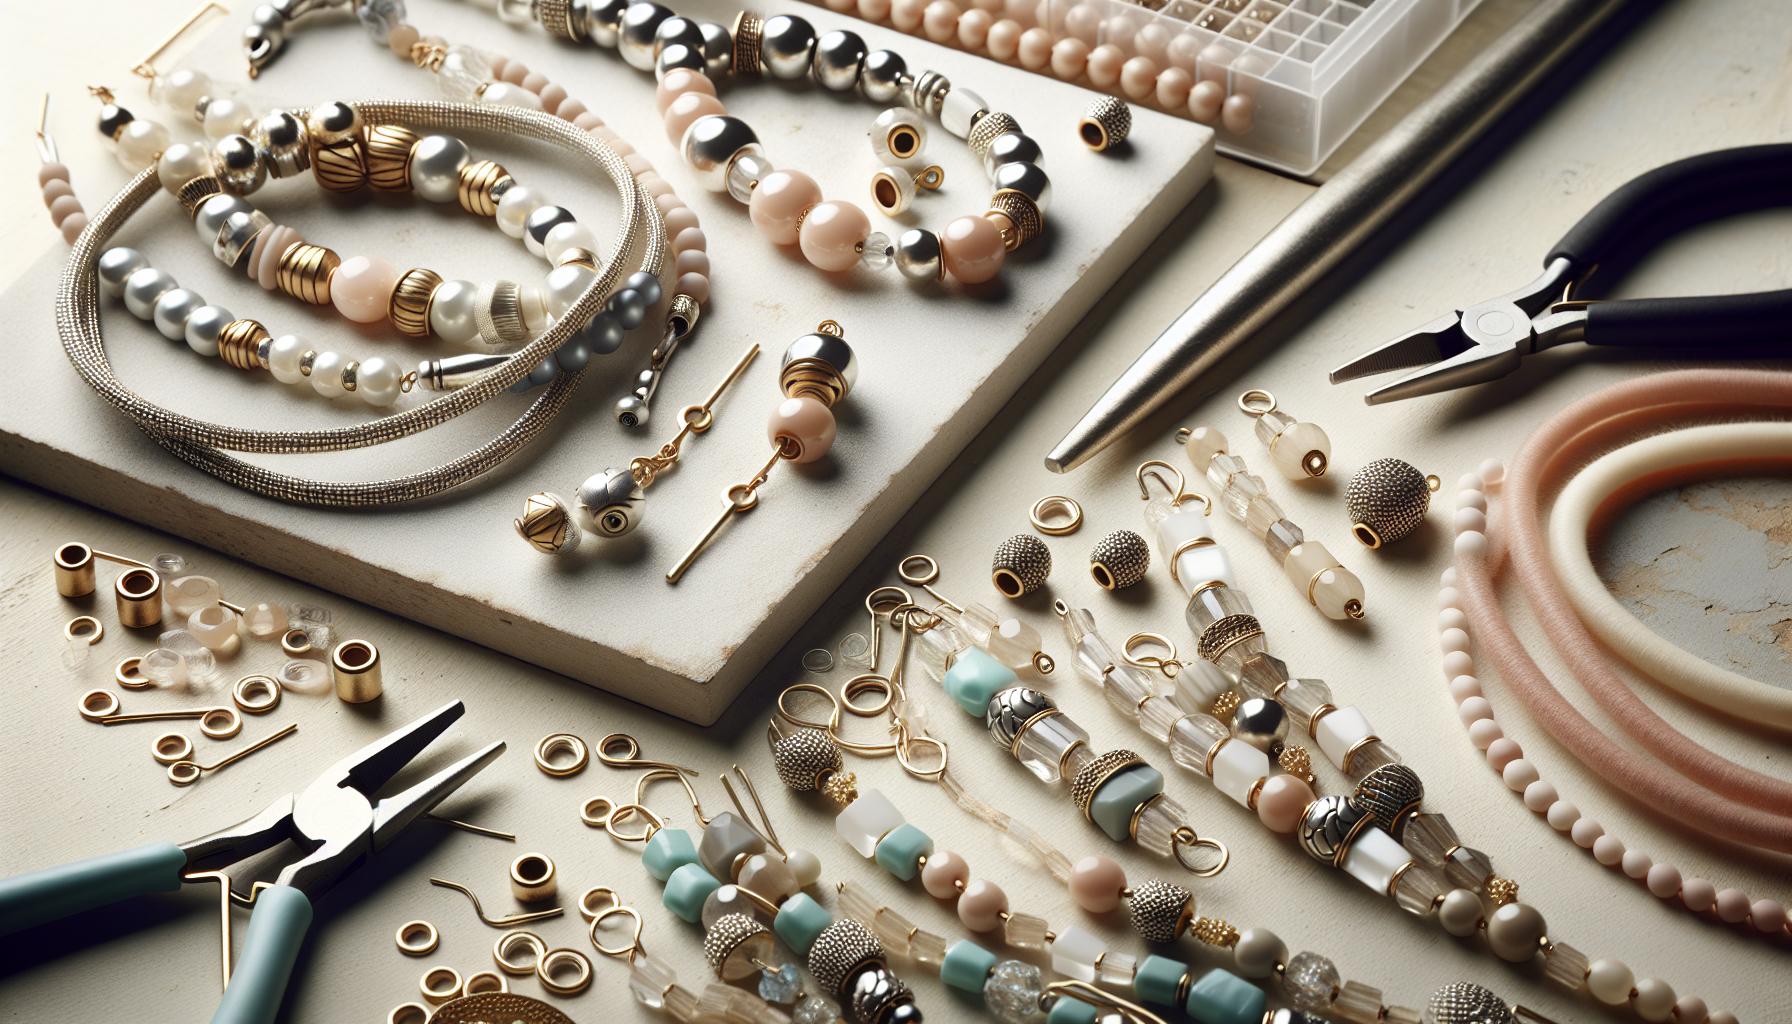
2-Hole Connectors from Hilmaspyssel.se – Small Details That Make a Big Difference
Are you looking for a simple way to make your homemade jewelry look more professional, stable, and well-thought-out? Then 2-hole connectors – also called 2-hole links or dividers – are exactly what you need. These small components help you create stylish multi-strand bracelets, necklaces, and earrings with a better fit and more even bead distribution.
At Hilmaspyssel.se, you'll find a wide range of 2-hole connectors in various materials, colors, and styles, from minimalist metal components to decorative motifs with hearts and flowers. In this guide, you'll learn what 2-hole connectors are, how to use them step-by-step, smart design ideas, a quality and buying guide – and practical tips for durable jewelry that lasts over time.
2-hole connectors are small but crucial components in modern jewelry making. Simply put, they are connectors with two holes through which you can thread wire, jewelry string, or elastic cord. They act as stable "bridges" between different parts of your jewelry, allowing you to create everything from simple bracelets to advanced multi-strand necklaces with a professional look.
What Differentiates 2-Hole Connectors from Beads and Links?
Many confuse connectors with regular beads or links, but their function is different:
-
2-hole connectors: Build the structure, separate threads, provide stability and shape to the jewelry.
-
Beads: Are usually decorative main components, used in longer rows, and typically have one hole.
-
Links and chains: Create length and movement, primarily used to connect parts or as a base in necklaces and bracelets.
In practice, this means that 2-hole connectors function as small design hubs, where you can control both how the beads fall and how the weight is distributed. This is particularly useful in bracelets, necklaces, earrings, anklets, and multi-strand jewelry where you want control over each strand.
Why are 2-Hole Connectors So Popular?
What makes 2-hole connectors so popular is the combination of stability and design possibilities. By distributing the beads across two holes, you get:
-
More even drape – bead strands lay more beautifully against skin and fabric.
-
Increased durability – less strain on individual threads and clasps.
-
More advanced look with simple means – a simple bead strand can immediately look more exclusive with a discreet 2-hole connector as a focal point in the center.
Imagine a simple bracelet with glass or natural stone beads in a single strand. By inserting a small, smooth 2-hole connector in the middle and allowing the bracelet to split into two parallel strands, you immediately get a more elaborate, "store-finished" piece of jewelry – without the technique becoming more difficult. It's this combination of simplicity and professional finish that makes 2-hole connectors a staple in every jewelry maker's assortment.
Different Types of 2-Hole Connectors at Hilmaspyssel.se
When you start working more with 2-hole metal connectors, you'll quickly notice that the right model makes all the difference to your jewelry. At Hilmaspyssel.se, you'll find a wide range of both simple and more decorative 2-hole connectors adapted for bracelets, necklaces, and earrings. In this section, we'll go through the most common materials, shapes, and styles – and when to choose what, so you avoid guesswork and get a more professional result right away.
Material Choice: Metal Alloys, Stainless Steel, and Silver/Gold Finishes
-
Metal Alloys (nickel-safe options): Perfect for trendy, affordable jewelry. Often somewhat softer, making them easy to work with but less suitable for very heavy stones.
-
Stainless Steel: Very durable, color-stable, and popular in everyday jewelry. Good for sensitive skin when you choose quality steel.
-
Silver and Gold-Colored Connectors: Give an exclusive look without having to work with genuine precious metal. Available in both high-gloss and matte/brushed finishes for different styles.
A smart way to work is to choose materials based on function: for a nice everyday bracelet with glass or natural stone beads, stainless steel works excellently, while lighter fashion bracelets often become both comfortable and stylish with nickel-safe alloys in gold or silver color.
Shape, Style, and How to Choose the Right Variant for Your Design
-
Elongated connectors: Ideal as dividers in bracelets and multi-strand necklaces where you want to keep two bead strands parallel and straight.
-
Decorative motifs (hearts, flowers, symbols): Act as a natural focal point in the jewelry. Perfect when the connector should be clearly visible, for example, in the middle of a bracelet.<
-
Discreet, minimalist connectors: Best when the beads or stones should take center stage and you only want stability and structure in the design.
A good rule of thumb is: choose a smooth, simple connector when working with strong colors or patterned beads, and choose a patterned, decorative connector when working with more neutral beads. This way, you get balance in the jewelry and avoid the design feeling cluttered – something many beginners struggle with but can easily avoid with the right type of 2-hole connector from Hilmaspyssel.se.
How to Use 2-Hole Connectors in Bracelets – Step-by-Step
Creating bracelets with 2-hole connectors is one of the easiest ways to achieve a more professional, "designed" look without complicated techniques. By letting the connector separate two rows of beads, you immediately get a fuller bracelet that sits beautifully around the wrist. Here, we'll go through a clear, practical method that you can follow even if you are relatively new to jewelry making.
Basic Technique – Thread Choice, Beads, and Preparation
-
Choose the right thread/wire:
For durable bracelets, jewelry wire is recommended. If you want a more flexible bracelet without a clasp, you can use elastic thread, but check that it fits through both holes in the connector. Nylon thread works for lighter beads. -
Match beads and connector:
Look at the length and width of the connector and choose beads that are proportionate. Small metal beads or 4–6 mm glass beads are often perfect for 2-hole connectors for bracelets. -
Preparation before threading:
Measure your wrist, lay out your pattern on a bead board, and test threading a piece of wire through the connector to ensure the holes are not too tight.
Once you have everything ready, first thread one row of beads, pass it through one hole in the connector, continue the bead row, and repeat the same with the other row in the other hole. Finish with crimp beads and a clasp (for wire) or a sturdy knot (for elastic thread).
Example: Double-Strand Beaded Bracelet with Decorative 2-Hole Connector
A popular beginner project is a double-strand beaded bracelet where a decorative 2-hole connector is placed in the middle of the wrist as a focal point.
A simple but effective recipe could be:
- Material idea: 6 mm mother-of-pearl beads, small silver-colored metal beads, and a silver-colored 2-hole connector from Hilmaspyssel.se.
- Design: let one strand consist of only mother-of-pearl and the other of alternating mother-of-pearl and metal beads. The connector connects the strands and provides a clear center point.
- Extra tip: place the connector slightly off-center towards the top of the wrist so that it is always visible when the bracelet is worn.
By varying the color scheme, bead size, and type of 2-hole connector, you can create everything from romantic wedding bracelets to stylish everyday jewelry – using the same simple basic technique as a base.
Design Necklaces with 2-Hole Connectors for Multi-Strand Jewelry
2-hole connectors are like small, discreet "dividers" that make it easy to create multi-strand necklaces with a professional look. Where many guides focus on bracelets, multi-strand necklaces are an area where the right 2-hole connectors truly make a difference – both for design, comfort, and durability. With the assortment at Hilmaspyssel.se, you can build everything from thin, layered necklaces to voluminous statement pieces, without them feeling clumsy or crooked.
How to Build a Two-Strand Necklace with 2-Hole Connectors
-
Plan the lengths: Let the innermost strand be shorter (e.g., 42 cm) and the outer one a few cm longer (e.g., 46–48 cm) so that the strands fall nicely without tangling.
-
Choose the right connector: An elongated, smooth 2-hole metal connector gives a clean look, while a connector with a heart, flower, or symbol can become a clear design focal point.
-
Mount the threads: Attach two separate threads to each side of the necklace and run them through the respective holes in the connector – this keeps the strands parallel and gives an even, full impression.
-
Balance the beads: Use slightly larger beads on the longer strand and smaller ones on the shorter, but stick to a uniform color scheme for a harmonious result.
When you work this way, you get a necklace where the connector functions both technically – as a stable divider – and visually, as a detail that elevates the design. This is a significant difference from simpler single-strand necklaces that often look "flatter."
Design Tricks for Stylish and Comfortable Multi-Strand Necklaces
A common mistake is making the front too heavy. Try to distribute the weight evenly around the neck: place the heaviest beads a bit away from the center and combine them with lighter glass beads or metal beads. Choose 2-hole connectors in the same metal tone as the clasp and other findings for a well-thought-out overall impression. Always test the necklace on – or on a bust – before permanently crimping everything. Adjust the length difference between the strands until they lay nicely without catching on each other. This way, you truly utilize the potential of multi-strand necklaces with 2-hole connectors from Hilmaspyssel.se and get jewelry that both looks exclusive and is comfortable to wear.
Creative Jewelry Ideas with 2-Hole Connectors – From Earrings to Matching Sets
2-hole connectors are not only practical in bracelets and necklaces – they are also perfect when you want to create more unique, playful, and personalized jewelry. Here, you can truly utilize the full breadth of the assortment at Hilmaspyssel.se and let small details make a big difference. In this section, we focus on creative solutions often overlooked in simpler guides, but which give your jewelry a more sophisticated, "designer-like" look.
Earrings, Pendants, and Unexpected Uses
-
Layered earrings with chains and beads: Use a small, decorative 2-hole connector as a "mini-connector" at the bottom of an earring. Attach two different chains or bead strands to each hole – one shorter and one longer – for an elegant, layered effect.
-
Small statement pendants: Combine a smooth 2-hole connector with a larger natural stone drop. Attach the stone to one hole and a short chain to the other – the chain can in turn hold a smaller bead for extra movement.
-
Charm carriers in charms: Thread a 2-hole connector horizontally into a necklace and let two different charms hang from each hole. Perfect if you want to create personalized family or friendship jewelry.
By thinking of the connector as a small "hub," you open up many more combinations than just straight bead strands. Try mixing chain, bead, and symbol in the same design for a more dynamic expression.
Create a Common Thread – Complete Jewelry Sets with the Same Connector
Matching sets often look more exclusive, even when the materials are simple. A smart way to make the overall look cohesive is to use the same type of 2-hole connector in all pieces:
-
Boho Set: Use antique silver-colored 2-hole connectors with natural stones (e.g., jasper, howlite, or lava). Make a double-strand bracelet, a two-strand necklace, and long earrings where the same connector is visible in all three pieces.
-
Minimalist Everyday Set: Choose smooth, small 2-hole connectors in stainless steel. Combine them with small metal beads or matte glass beads in a neutral color palette – gray, white, beige – for a stylish set that works every day.
When designing sets, it's helpful to sketch simply on paper before you start. Start with the connector you like best, decide what role it should play in each piece of jewelry (focal point or discreet detail), and then build the rest around it. This way, you get well-thought-out jewelry where the 2-hole connector acts as the unifying signature – something many ready-made jewelry collections from big brands actually build upon.
How to Choose the Right 2-Hole Connector – Size, Style, and Quality
Choosing the right 2-hole connector determines whether your jewelry looks homemade or professional. At Hilmaspyssel.se, there is a large selection of connectors in metal, stainless steel, and various finishes, but the key is to match size, style, and quality to your specific project. In this section, we go a step further than most guides and break down how to think like a designer – not just a hobbyist.
Size and Style – How to Find a Harmonious Design
-
Proportions to beads: As a rule of thumb, a 2-hole connector should not be larger than the largest bead in the jewelry, unless you want it to be a clear focus. For small 4–6 mm beads, narrow, discreet connectors are suitable, while 8–10 mm beads can handle larger, more elaborate connectors.
- Style matching:
- Romantic/vintage: Choose antique silver, oxidized finish, swirl, and floral details. Perfect for glass beads, faceted beads, and mother-of-pearl.
- Modern/minimalist: Smooth surfaces, clean lines, bar-shaped or geometric connectors in shiny silver or gold-colored metals.
-
Boho/natural: Rustic surfaces, mixed metal tones, hammered connectors with natural stones and wooden beads.
-
Practical example: A bracelet with matte natural stones in earthy tones is enhanced by an antique silver 2-hole connector, while an elegant bridal necklace often looks best with a smooth, narrow silver-colored divider.
By taking an extra two to three minutes to consider style and proportions, you avoid the most common pitfall: a connector that "disturbs" instead of unifying the design.
Quality, Hypoallergenic Properties, and Smart Searching on Hilmaspyssel.se
Quality is crucial, especially if you are making jewelry for sale or for sensitive recipients.
-
Hole size vs. wire type: Always check the product description. If you are using thicker jewelry wire or two threads in each hole, you will need connectors with slightly more generous holes. It's a good idea to test with a scrap piece of wire before assembling the entire piece of jewelry.
-
Surface treatment and durability: Choose stainless steel or high-quality plating if the jewelry will be used daily. These retain their color better and are more resistant to wear and moisture.
-
Nickel and lead-free options: For customers or users with sensitive skin, it is wise to choose nickel-safe or nickel/lead-free connectors. Hilmaspyssel.se clearly states this in many product descriptions – read them carefully.
-
Search tips on Hilmaspyssel.se: Use combinations such as “2 hole connector silver”, “connector divider” or “stainless connector” to quickly filter for the right type. Also, combine with style words like “heart”, “flower” or “minimalist”.
By considering both aesthetics and quality, you create jewelry that not only looks beautiful in pictures – but also retains its shape, color, and feel for a long time, whether used for everyday wear or special occasions.
Practical Tips for Durable Jewelry with 2-Hole Connectors
Durability is crucial when working with 2-hole connectors – especially in bracelets and necklaces that are used frequently. In this section, we focus on how to make your jewelry from Hilmaspyssel.se maintain its shape, retain its shine, and withstand everyday use without breaking at the connectors, which are often a critical point in the construction.
Assembly Technique for Extra Strength
-
Use the right basic components: Combine 2-hole connectors with jewelry wire, crimp beads, and preferably wire guards at the clasp to relieve stress on the wire where wear is greatest.
-
Secure the wire through the connector: Let the wire pass through the connector, back through a few beads, and finish with two crimp beads instead of one – this provides significantly better durability, especially with heavier beads and natural stones.
-
Choose thread thickness according to hole size: Thin threads in large holes cause the jewelry to move and wear out faster. Adjust the wire dimension up or thread in an extra small metal bead to "fill out" the hole at the connector.
This type of careful assembly is not visible to the naked eye – but is clearly felt when the jewelry is worn. Bracelets drape better, multi-strand necklaces twist less, and the load is better distributed between your 2-hole connectors and the clasp.
Care, Storage, and Final Quality Control
-
Proper storage: Store jewelry with metal connectors in a dry place, preferably in separate small bags or compartments, to reduce scratches and oxidation. Avoid bathrooms and other humid environments.
-
Gentle cleaning: Wipe the jewelry with a soft, dry cloth after use. Avoid silver dips and strong chemicals if you combine metal with beads, crystals, or natural stones – instead, clean gently with a slightly damp cloth if needed.
-
Common mistakes to double-check: Always check that
-
gently pull each thread near the connector
-
feel for sharp edges on the connector and wire
-
bend the piece of jewelry as if it were on a wrist or around a neck – if there is a gap around the 2-hole connector, you need to adjust the thread length or the number of beads.
Before selling or gifting your jewelry, a short checklist is invaluable: is the clasp secure, are the connectors straight, does everything feel smooth against the skin? By spending a few extra minutes on assembly, care, and inspection, you'll create durable, professional jewelry where your 2-hole connectors truly shine. Hilmaspyssel.se provides the components – with the right technique, your creations will last a long time.
Frequently Asked Questions About 2-Hole Connectors
Q: What is the difference between 2-hole connectors and regular beads or links?
A: A 2-hole connector is a connector with two separate holes that keep two threads or bead rows apart, while a regular bead usually only has one hole and is mostly used decoratively. Links and jump rings connect parts lengthwise (e.g., chain + clasp), while the connector acts as a stable divider that provides structure, stability, and a clear shape to bracelets, necklaces, or earrings. The result is more even bead rows and a more elaborate design.
Q: Which material for 2-hole connectors is best if I have sensitive skin?
A: If you have sensitive skin, it's wise to choose nickel-safe metal alloys or stainless steel, which Hilmaspyssel.se clearly labels in the product descriptions. Stainless steel is extra durable, colorfast, and suitable for jewelry worn daily. Avoid unmarked metals and look for words like nickel-free, lead-free, and preferably cadmium-free in the product text before ordering.
Q: How do I know what size 2-hole connector to choose for my beads?
A: Consider both bead size and jewelry type. As a rule of thumb:
-
Small beads (3–4 mm) → thin, discreet connectors
-
Medium beads (6–8 mm) → medium-width connectors, preferably with some decoration
-
Larger beads (10 mm and up) → stronger connectors so that the proportions feel balanced
Feel free to measure a bead and compare it with the dimensions in the product description on Hilmaspyssel.se to ensure that the width and height harmonize.
Q: Can I use 2-hole connectors with elastic thread, or do I have to use wire?
A: You can use both, but with different considerations. Elastic thread is suitable for stretch bracelets, provided the holes in the connector are not too large. In that case, you should either use double elastic cord or supplement with small beads/crimp beads so that the thread doesn't "gap." Jewelry wire provides more stability, especially with heavier beads or multi-strand jewelry, and is therefore often the first choice in more advanced projects.
Q: How do I prevent jewelry with metal connectors from discoloring or losing their shine?
A: Store the jewelry dry and separately, preferably in small zip bags or jewelry boxes, and remove them before showering, exercising, and swimming. Wipe with a soft, dry cloth after use to remove skin oils and moisture. Avoid perfume, hairspray, and strong cleaning agents directly on the jewelry. For light polishing, a soft jewelry polishing cloth works well – harsh chemicals can damage both metal and beads.
Q: I'm a beginner – what is the easiest project with 2-hole connectors to start with?
A: A double-strand stretch bracelet is perfect as a first project. Choose:
- A straight, simple 2-hole connector from Hilmaspyssel.se
- Elastic thread that fits the holes
- Two types of beads in the same color scheme
Measure your wrist, string the beads onto two threads through the connector, tie secure double knots, and if necessary, secure with a drop of jewelry glue. In a short time, you'll have a piece of jewelry that looks advanced but is technically easy to succeed with.
Create More with Your Jewelry – Conclusions on 2-Hole Connectors
2-hole connectors are small components that make a huge difference: they provide stability, open up possibilities for multi-strand designs, and help you create jewelry that looks both thoughtful and professional. In this guide, you've gained a comprehensive understanding – from what 2-hole connectors are, different materials and styles at Hilmaspyssel.se, to step-by-step instructions for bracelets and necklaces, creative ideas for earrings and sets, and how to choose the right quality and care for your jewelry so it lasts a long time.
Now the next step is to put inspiration into practice. Start with a simple project, such as a double-strand bracelet or a two-strand necklace, and let a favorite connector guide your design. Visit Hilmaspyssel.se, search for "2-håls mellandelar" (2-hole connectors), filter by style and metal color, and put together a small starter kit with connectors, beads, wire, and clasps. This way, you can immediately start creating personalized, durable jewelry that looks – and feels – like something from a professional jewelry studio.